...
This is the fourth exercise of the Basic Level. The main goal of this exercise is to give you an idea of how to set up and manage Xporter for Jira Permission Schemes.
Permission schemes allow administrators to define which Projects, Issue Types, User Roles, and Groups will be available to use Xporter, as well as manage the templates allowed to be used on each of those available Issue Types.
...
In order to perform the initial setup, navigate to Permission Schemes on the Xporter for Jira administration section Apps page of the Jira Administration and you'll see a warning informing you There are no Xporter for Jira Permissions Schemes configured, a + Add button and an empty grid below it. Once a Permission Scheme is configured, its entry will be displayed on that grid.
...
| Info |
|---|
In order to perform this exercise properly, please create a Basic software development Project on your Jira instance, and name it as Academy. You'll need to have at least 2 templates installed too. Also, create a New Jira user named Arthur and let it be associated only with the jira-software-users Group (it will be by default). After that, on JIRA Jira Administration -> System, on the sidebar under Security, access Project roles and add a Project Role named King. Finally, go to the project Academy -> Project settings, and on the sidebar access Users and roles. Select Add users to a role, and on the dialog add the user Arthur to the role King. After all that is done, create a Bug issue, a Task issue and an Improvement issue for your Project. |
...
On the Permission Schemes on the Xporter for Jira administration section Apps page of the Jira Administration, click on + Add button and fill in the Name and Description of your Permission Scheme - name it Academy - and after clicking the Create button a Success! message will be displayed informing the Permission Scheme was successfully added.
It will be displayed with an entry on the Xporter for Jira Permission Schemes grid.
| Note |
|---|
If the Permission Scheme name is the same of an existing Permission Scheme, an Error! message will be displayed when clicking the Create button, informing you of that conflict. |
...
- Issue Types allowed to be exported;
- Roles allowed to use Xporter for Jira;
- Groups allowed to use Xporter for Jira;
As well as mapping issue types into corresponding templates, allowing that for specific issue types, only specific templates will be available.
...
Click the X next to Improvement and it will be removed.
3) Defining the Roles allowed to use Xporter for Jira
Now, click the Assign on Roles allowed to use Xporter for Jira and on the pop-over dialog pick the select box next to Roles on the top of the list - all listed roles will be selected - and click Assign. The previous warning No Roles assigned for this Permission Scheme will now be replaced with your picked choices.
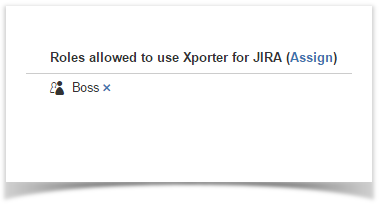
Click the X next to all the listed items except King.
4) Defining the Groups allowed to use Xporter for Jira

Now, click the Assign on Groups allowed to use Xporter for Jira and on the pop-over dialog don't select any of the options and click Assign. The warning No Roles assigned for this Permission Scheme will still be displayed since no option was picked.
...
A Warning message will be displayed informing the permission scheme does not have associations between issue types and templates and as consequence Xporter for Jira will be unusable with the permission scheme.
...
Back on the Permission Schemes on the Xporter for Jira administration section Apps page of the Jira Administration, on our created Permission Scheme entry, click the Projects button on the Operations column, and a pop-over dialog will be displayed.
...
With all the Permission Schemes set up done, navigate to the Global Settings on the Xporter for Jira administration section Apps page of the Jira Administration, and on Enable Xporter for Jira for all projects and all users under Global Permissions tick Off and Save.
Also, make sure the Enable Xporter for Jira panel on Single Issue View is ticked On.
...
On a new browser window, logged in as Arthur, navigate to the Improvement issue type of the project Academy, and you will notice the Xporter panel isn't displayed on the right sidebar. Click the Export drop-down menu, select Xporter for Jira and you will navigate to a page titled Export issues using Xporter for Jira where an Error! message will be displayed informing you are unable to export the selected issues. Clicking the Check Details button, an Error Reporting pop-over will be displayed, with an entry of the Issue Key you are trying to export, along with the description User has no permissions for using Xporter for Jira in current Permission Scheme.
...
With your user with Administration access, navigate to the Permission Schemes on the Xporter for Jira administration section Apps page of the Jira Administration, click Permissions under the Operations column of your entry, and map a common template to both the Bug and Task issue types.
...
With your user with Administration access, navigate to the Permission Schemes on the Xporter for Jira administration section Apps page of the Jira Administration, click Permissions under the Operations column of your entry, click the Assign on Groups allowed to use Xporter for Jira and on the pop-over dialog select jira-administrators and click Assign. Also, click the X next to King under the Roles allowed to use Xporter for Jira.
Now, back to the browser using the user Arthur, try to bulk export the Bug and Task issues from the project Academy again, and an Error! message will be displayed informing you are unable to export the selected issues. Clicking the Check Details button, an Error Reporting pop-over will be displayed, with an entry informing your user doesn't have permissions.
...
This Exercise is now completed - move to Exercise 5 to learn how to manage your Xporter for Jira license.
| Info |
|---|
If you like this exercise, please share your opinion on the page by just leaving a comment or a Thank you in advance. Enjoy our product. |