...
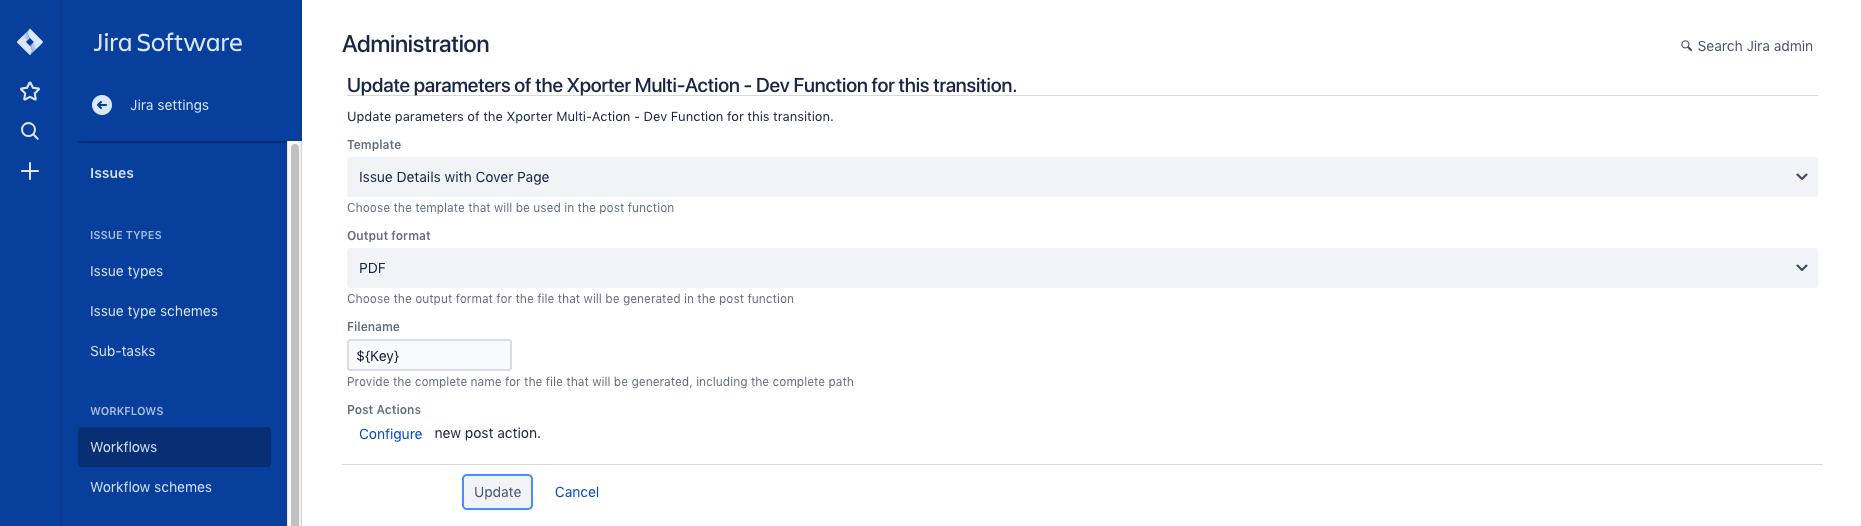
- Select the template to use.
- Select the output format.
- Provide the name of the file you want to generate.
- Select if the Xporter Post Function should have a Javascript condition to be evaluated when this Workflow function is executed (Workflow Post Functions: JavaScript conditions)

| Info |
|---|
If the Include Attachments option is turned on, the file will be generated with the issue's attachments. |
...
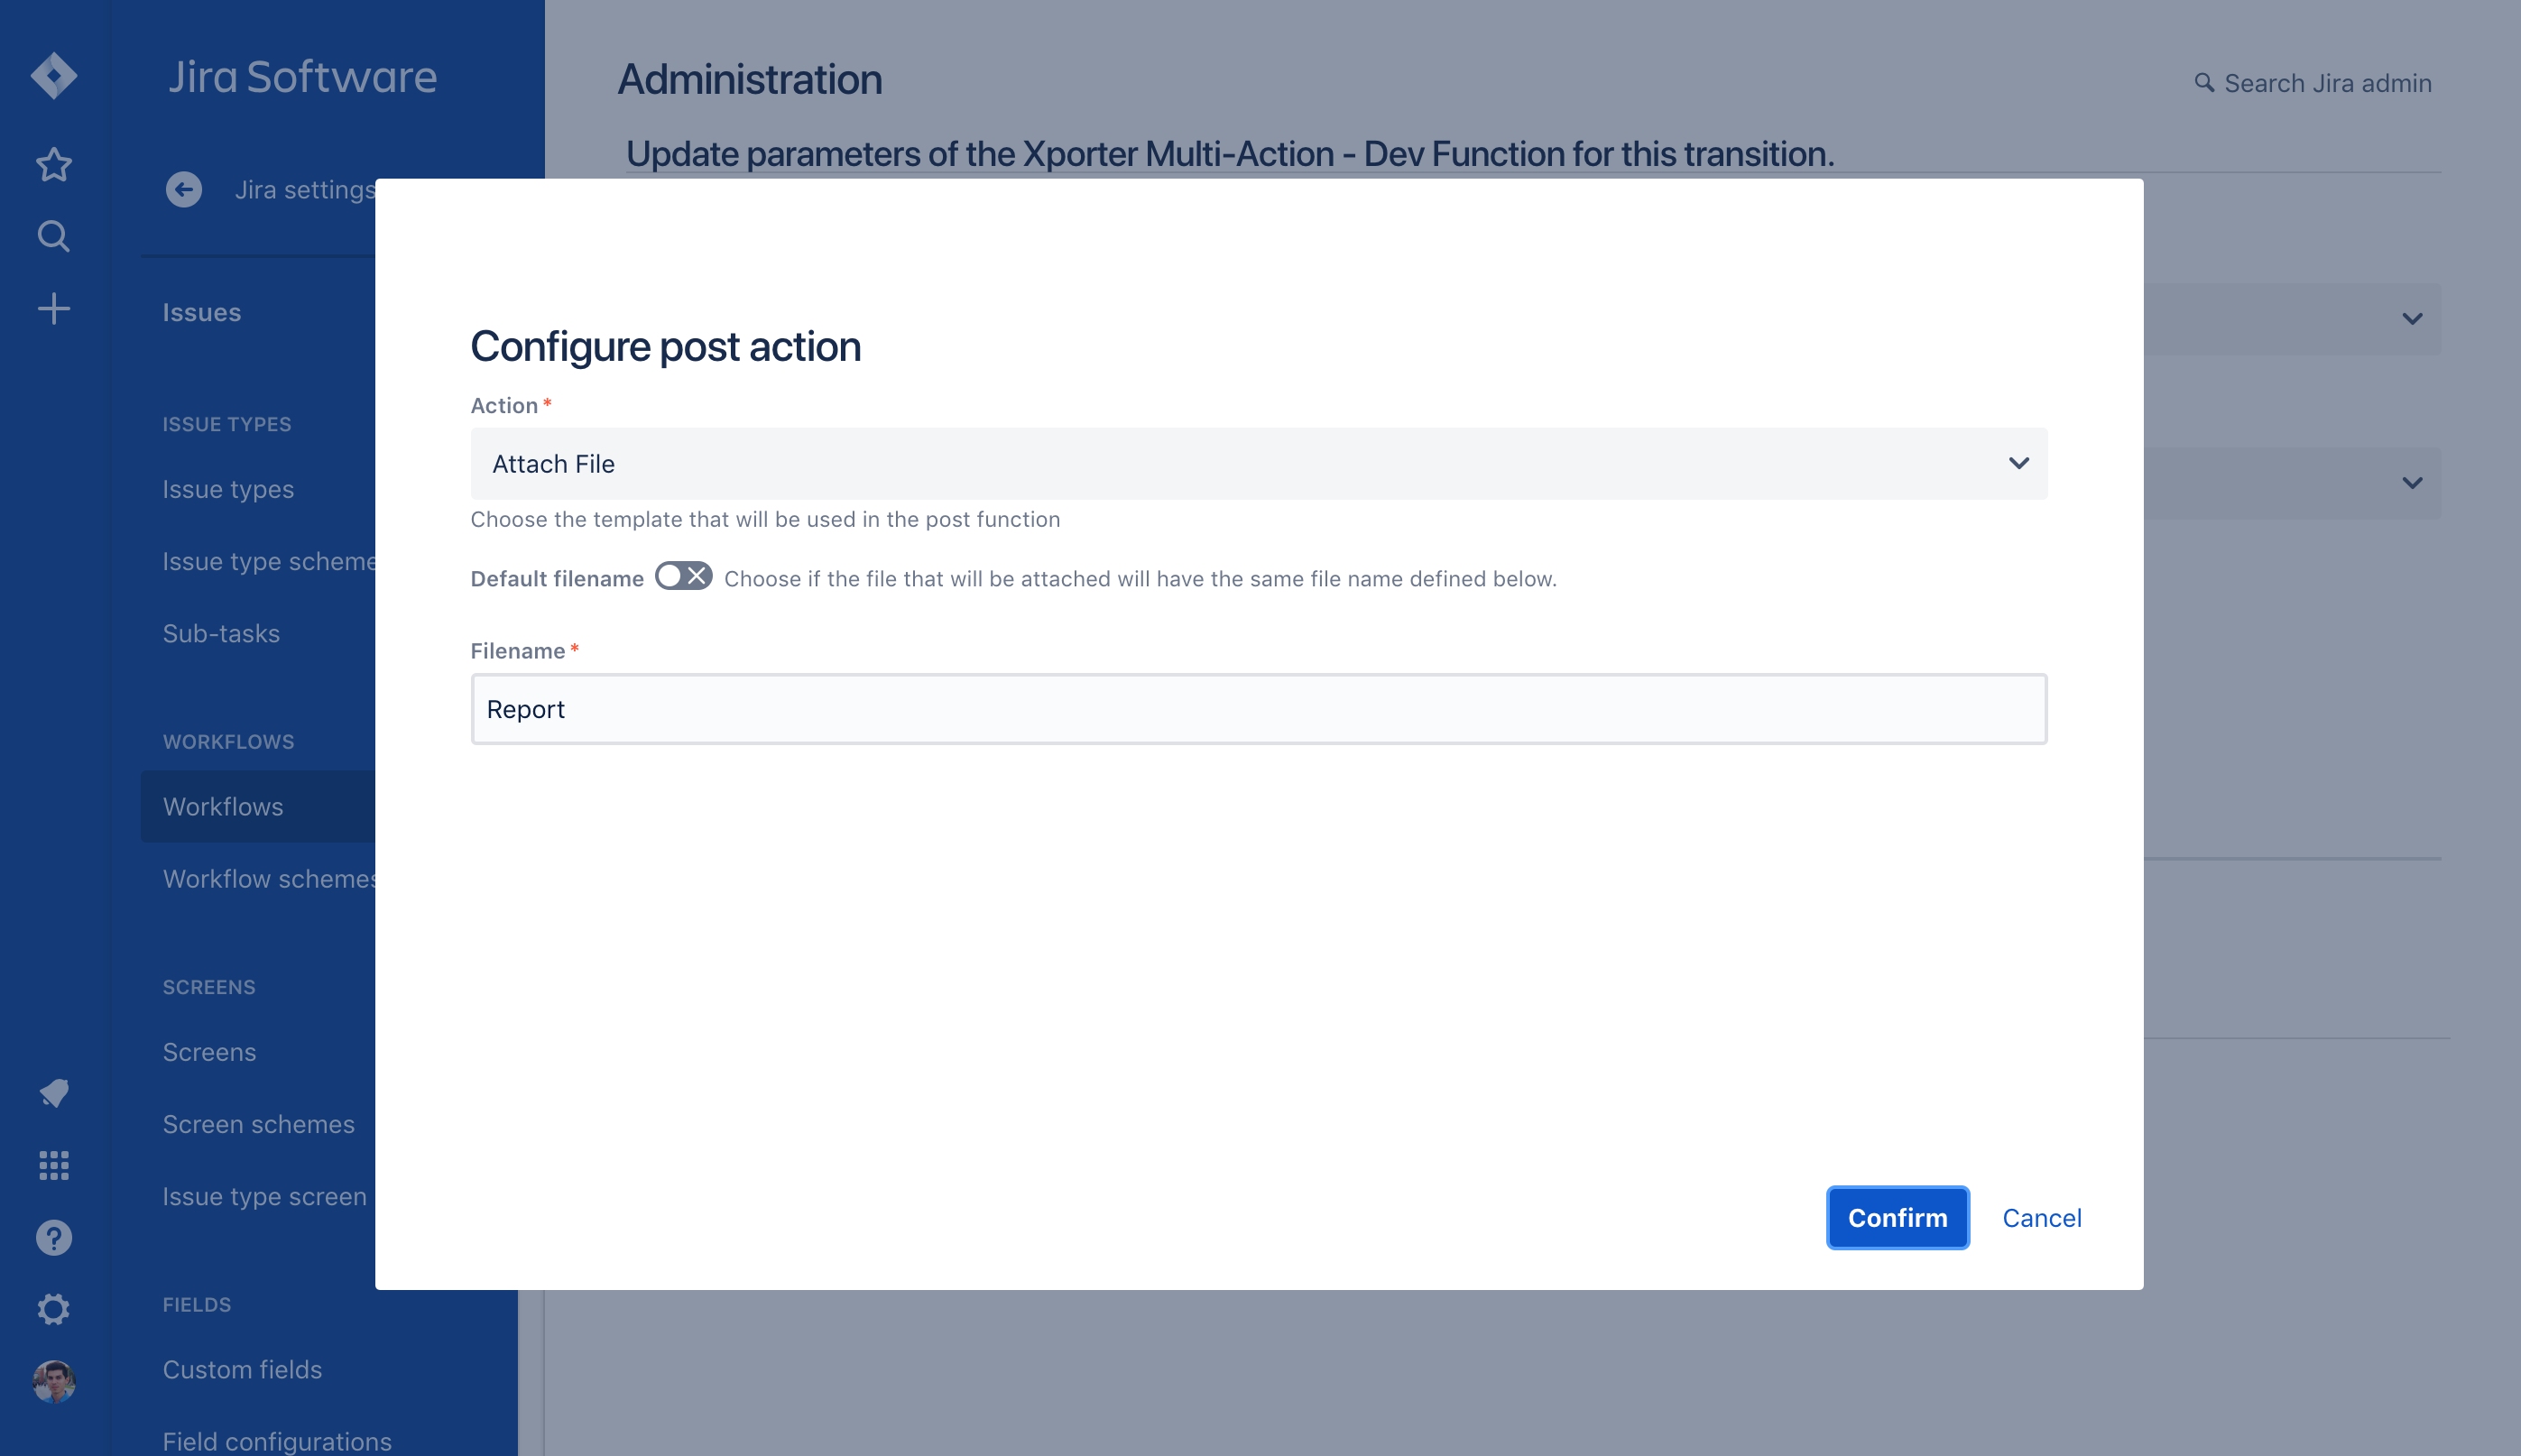
The document generated can be attached to the issue who performed the transition.

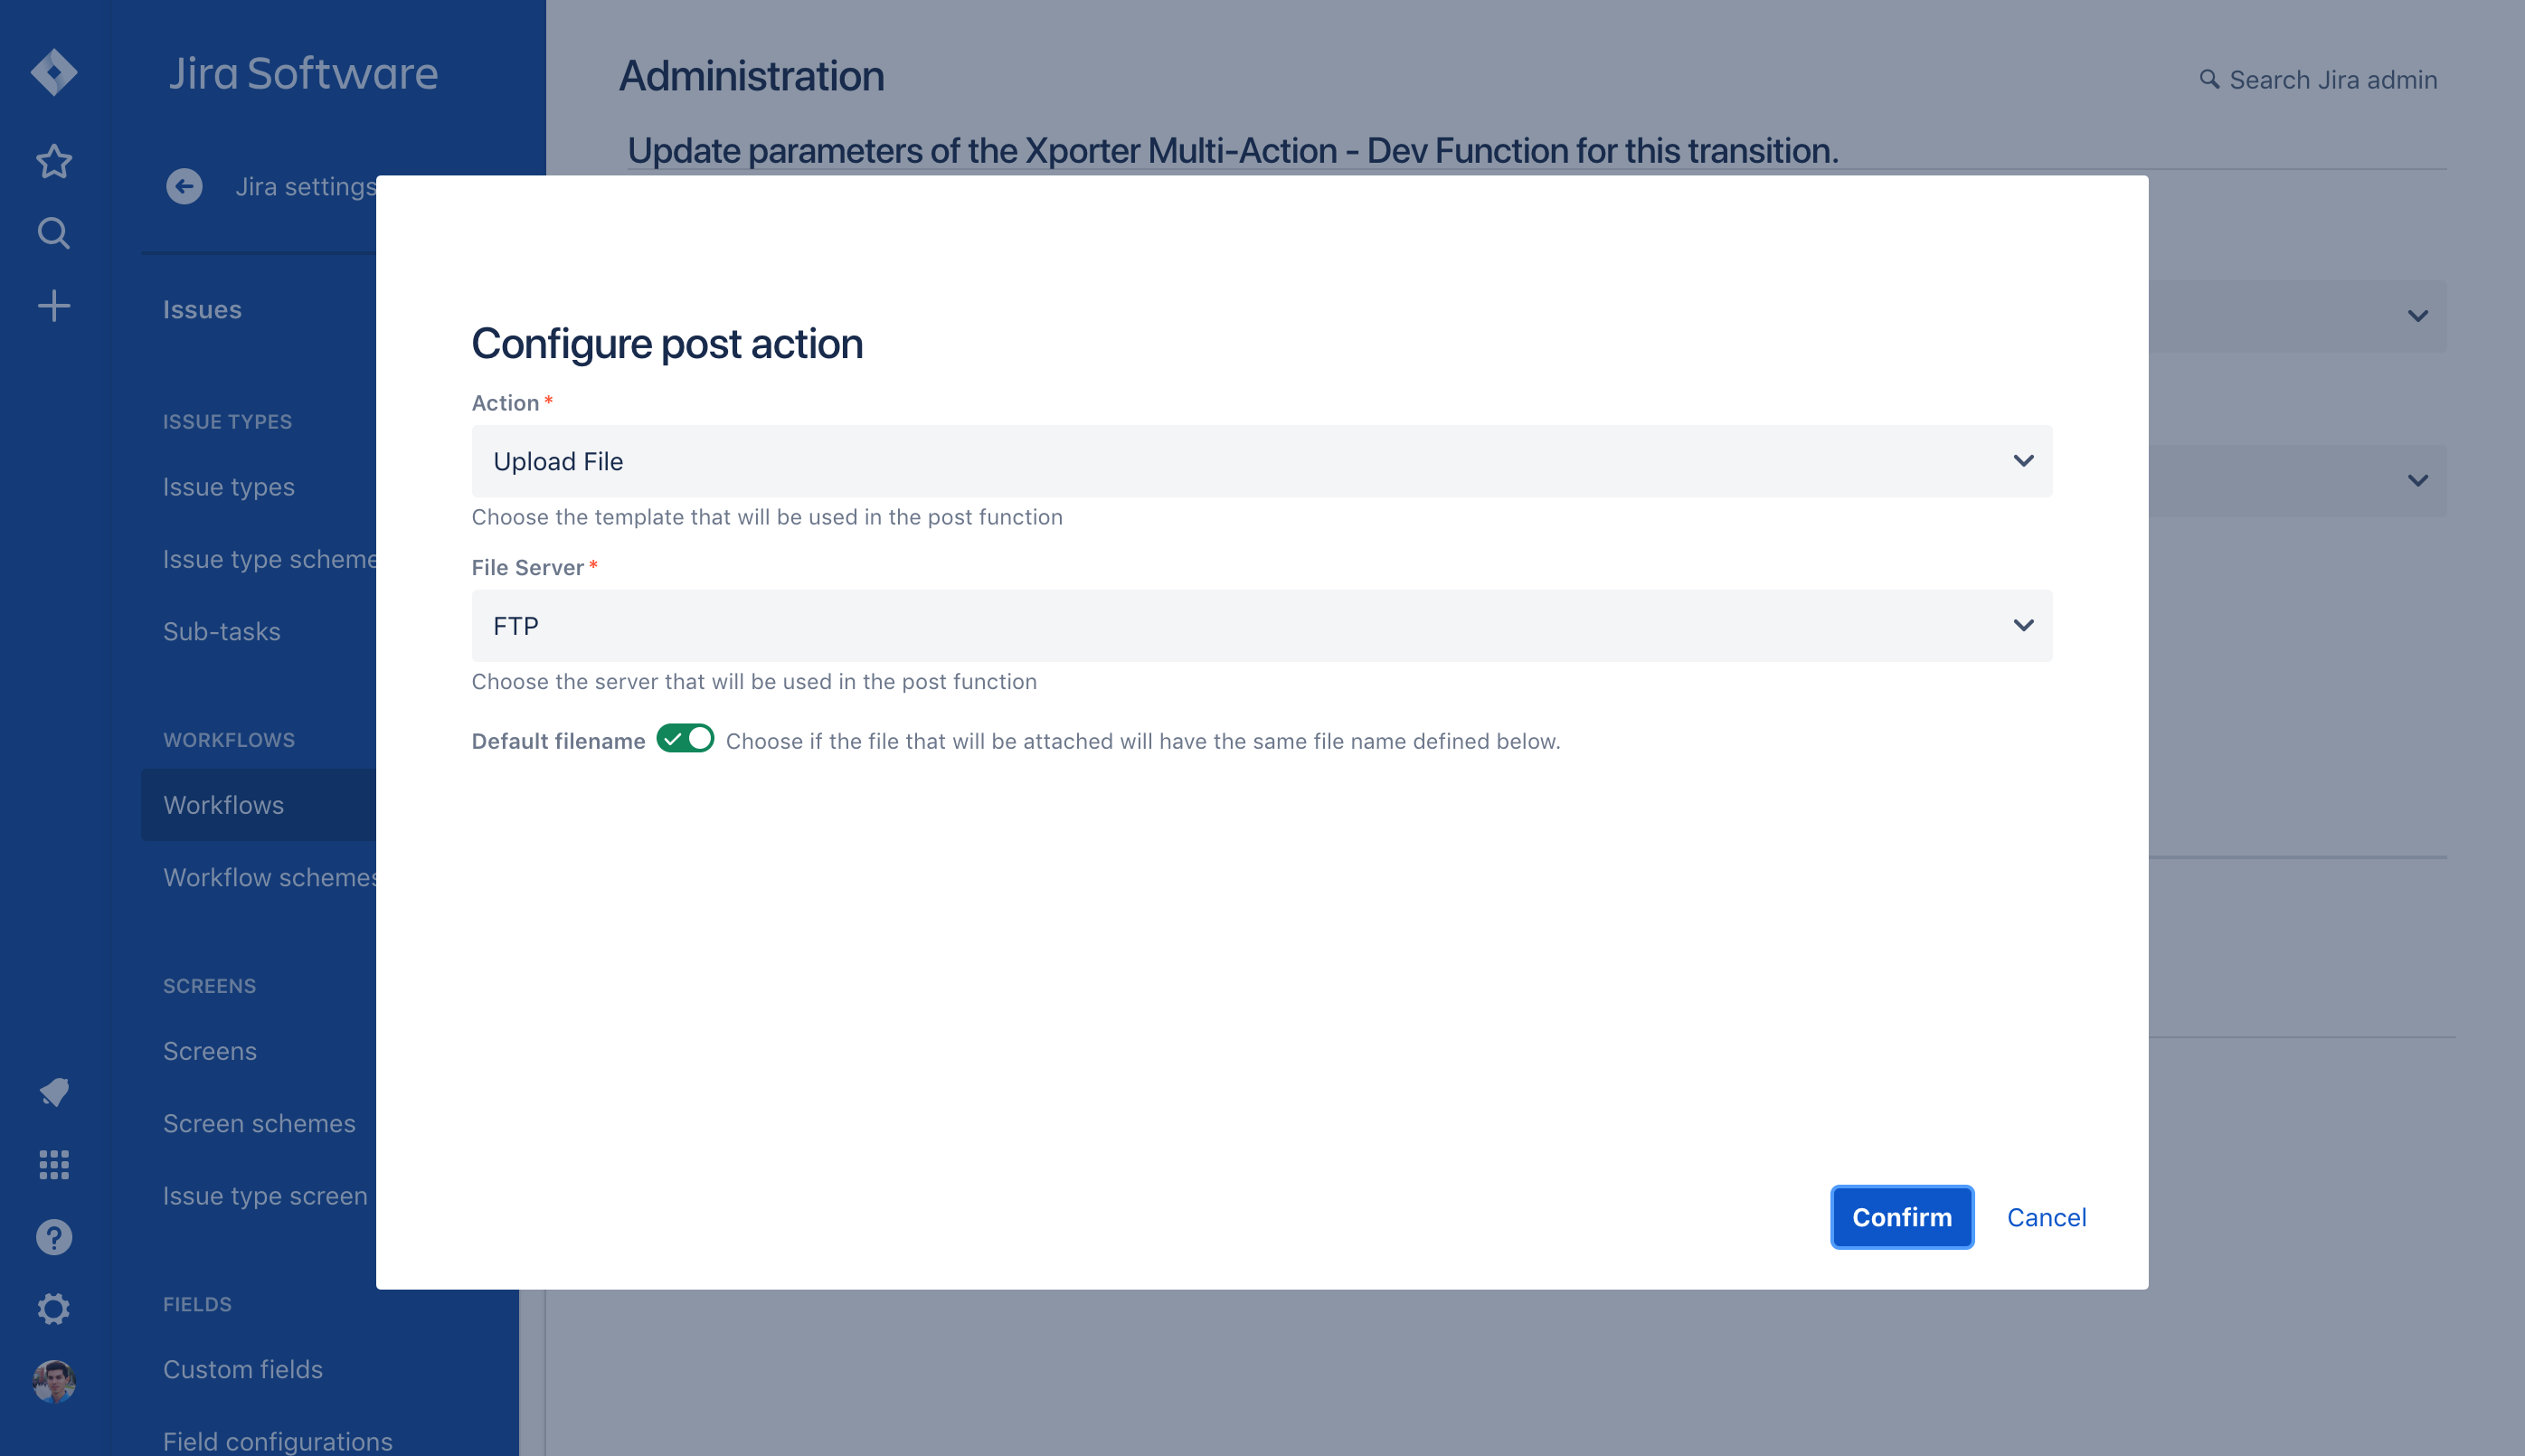
Upload File
Choose if you want to upload the generated document to a File Server.
Just pick the Server to which the exported file will be saved and after this, the administrator will have the opportunity to define the path on the filename.

Send Email
Is Also, is it possible to send the generated document reports by email with a custom body message.

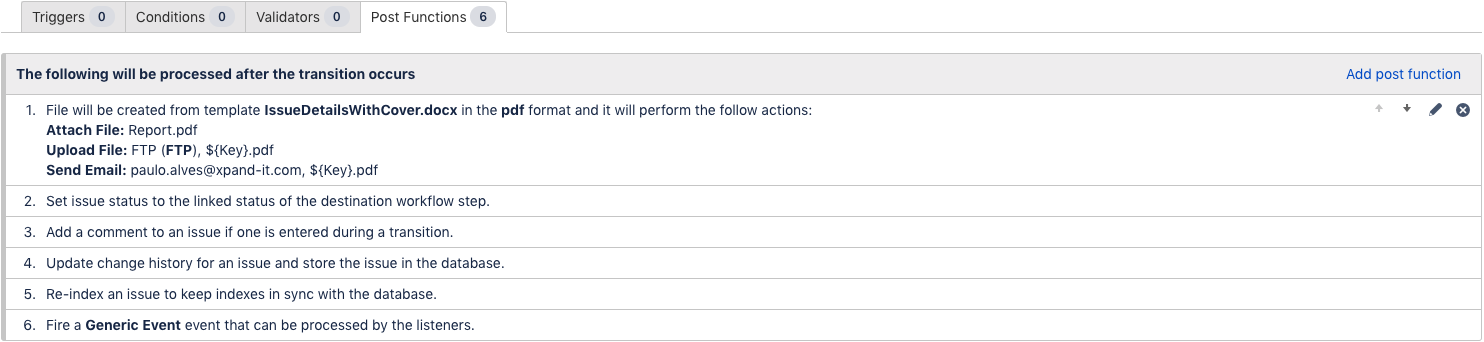
Xporter Post Function Overview
After choosing all the actions that will be performed, the Xporter will give you an overview of each action with a description and the filename.
Furthermore, you'll be able to edit the existing actions according to your expectations.

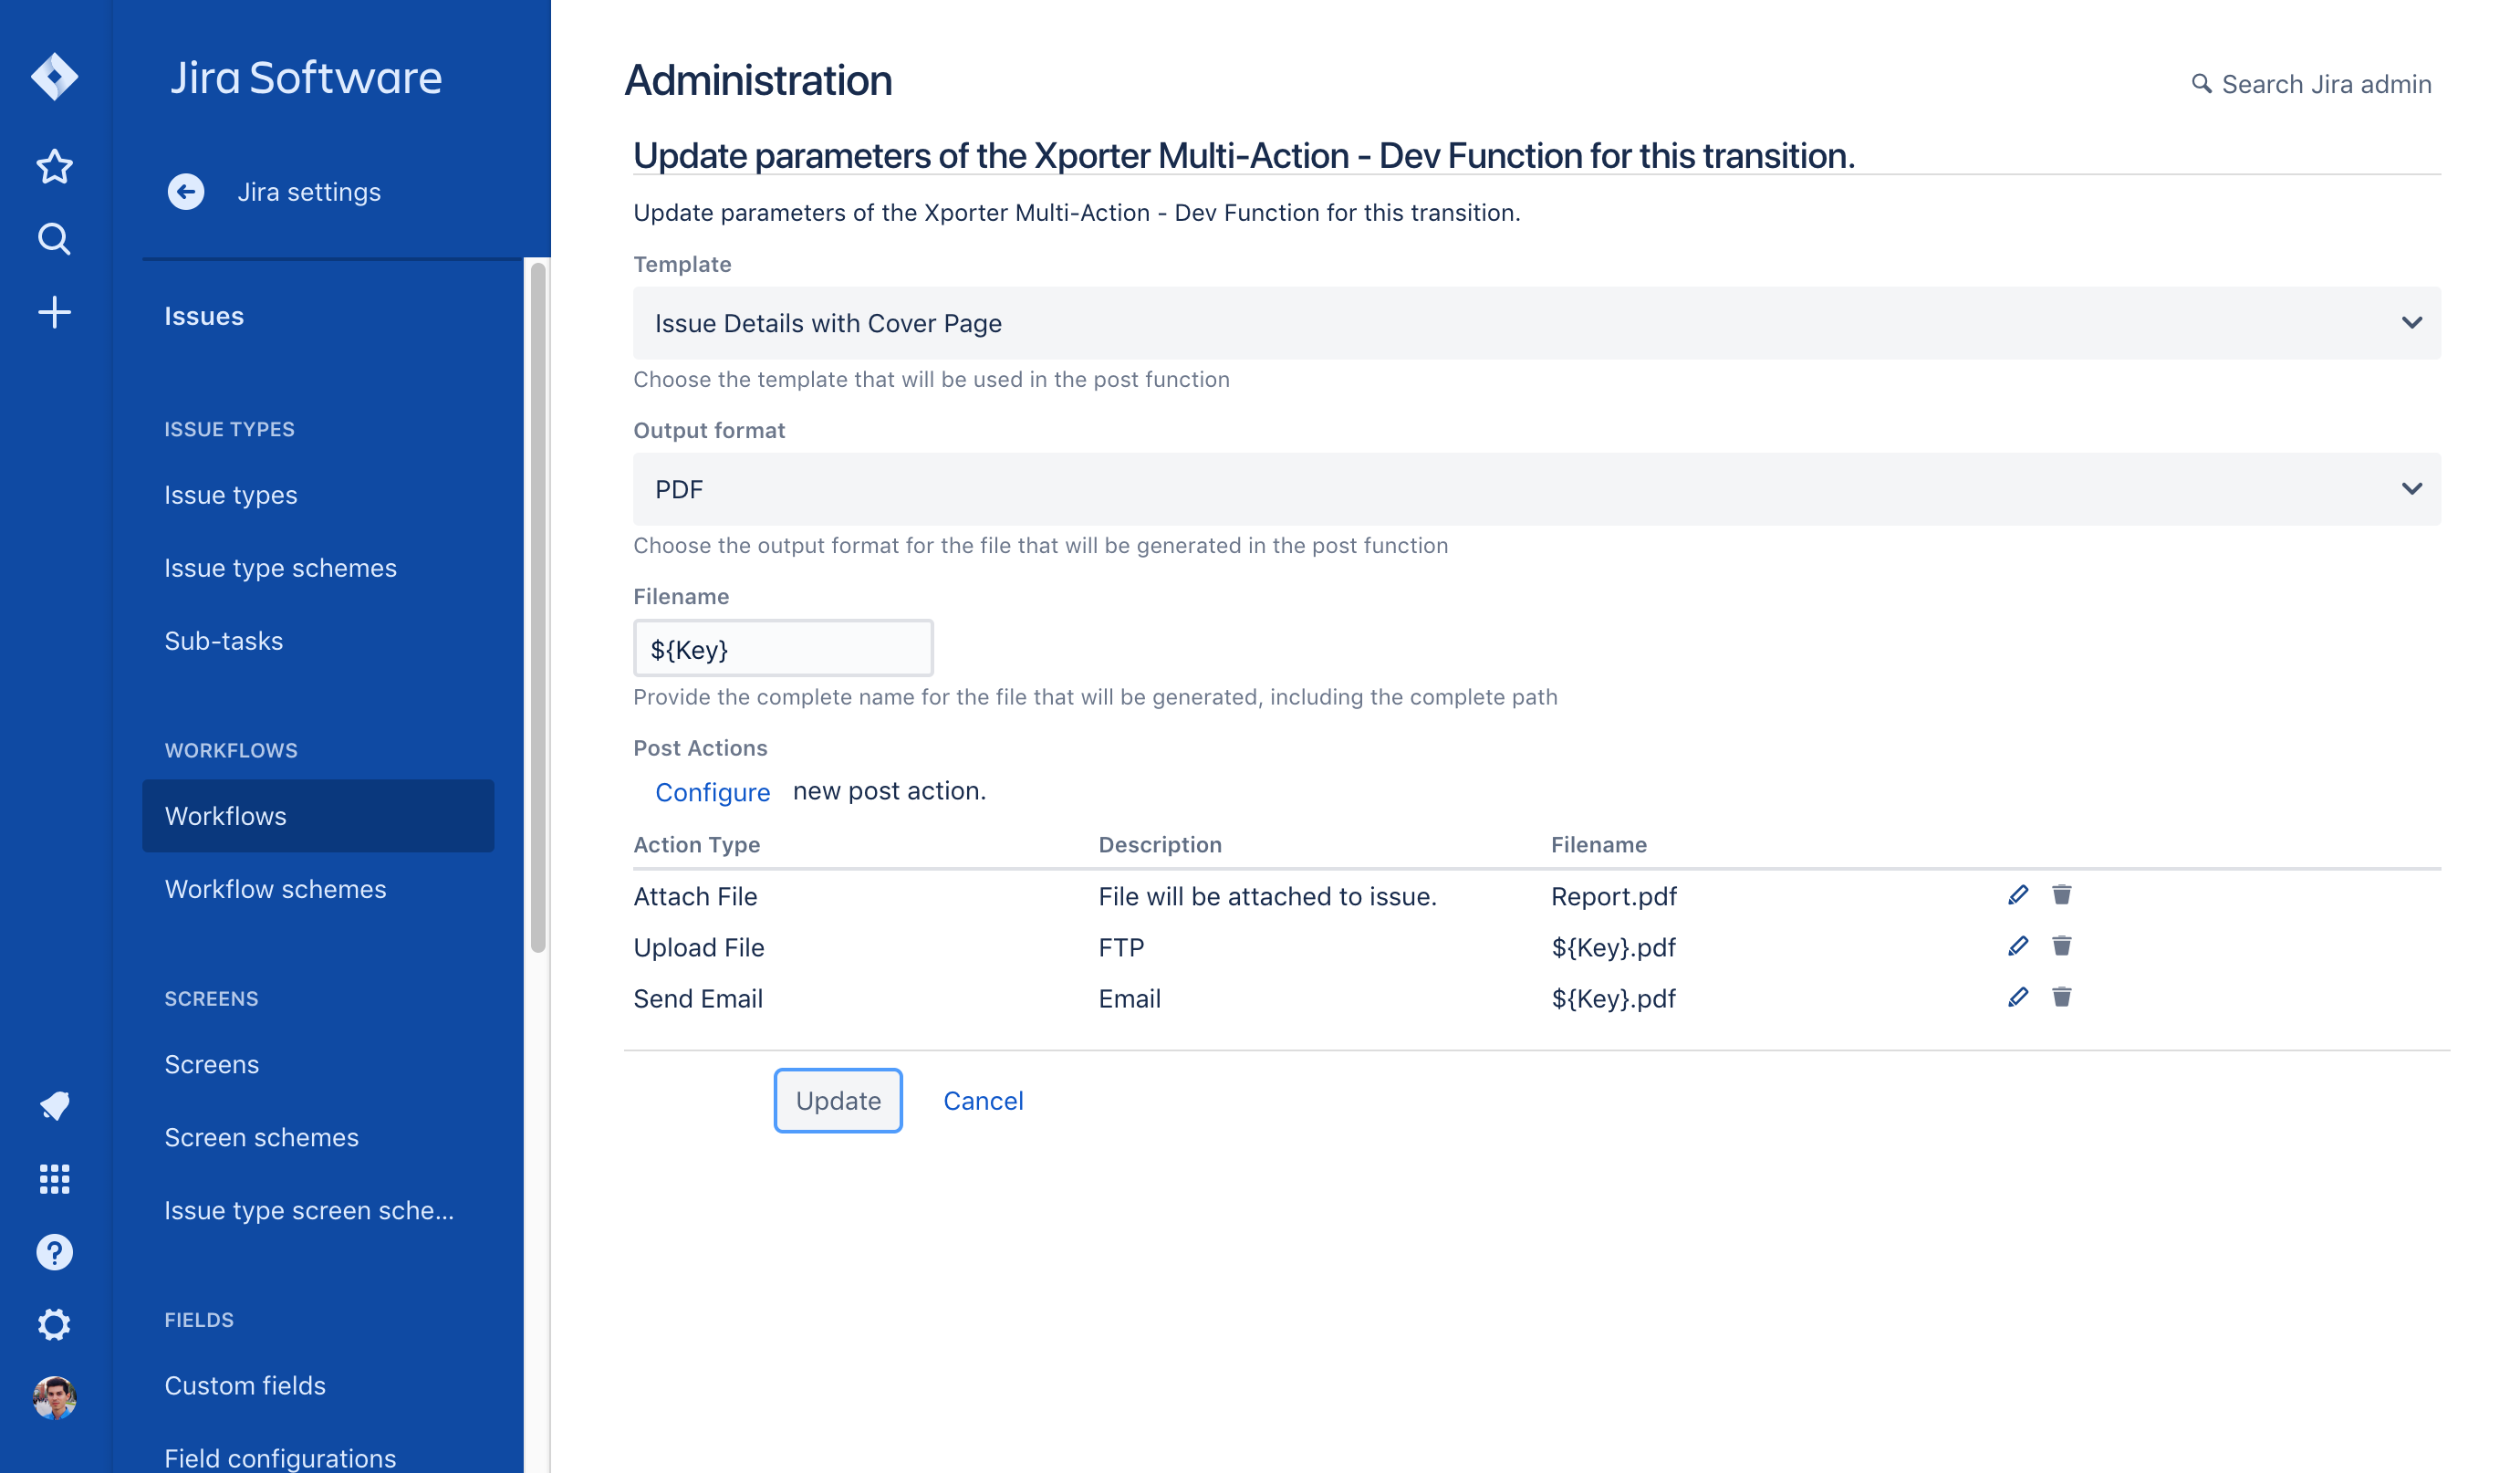
After the configuration process, the post functions of the transition will look like the screenshot below.