| Table of Contents |
|---|
Introduction
This is the third exercise of the Advanced Level. The main goal of this exercise is to show you how to set up and manage Xporter for Jira Workflow Post Functions.
Workflow Post Functions allow administrators to set parameters that will make the Xporter for Jira Create Document Post Function automatically generate documents based on the Status Transitions of issues, along with customizations of File Names and File destinations.
| Info |
|---|
For further information please check our documentation here. For more information on Jira Workflow Post Functions, please refer to the Atlassian documentation here. |
In order to perform the initial setup, on Jira Administration navigate to Issues, click Workflows on the sidebar, and Edit the Workflow of the Academy Project. On the next page, select to show the workflow as Text, and on Step Name (id) To Do, under the Transitions (id) column, click In Progress. On the next page, click the Post Functions tab and then Add post function.

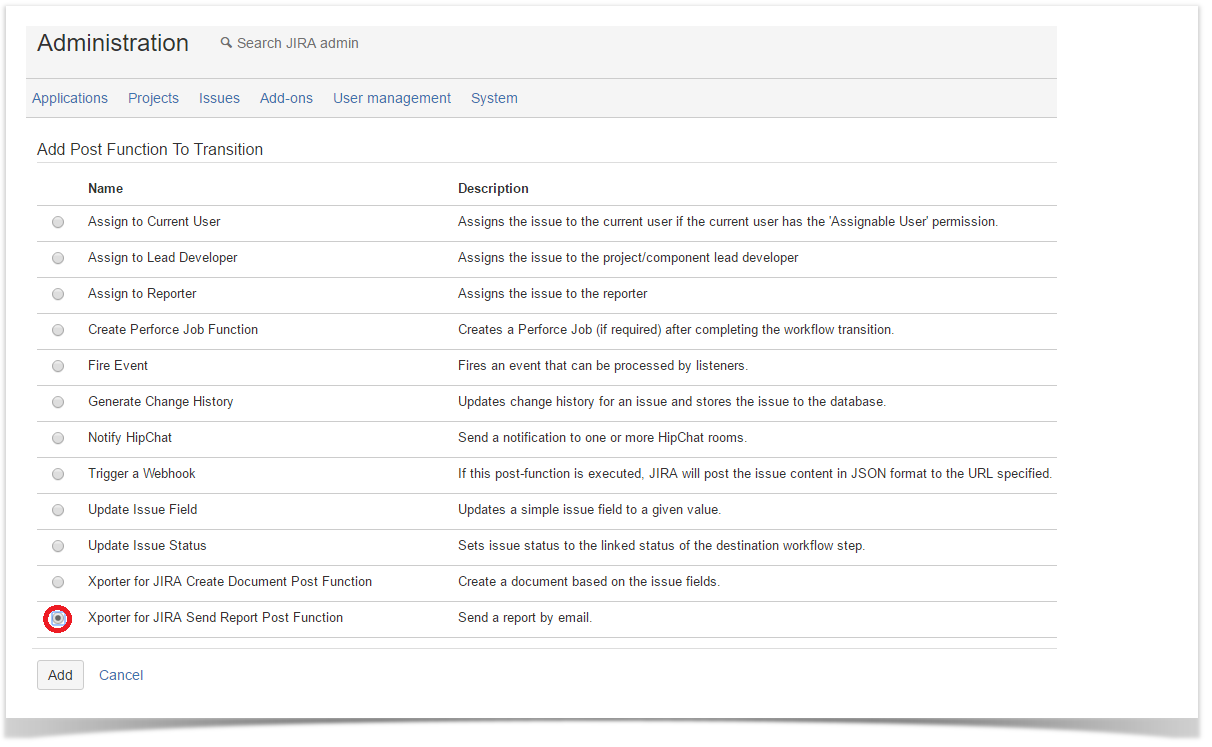
On the Add Post Function To Transition page, the following will be displayed, along with other options:
- the Xporter for Jira Create Document Post Function selector, to create a document and define where to save the generated file
- the Xporter for Jira Send Report Post Function selector, to create a document and send the generated file by Email
| Info |
|---|
In order to perform this exercise properly, you'll make use of the File Servers created on the How to Manage File Servers exercise, as well as a Jira SMTP mail server configured to send emails. For more information on how to create a Jira SMTP mail server, please refer to the Atlassian documentation here. |
| Note |
|---|
Workflow Post Functions are not limited by Permission Schemes. |
The Exercise(s)
1) Adding an Xporter for Jira Create Document Post Function
On the Add Post Function To Transition page of the transition mentioned earlier, tick the Xporter for Jira Create Document Post Function option and Parameters page will be displayed.
| Info |
|---|
You can include mappings in the filename, the same mappings that are used inside the templates, with a slightly different notation: start with $ and the name of the field. Examples:
|
1.1 Saved locally
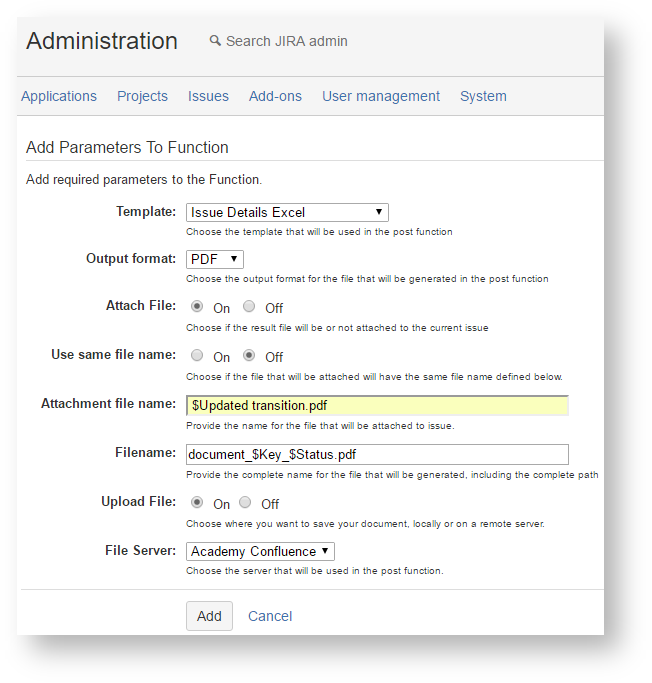
Select any Template and Output from the selectors.
Turn On Attach File so that the generated document will be attached to its issue.
Turn Off Use same file name so that the generated document that will be attached to its issue will have a name distinct from the one that will be saved locally/uploaded to a File Server.
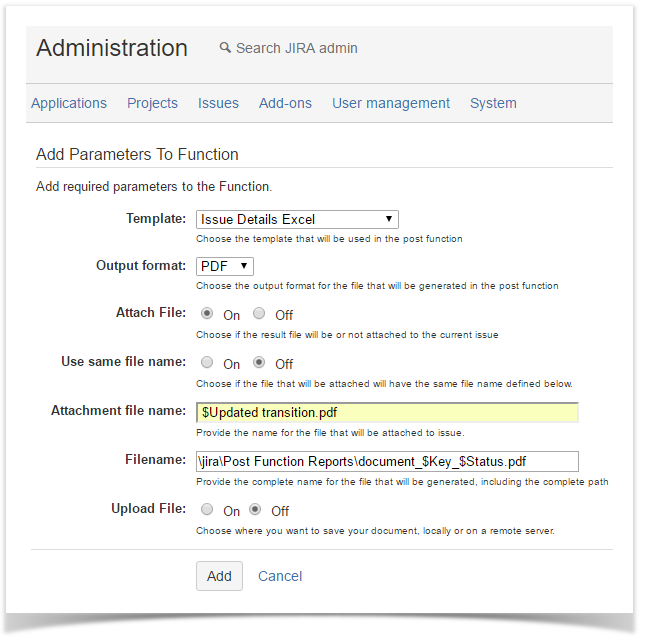
On Attachment file name, enter ${Updated} transition. Notice that the file extension will be added automatically, based on the Output format previously selected.
The Filename is where we define the name of the generated document that will be saved locally. Enter /jira/Post Function Reports/document_$Key_$Status since we want it to be saved locally on the path /jira/Post Function Reports/. Notice that the file extension will be added automatically, based on the Output format previously selected.
| Note |
|---|
The mappings in the filename are restricted by the maximum characters allowed. If the size of the filename is too long, the file will not be created. |
Click Add, and as you're navigated back to the Transtion page, your Workflow Post Function is now displayed under Post Functions.
At the top of your current page, click Publish Draft, and then Publish.

Then, navigate to an issue of the Academy project with the Status To Do and click Start Progress.
After that action, check the issue attachments. The generated file will be attached to the issue named as you've defined.
1.2 Updated to a File Server
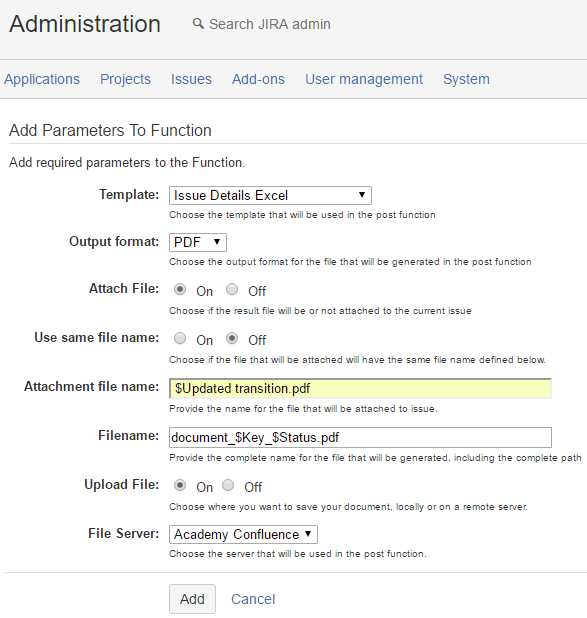
Select any Template and Output from the selectors.
Turn On Attach File so that the generated document will be attached to its issue.
Turn Off Use same file name so that the generated document that will be attached to its issue will have a name distinct from the one that will be saved locally/uploaded to a File Server.
On Attachment file name, enter ${Updated} transition. Notice that the file extension will be added automatically, based on the Output format previously selected.
The Filename is where we define the name of the generated document that will be uploaded to a File Server. Just add the filename (e.g., document_$Key_$Status). Notice that the file extension will be added automatically, based on the Output format previously selected.
Turn On Upload File, and on the File Server selector below, pick the Academy Confluence we've set up in the How to Manage File Servers exercise. (You can pick the Academy FTP instead, just make sure to check the generated file there after the workflow transition).
| Note |
|---|
The mappings in the filename are restricted by the maximum characters allowed. If the size of the filename is too long, the file will not be created. |
Click the Add button, and as you're navigated back to the Transition page, your Workflow Post Function is now displayed under Post Functions.
At the top of your current page, click Publish Draft, and then Publish.
Navigate to an issue of the Academy project with the Status To Do and click Start Progress.
After that action, check the issue attachments. The generated file will be attached to the issue named as you've defined.
Also, check the local path on your machine hosting Jira as well as the Space page you've defined on your Academy Confluence File Server. There, you'll find the generated report, named as you defined it.
2) Adding a Xporter for Jira Send Report Post Function
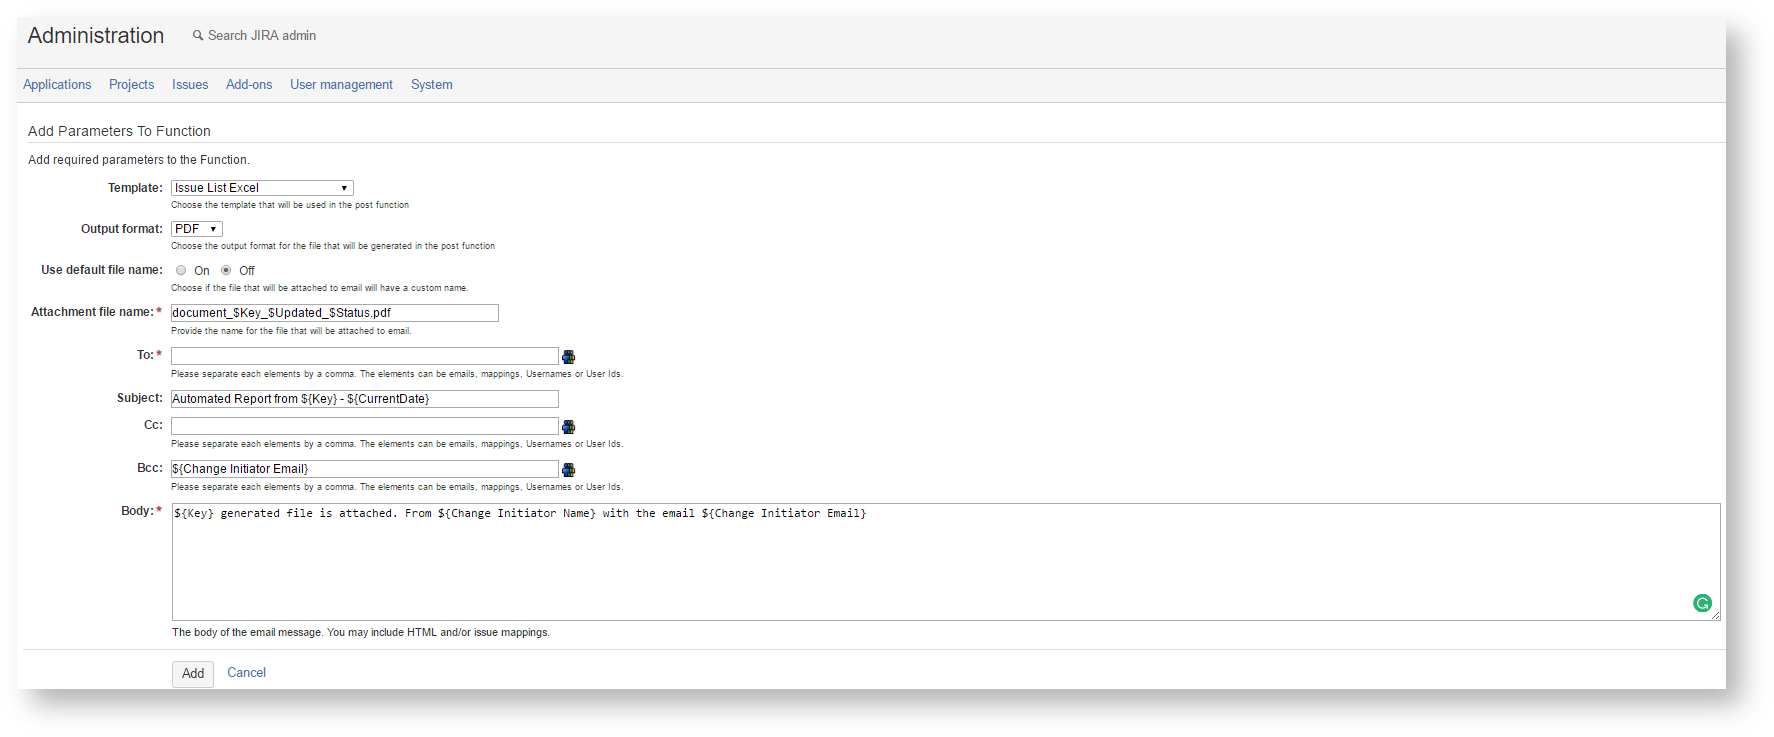
On the Add Post Function To Transition page of the transition mentioned early, tick the Xporter for Jira Send Report Post Function option and the Parameters page will be displayed.
Select any Template and Output from the selectors.
Turn Off Use default file name so that we can customize the name of our generated document.
On Attachment file name, enter document_$Key_$Updated_$Status. Notice that the file extension will be added automatically, based on the Output format previously selected.
Enter your email address in To. On the Subject, enter Xporter Report from ${Key} - ${CurrentDate}. On Cc, open the User Picker next to it and select your Jira User.
Enter ${Change Initiator Email} on Bcc.
On the Body, enter ${Key} generated file is attached. From ${Change Initiator Name} with the email ${Change Initiator Email}.
| Info |
|---|
You can use emails, mappings, Usernames or User Ids on the Attachment file name, To, Subject, Cc, Bcc and Body fields. The mappings you include are the same mappings that are used inside the templates with the same notation. You can also use the following Xporter for Jira format functions: |
Click the Add button, and as you're navigated back to the Transition page, your Workflow Post Function is now displayed under Post Functions.
Navigate to an issue of the Academy project with the Status To Do and click Start Progress.
After that action, check your email, and you'll find its Subject and Body filled as you've defined, along with the generated Report as an attachment.
Congratulations! You've completed the Advanced level ![]()
| Info |
|---|
If you like this exercise, please leave a comment or a Thank you in advance. Enjoy our product. |