Xporter for Jira allows you to configure the export of an attachment at the template level.
Let's suppose you want to choose which of your templates should export attachments.
First, make sure you disable the Include Attachments option on the Global Settings page. This will ensure that only the templates with the attachments enabled will export the issue attachments.

If the Include Attachments option is enabled, all templates will export the attachments. |
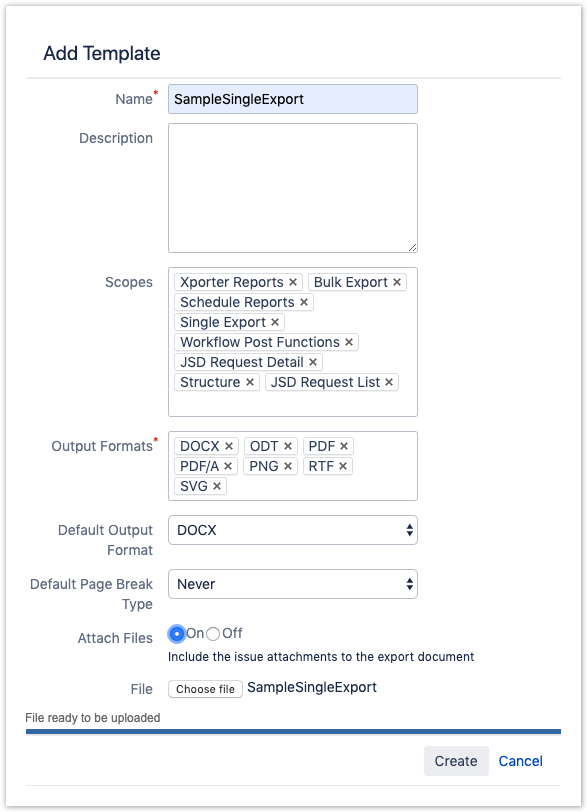
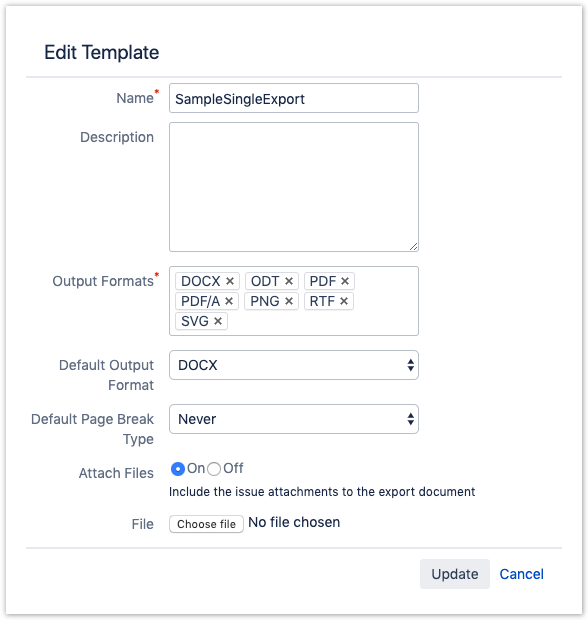
Go to the template page and add/edit the template. You then specify whether or not you want to have the attachments included in each template.
(The templates you already have in the previous version will have the attachments disabled.)


After adding/editing the template, the Xporter for Jira Templates page will indicate which templates have the attachments enabled.

In the example above, SampleSingleExport has the attachments enabled while SampleSingleWithoutAttach has it disabled.
The templates downloaded from the template Store, by default, will have the attachments disabled. If you want to enable the attachments, just edit the template. |
If you have attachments on an issue and you try to export a template with extension DOCX, you will be able to see, at the end of the file, the attachments included in the document generated. To open an attachment, you just need to do double-click on the attachment icon, see the examples below.

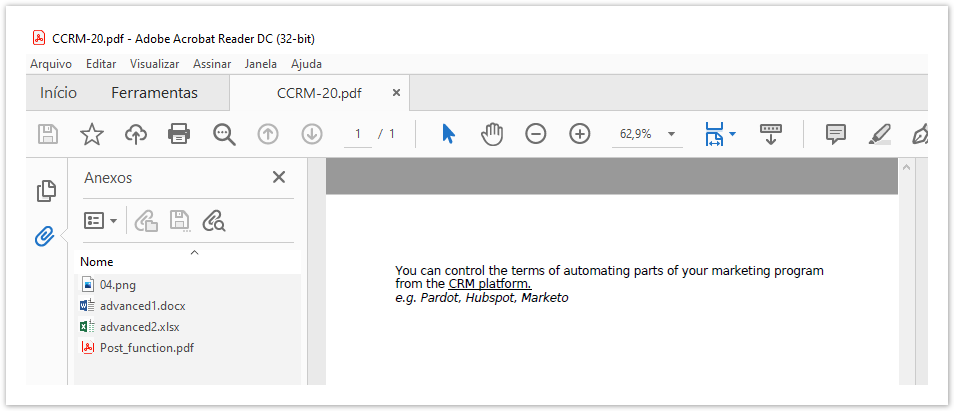
If you have attachments on an issue and you try to export a template with an extension PDF, you will able to see the symbol ![]() in the left sidebar in the Adobe Acrobat Reader, the attachments included in the document generated. To open an attachment, you just need to do double-click on the attachment icon, see the examples below.
in the left sidebar in the Adobe Acrobat Reader, the attachments included in the document generated. To open an attachment, you just need to do double-click on the attachment icon, see the examples below.

As you can see, this is very simple to do and allows you to get attachments included in your template.
Furthermore, you're able to define which templates you want with the attachments included.