Xporter is available on Agile Boards. You will be able to export all the issues that belong to the Active Sprint, Backlog or by Release.
First, you need to enable the feature on the Integrations screen under Xporter administration section.
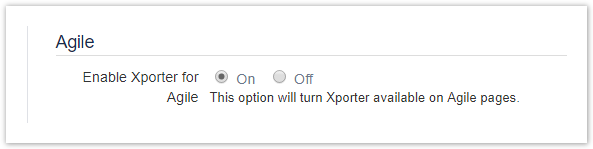
After enabling Xporter for Agile, you will be able to perform all the exports that are listed in the topics below.
Export from Active Sprint
Xporter allows our users to export all the issues that belong to the Active Sprint directly from the Agile Board.
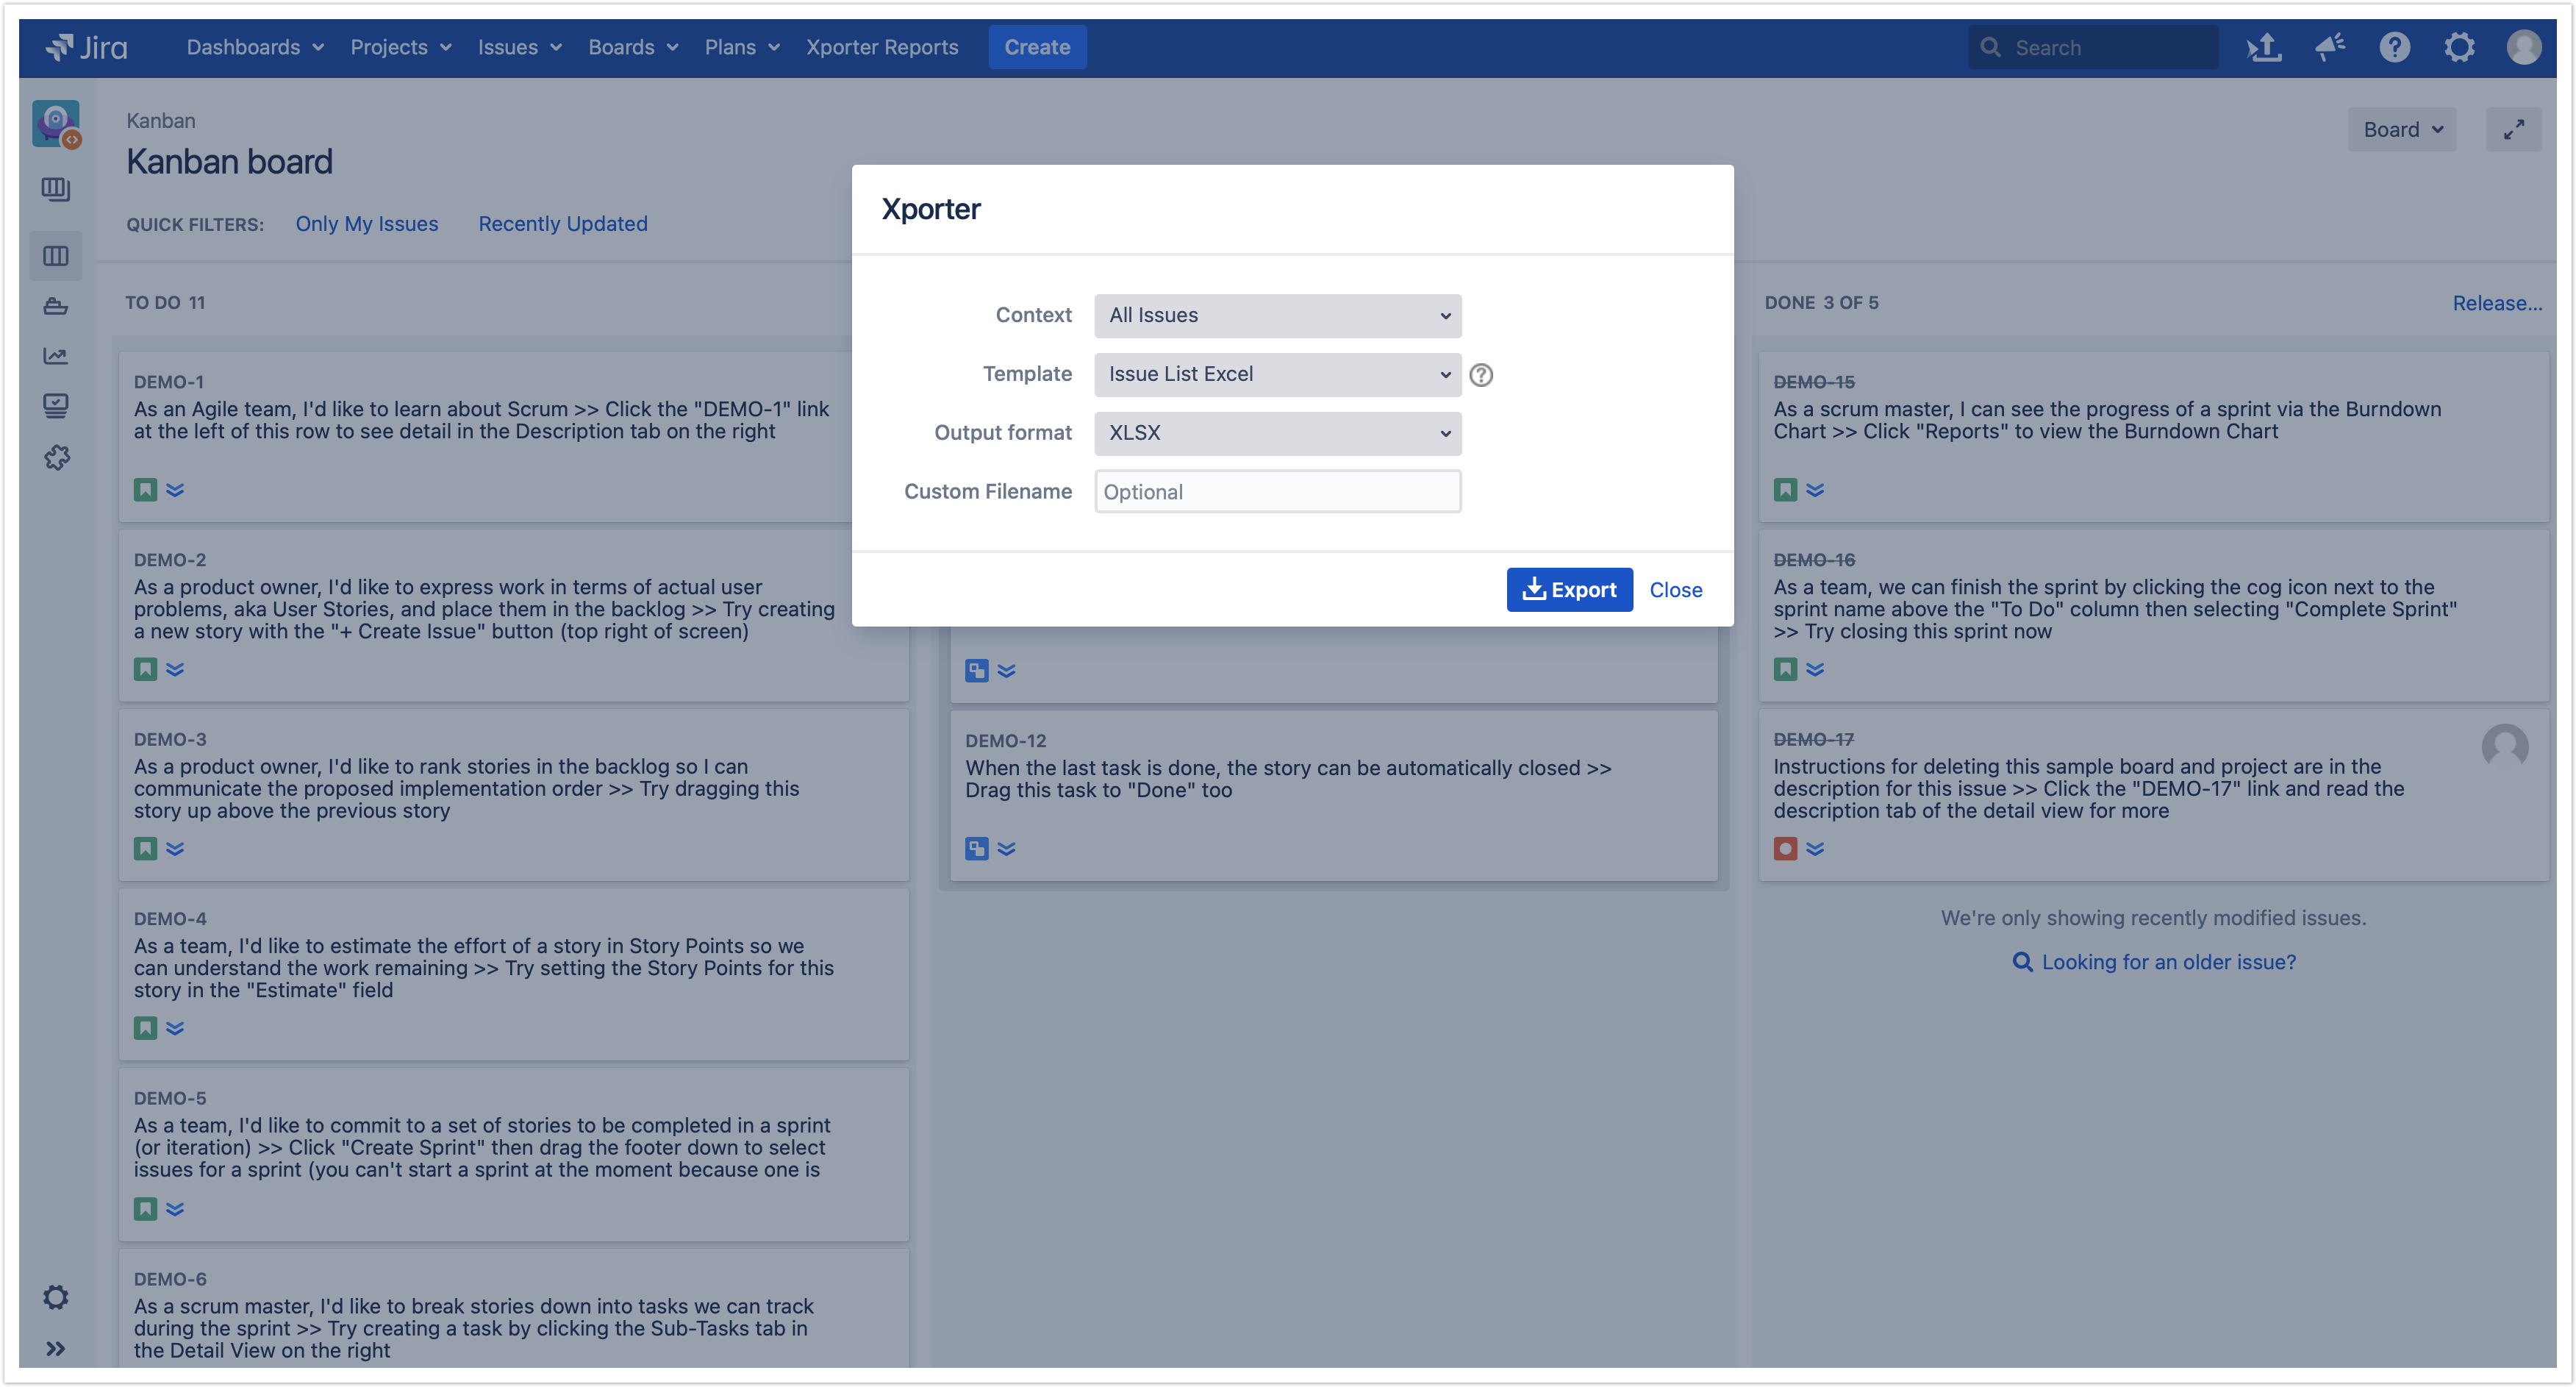
Step 1 - From the Agile Board, select Board, then click on the Xporter option.
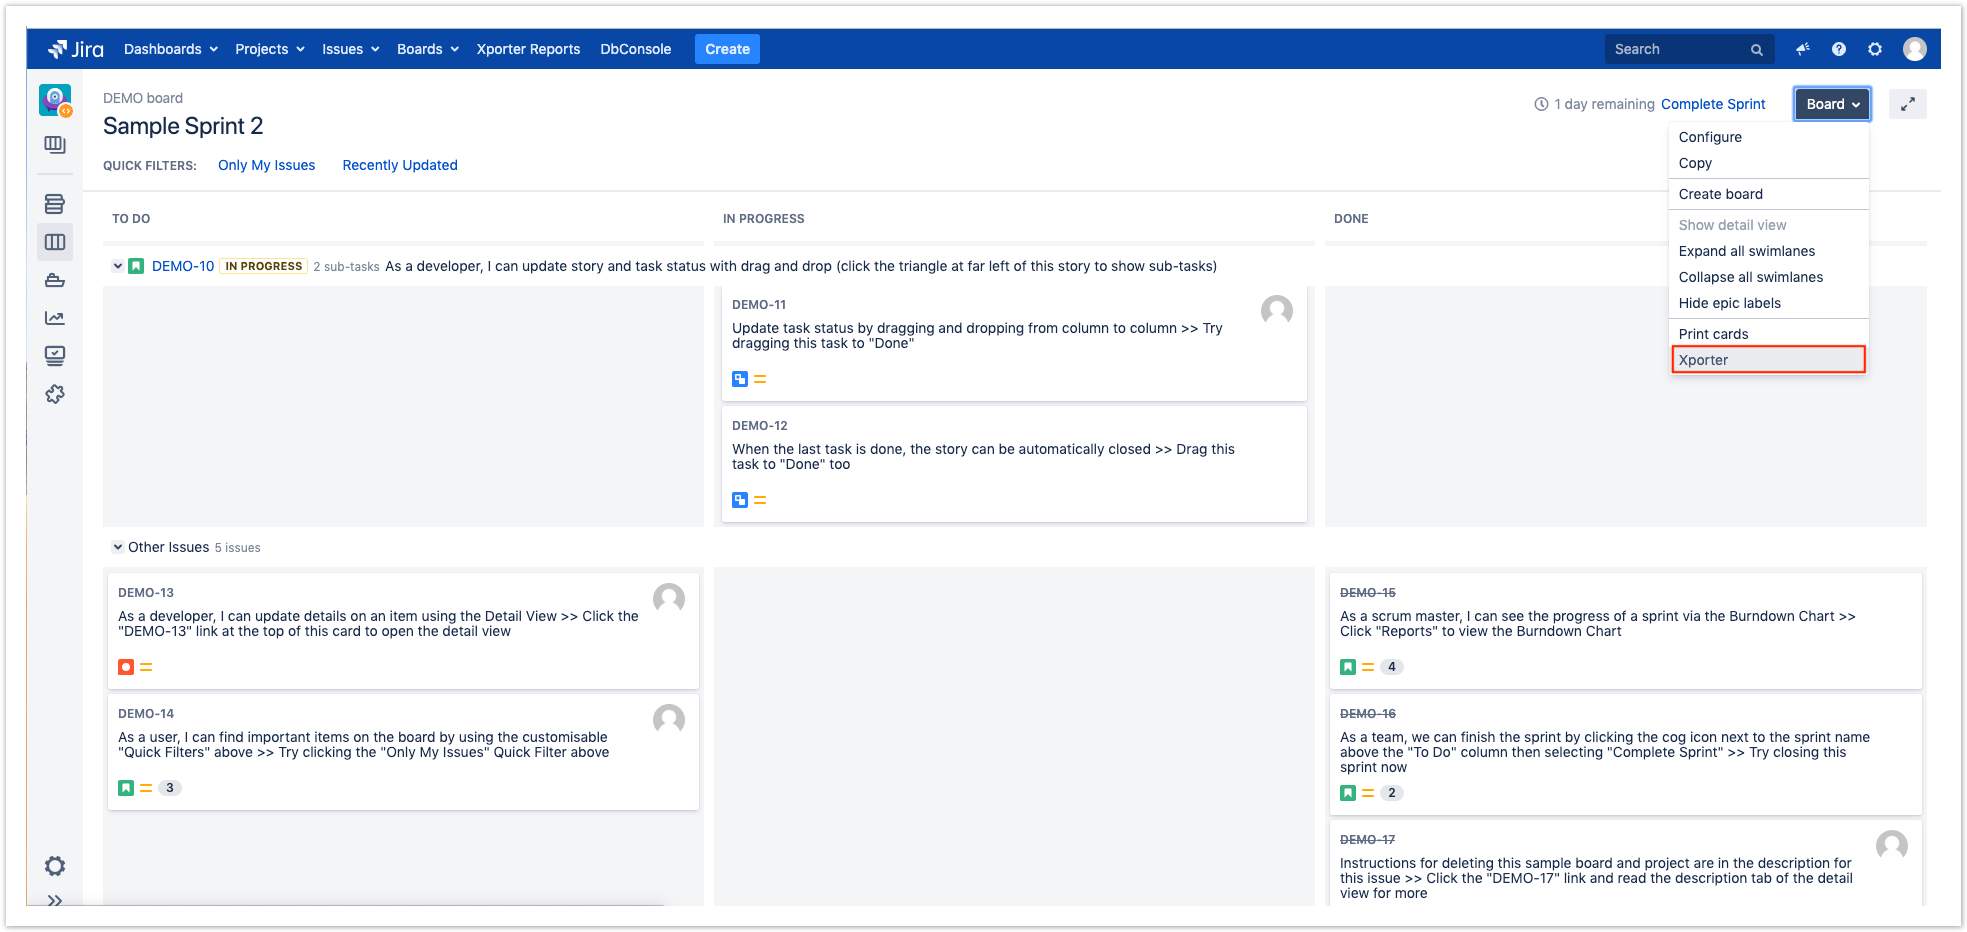
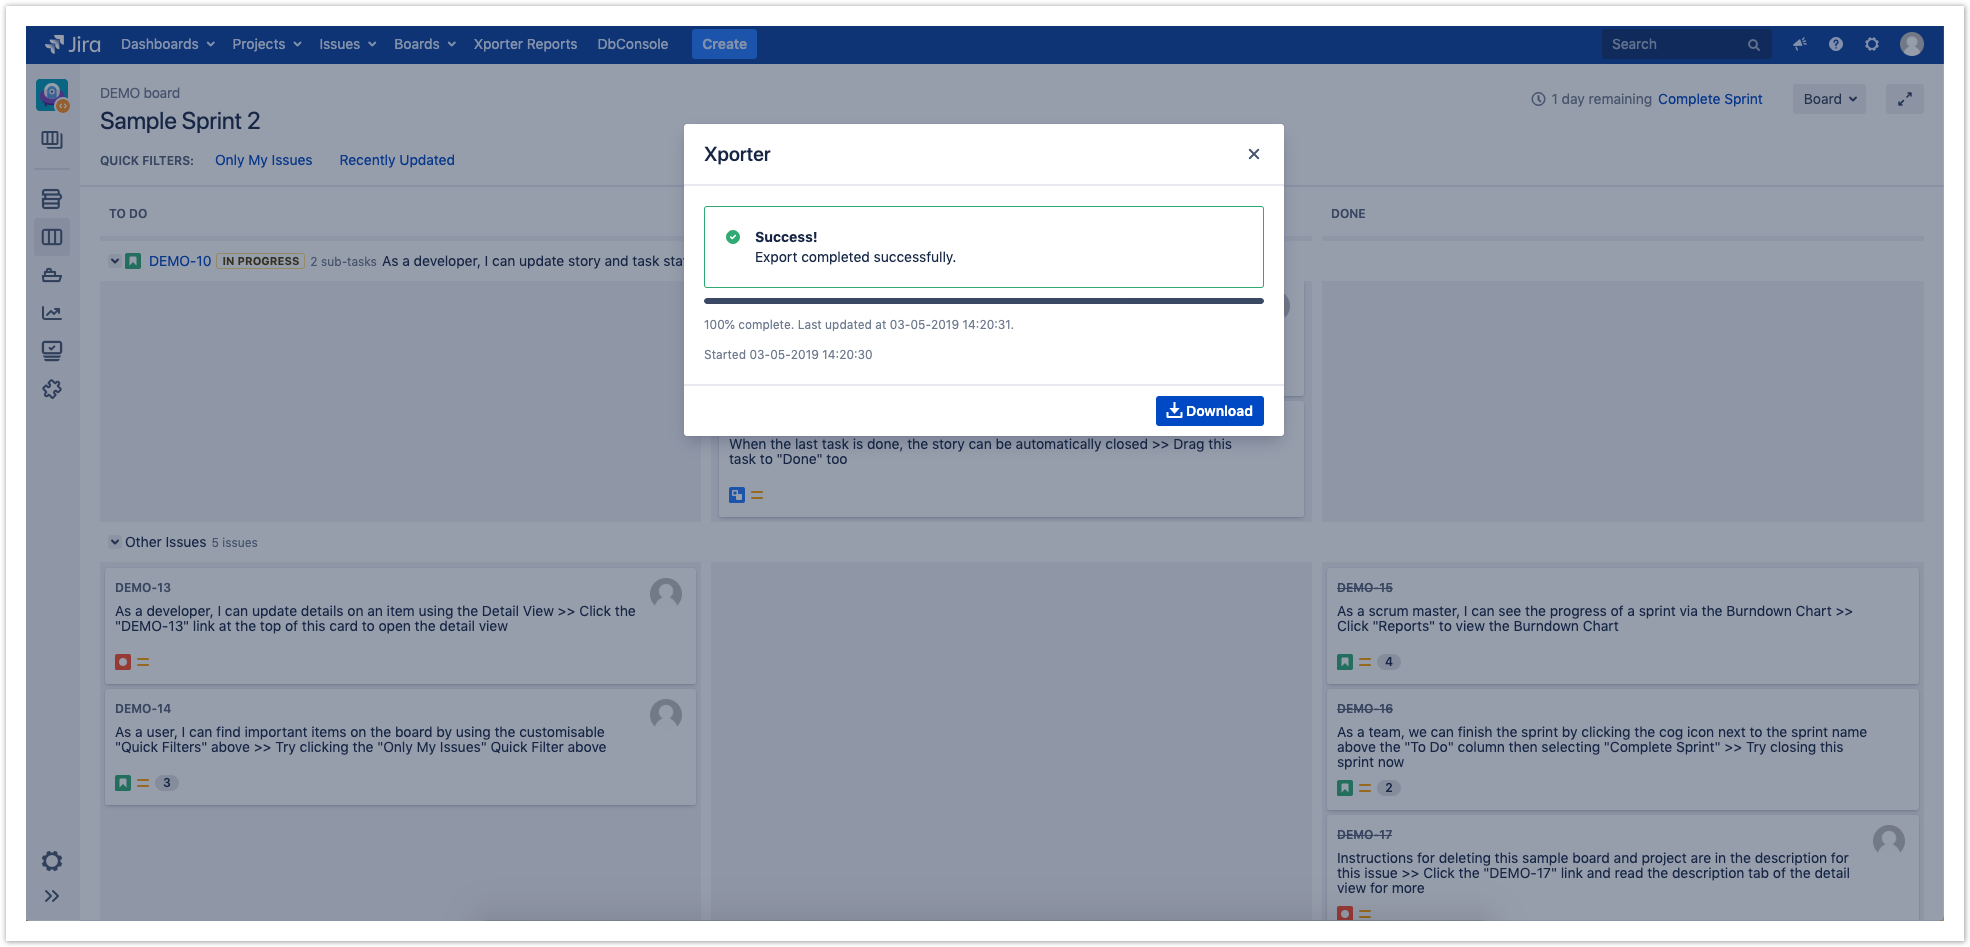
Step 2 - After clicking on the Xporter option, you will have a pop-up that will have a list with all contents available to export, all templates available to use in this context, the export type format and the option that allows you to break a page when changing Issues, Projects, Issue Types or Components. Also, there is an optional field to customize the file name of the report that will be generated. Then, click Export.

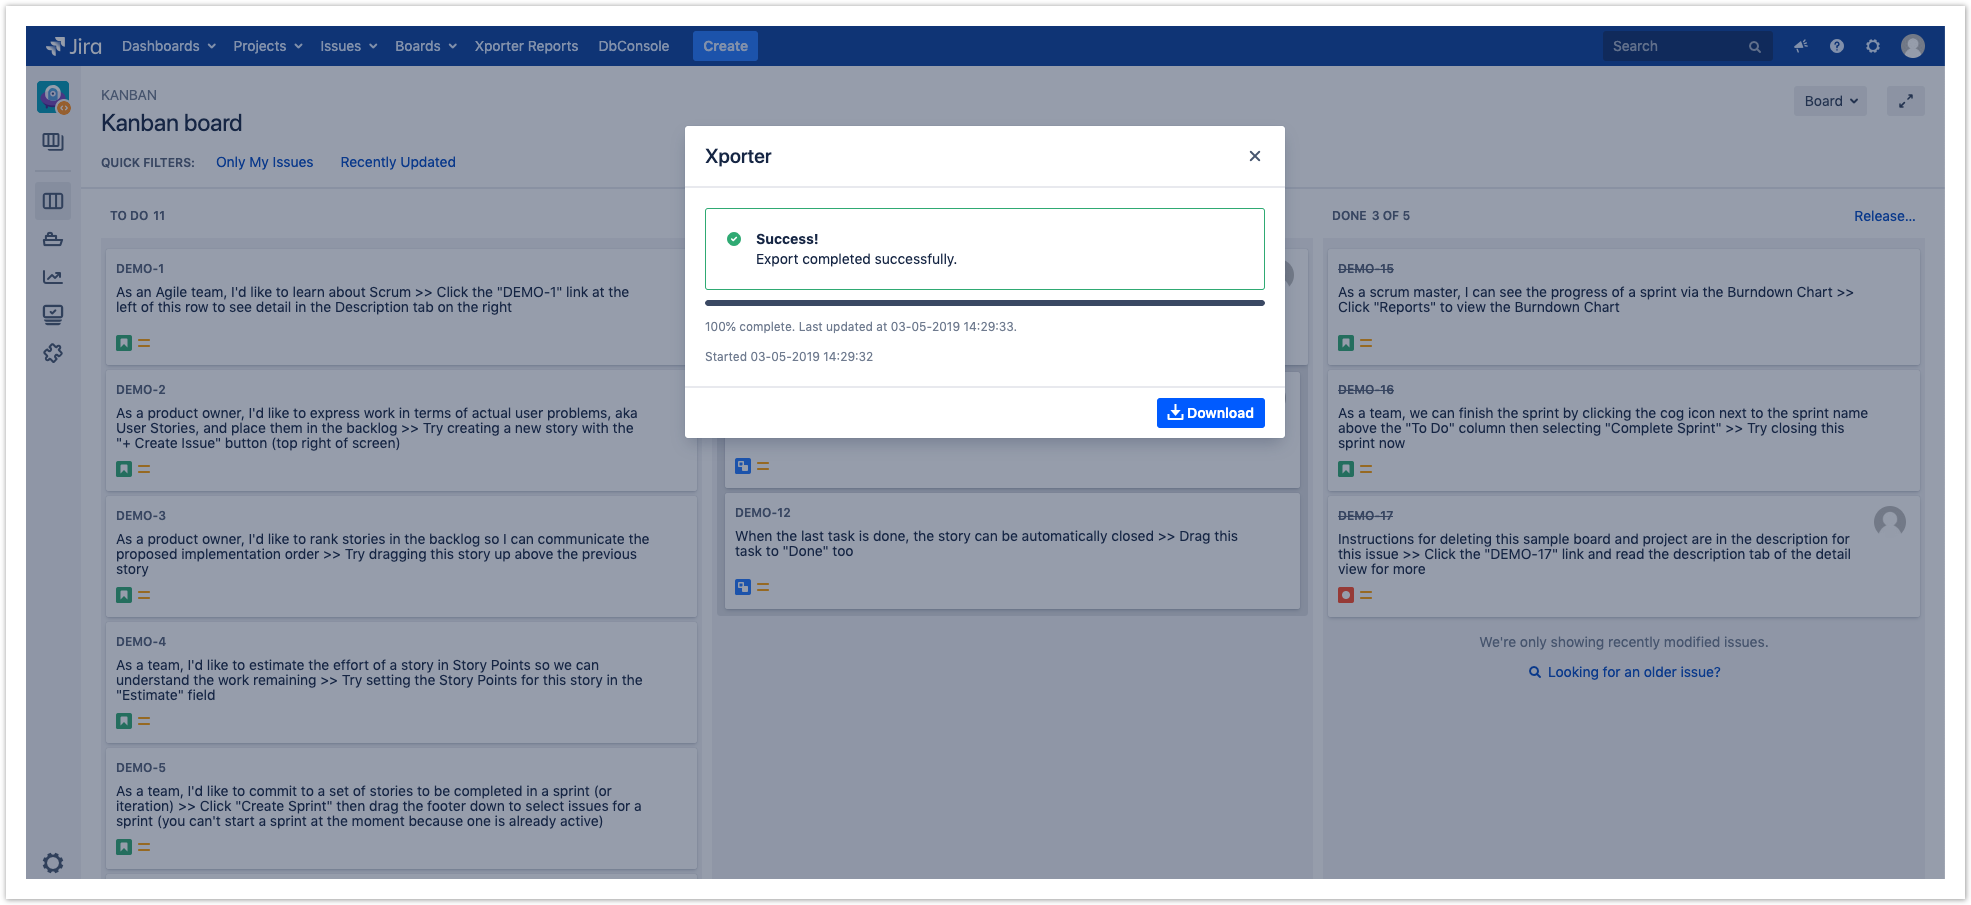
Step 3 - Wait for the operation to finish and then click on the link to download your document.
As illustrated above, this is a simple process and it will help you get all the issues from the active sprint in an easy and simple way.
Export from a specific column Scrum/Kanban boards
Xporter gives our users the possibility to export directly from each column who belongs to a Scrum/Kanban board.
First, you need to check if "Enable Xporter for Agile" is enabled on the global settings. After this, you will be able to perform new exports.
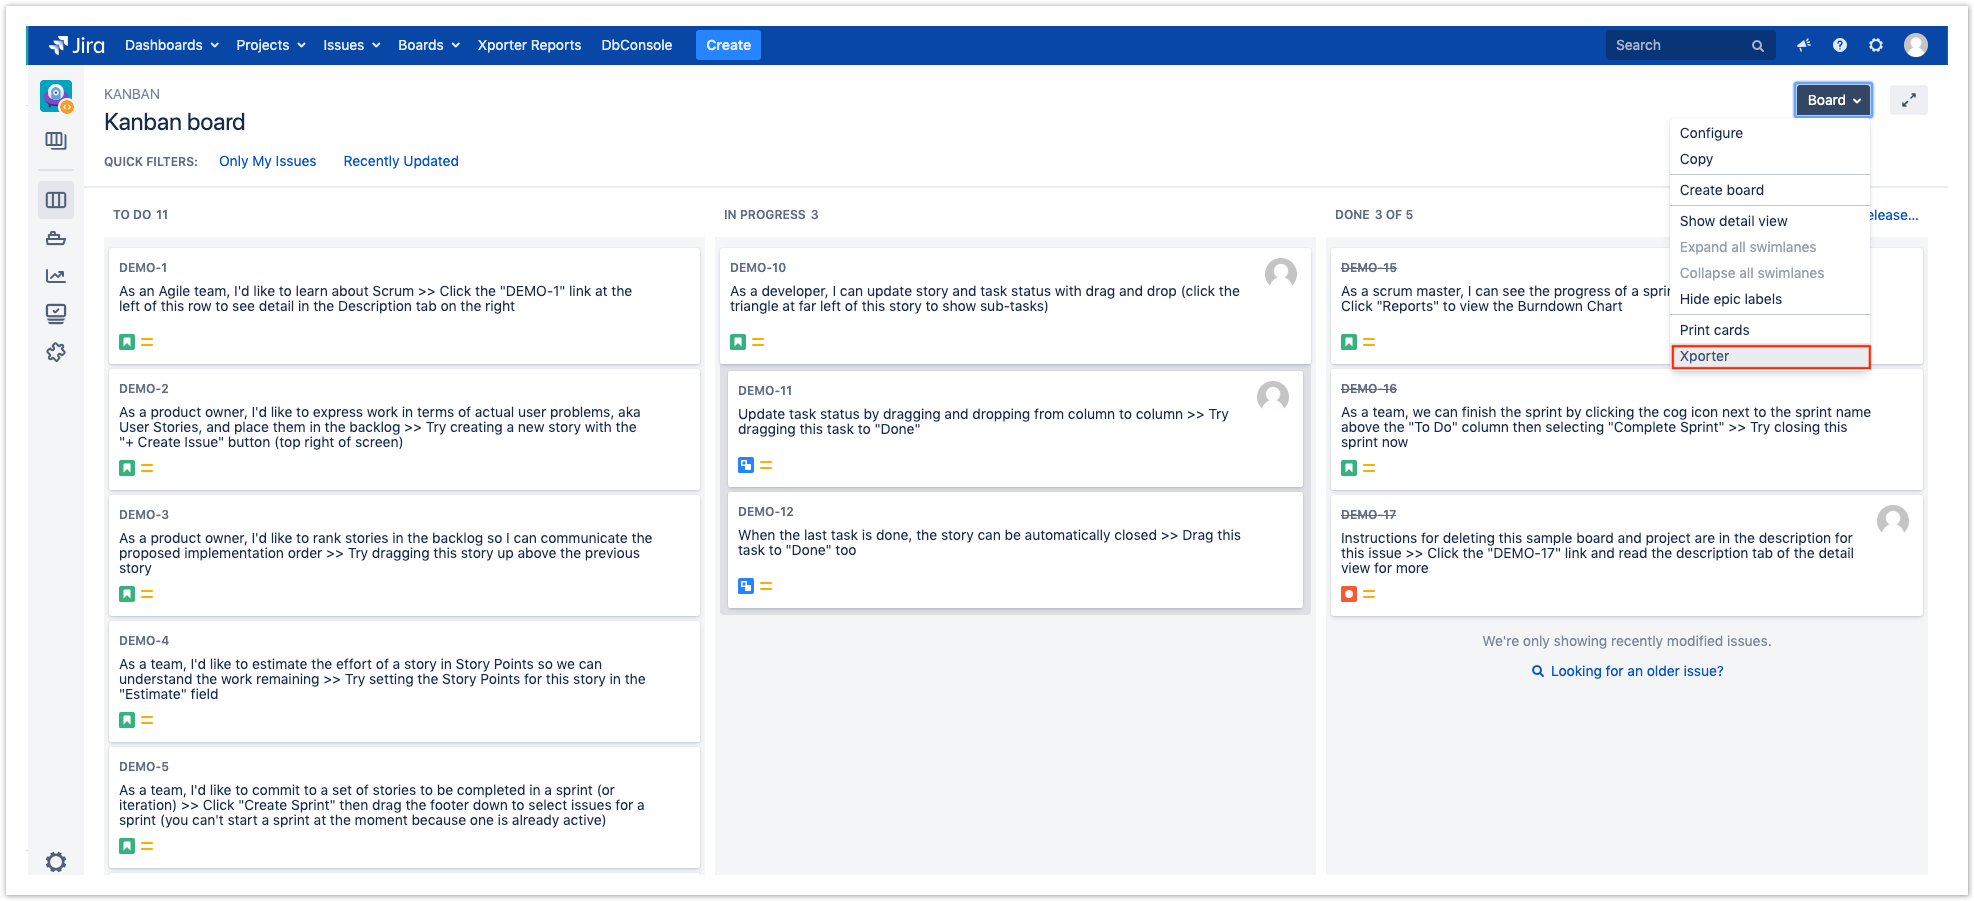
After this, click on the Xporter icon of the column you want to export and select the template and the respective output format.
Finally, you need to export and the report generated will be ready to be downloaded.
Export from Backlog
Xporter allows our users to export all the issues that belong to the Backlog and also those who belong to a certain sprint.
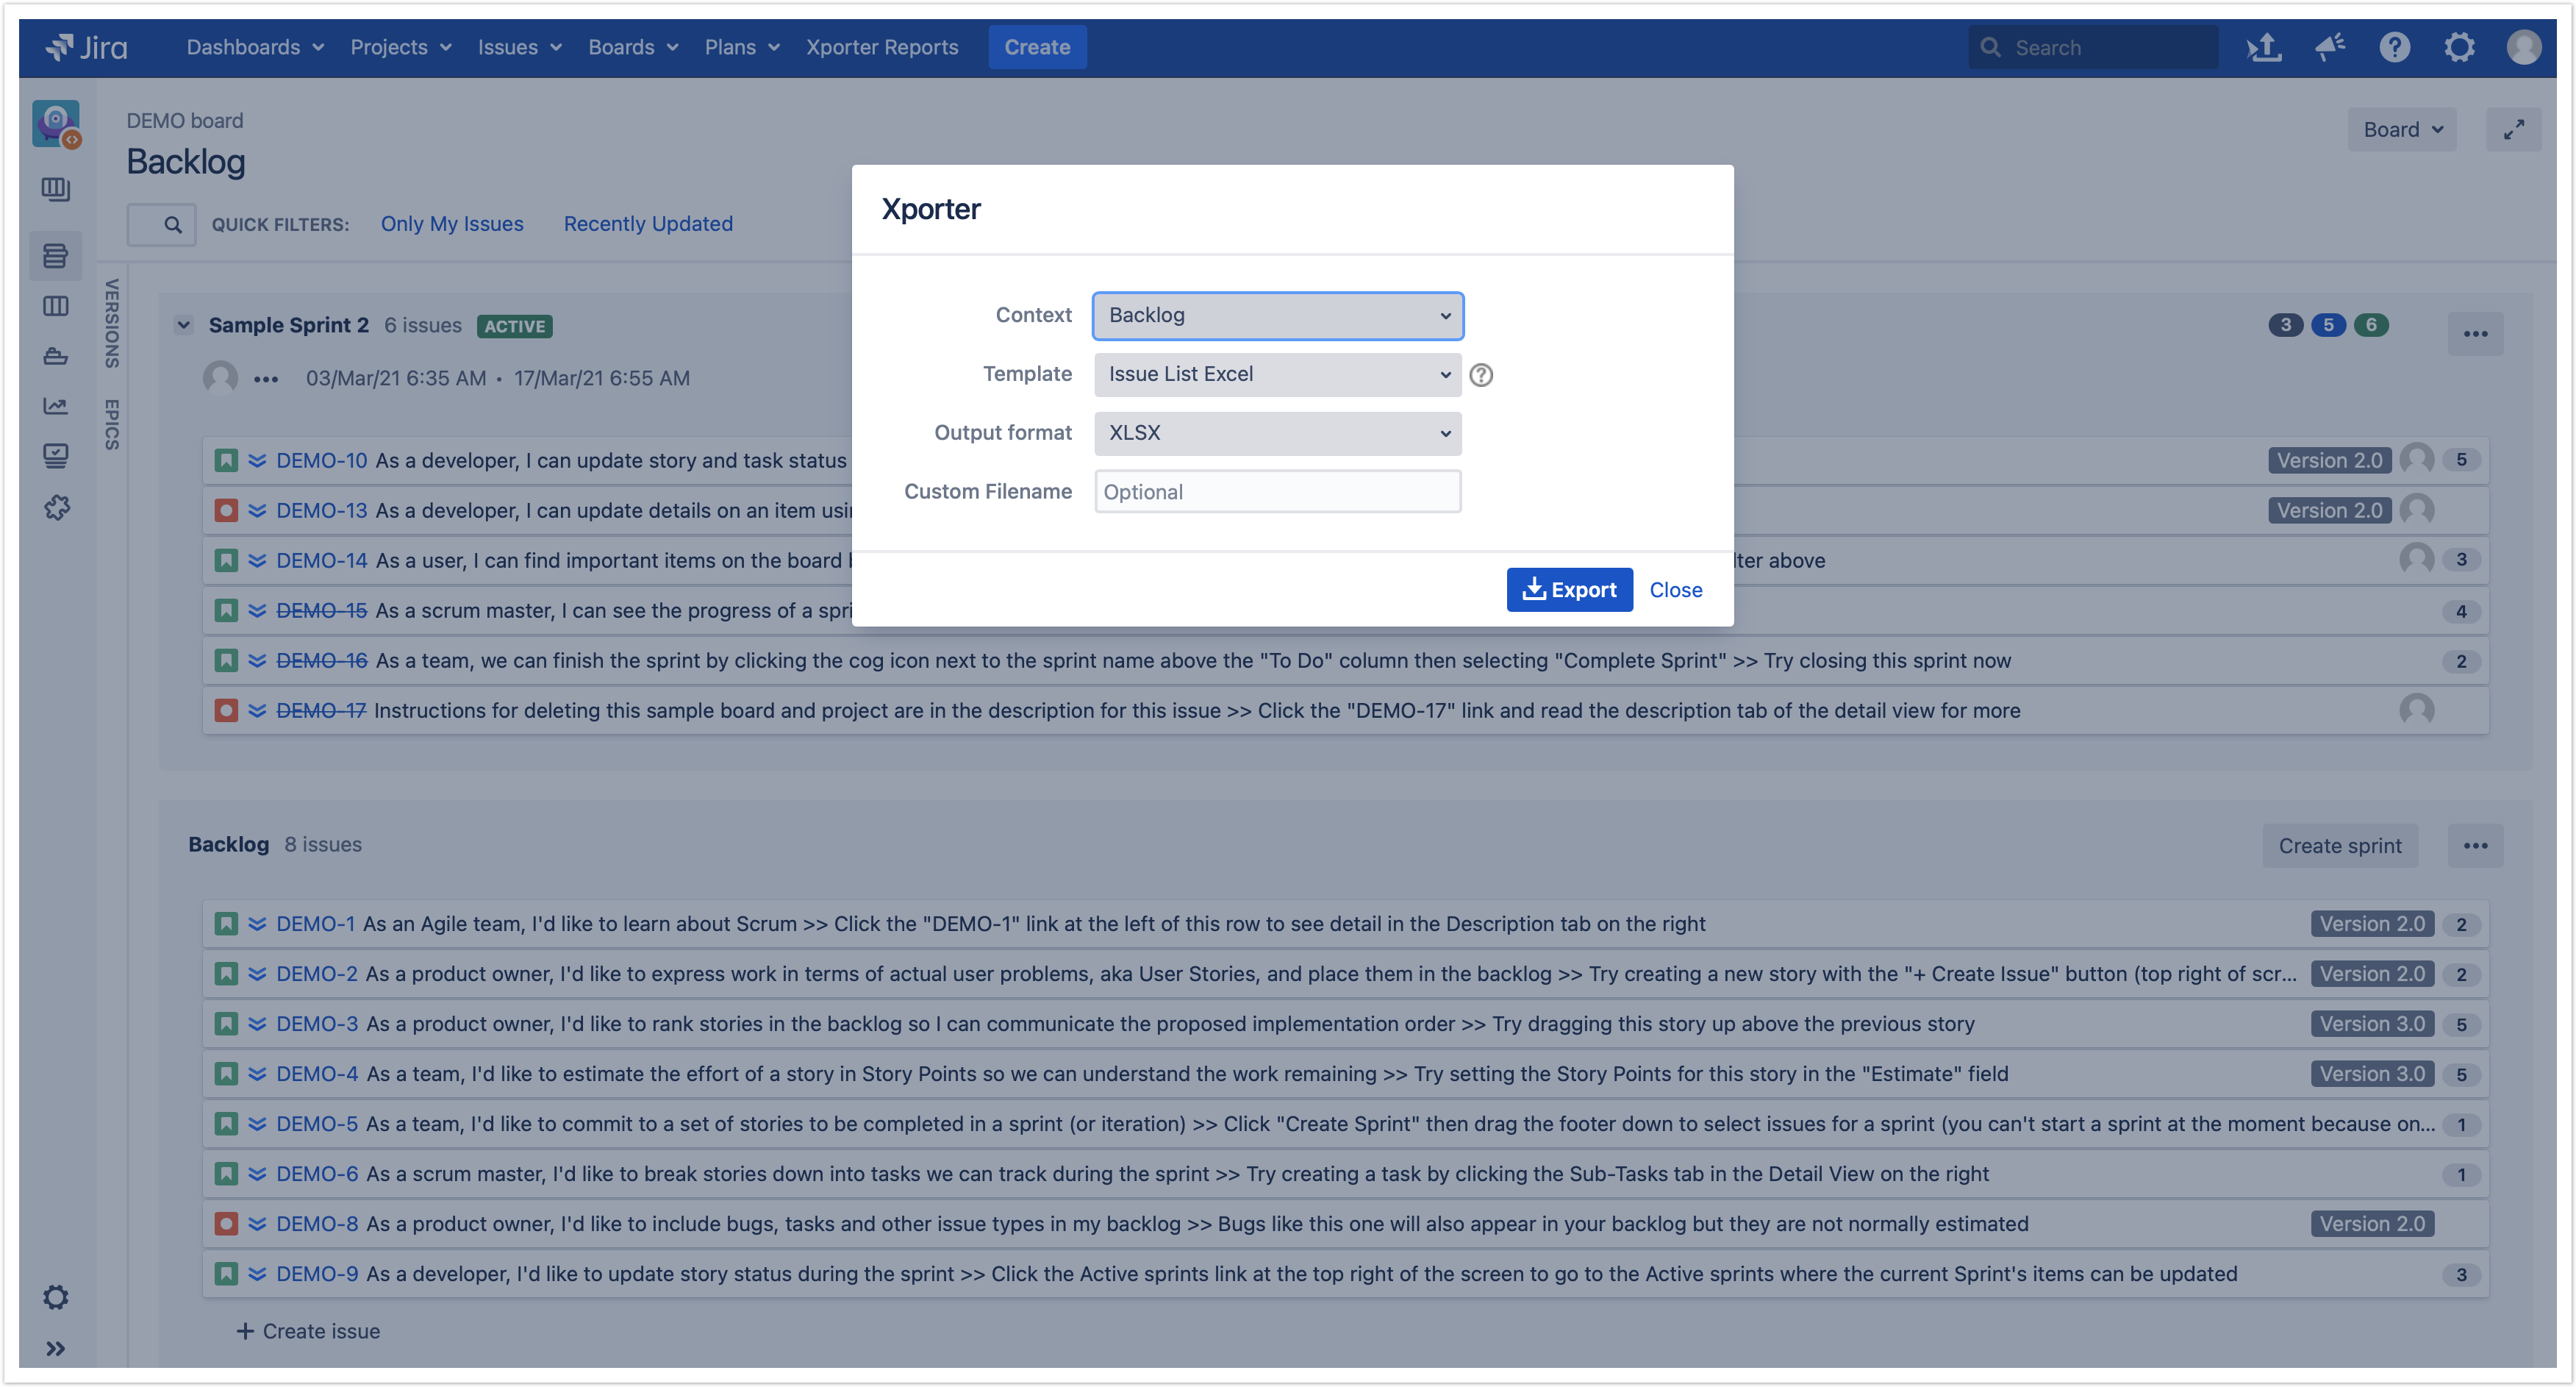
Step 1 - From the Backlog Board, choose which sprint or backlog you want to export and then click on the Xporter button.

Step 2 - After clicking on the Xporter button, you will have a pop-up that will have a list of all the templates available to use in this context, the export type format and the option that allows you to break a page when changing Issues, Projects, Issue Types or Components. There is also an optional field to customize the file name of the report that will be generated. Then, click Export.
Step 3 - Wait for the operation to finish and then click on the link to download your document.
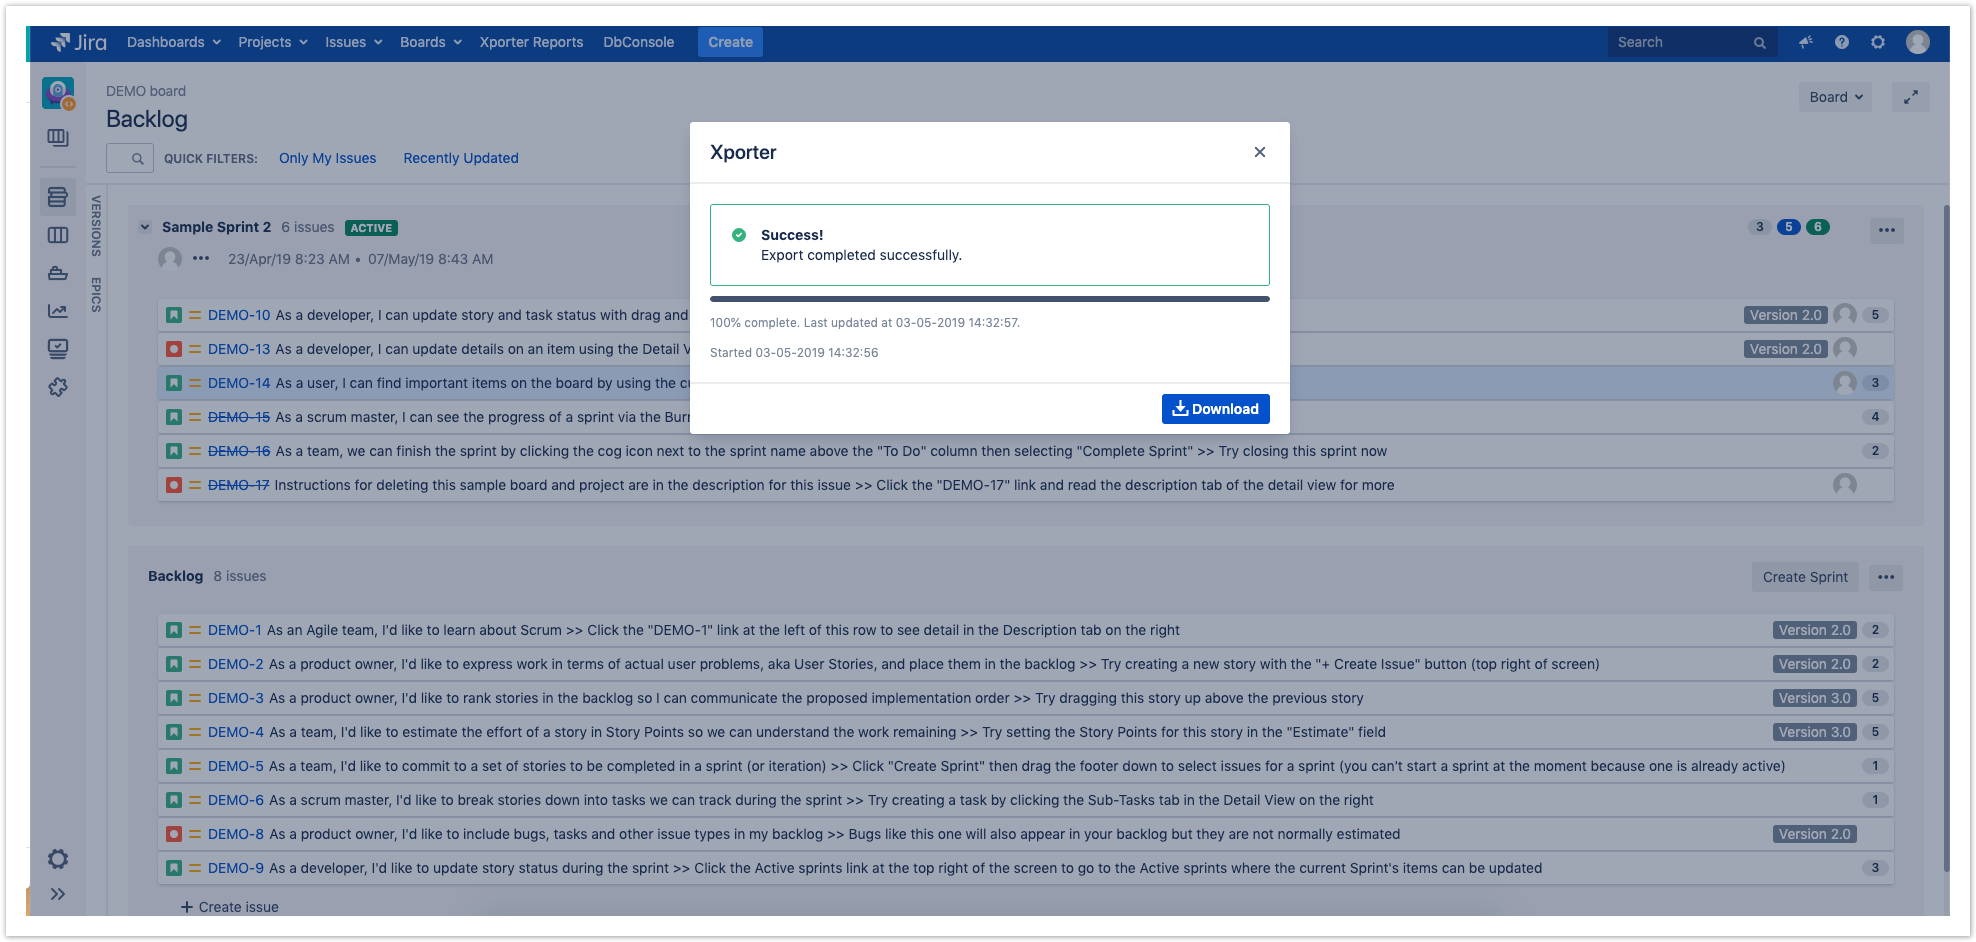
As illustrated above, this is a simple process that will help you get all the issues from the backlog board in an easy and simple way.
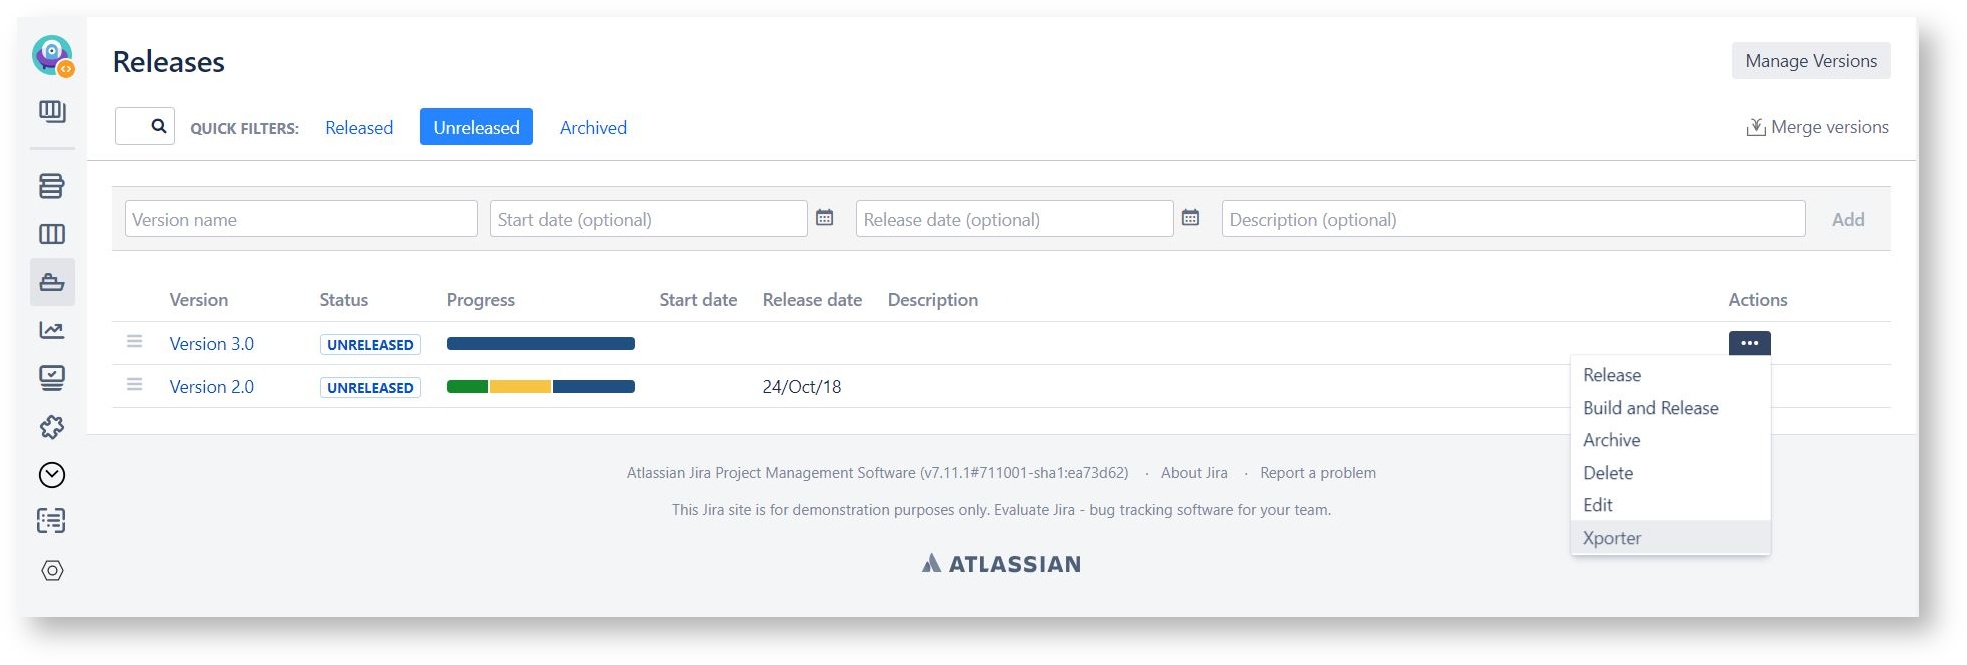
Export from the Releases page
Xporter gives the option to export all the issues by release version.
You will have a simple method to get all the issues by version printed on a report customized to your needs.
Step 1 - From the Release tab, you will have a new table entry for each release version. Furthermore, for each release version, you have the Actions tab. Just need to click on this option and then select the Xporter option.
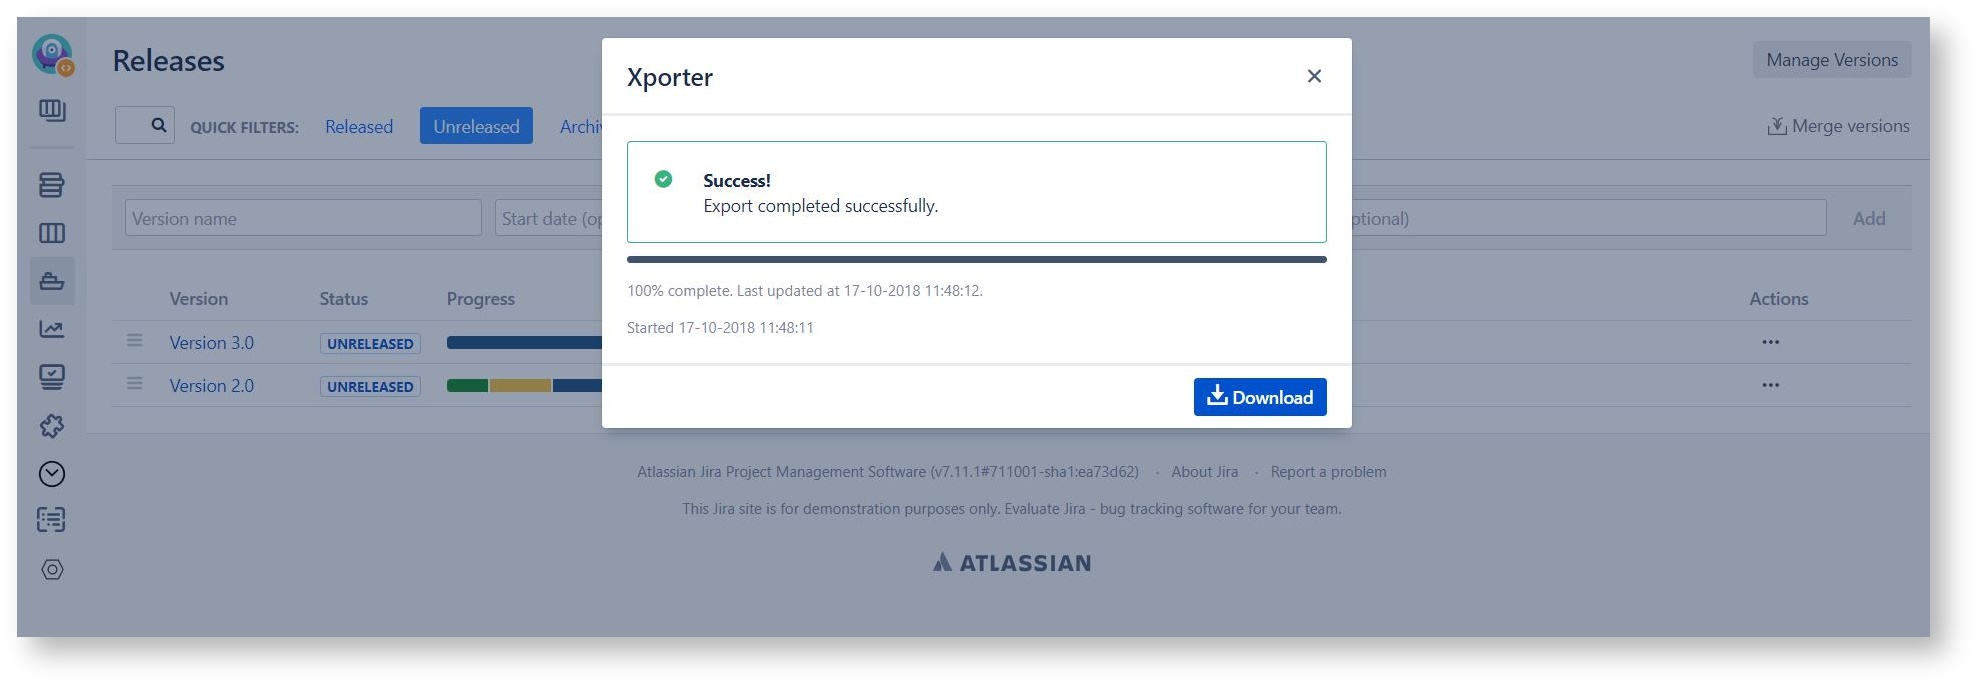
Step 2 - After clicking on the Xporter option, you will have a pop-up that will have a list of all the templates available to use in this context, the export type format and the option that allows you to break a page when changing Issues, Projects, Issue Types or Components. You can also define the custom file name to the report that will be generated. Then, click Export.

Step 3 - Wait for the operation to finish and then click on the link to download your document.
And that's it, with this new feature, in three simple steps, you will have a new report that has all the issues organized by release version.