The main goal of this first exercise is to give you an idea of how Xporter for Jira for works.
As explained here, it is based on mappings with the following notation:
${<Issue Field>}
This notation works with both native and custom fields. You just need to define the field name.
During the document processing, Xporter for Jira loads all necessary data from the Jira Issue and writes that data into the document. The result will be your template filled with the Issue(s) data.
In this exercise, we'll learn how to get the Issue's data printed on a document. The first step is to create a new Word document and then, you'll be ready to start defining which fields will be printed.
In this case, we'll use fields listed on the table below:
| Fields | Description |
|---|---|
| ProjectName | The issue project name |
| ProjectKey | The issue project key |
| Key | The internal issue Key |
| Summary | The issue Summary |
| IssueType | The issue type |
| Priority | The issue priority |
| Status | The issue status |
| Description | The issue description |
| AssigneeUserName | The issue assignee Jira user |
| ReporterUserDisplayName | The issue Reporter Jira display name |
| Created | The issue creation date and time |
| Updated | The date and time when the issue was updated |
Make sure that all fields that you are going to print are populated on the issue; otherwise, the field will be printed as blank.
These fields are a small subset of all fields available. You can see them all here.
The fields with the notation are listed below:
Now, the field dates are printed with a standard ISO, but you can format them.
You only need to use the dateformat function, which you can learn more about here.
Xporter for Jira allows you to customize the document layout. You can use Headings, Tables, Images, Text styling, Table of Contents and much more.
Below is a sample of how the mappings will be displayed in a Word template:
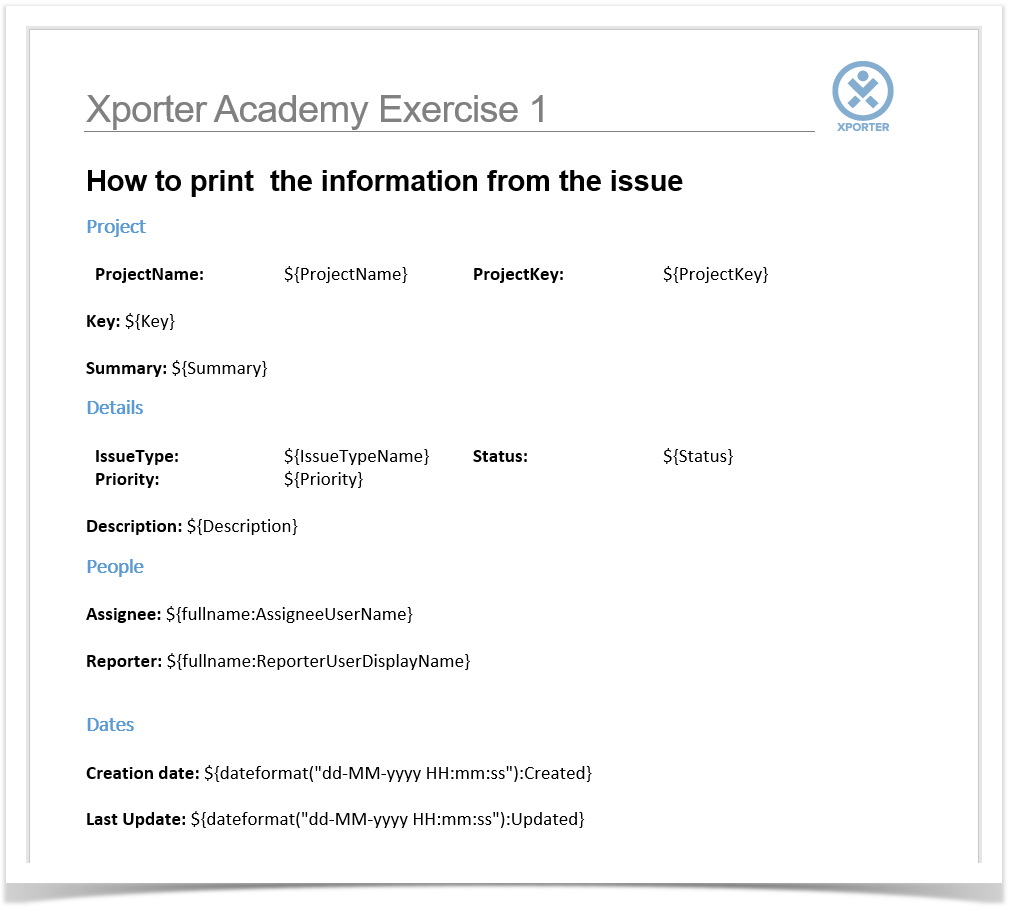
This template has:
- a Header with an image
- Headings
- Text styling
When your template is finished, upload it to your Jira instance using the Manage Templates menu option from the Xporter for Jira administration section. You must define where your template will be available (I.e., select the scopes).
The Xporter for Jira App administration section can be accessed through Jira Administration and is located on the left sidebar.
Finally, navigate to the issue you want to export. Select your template and output format, and click Export.
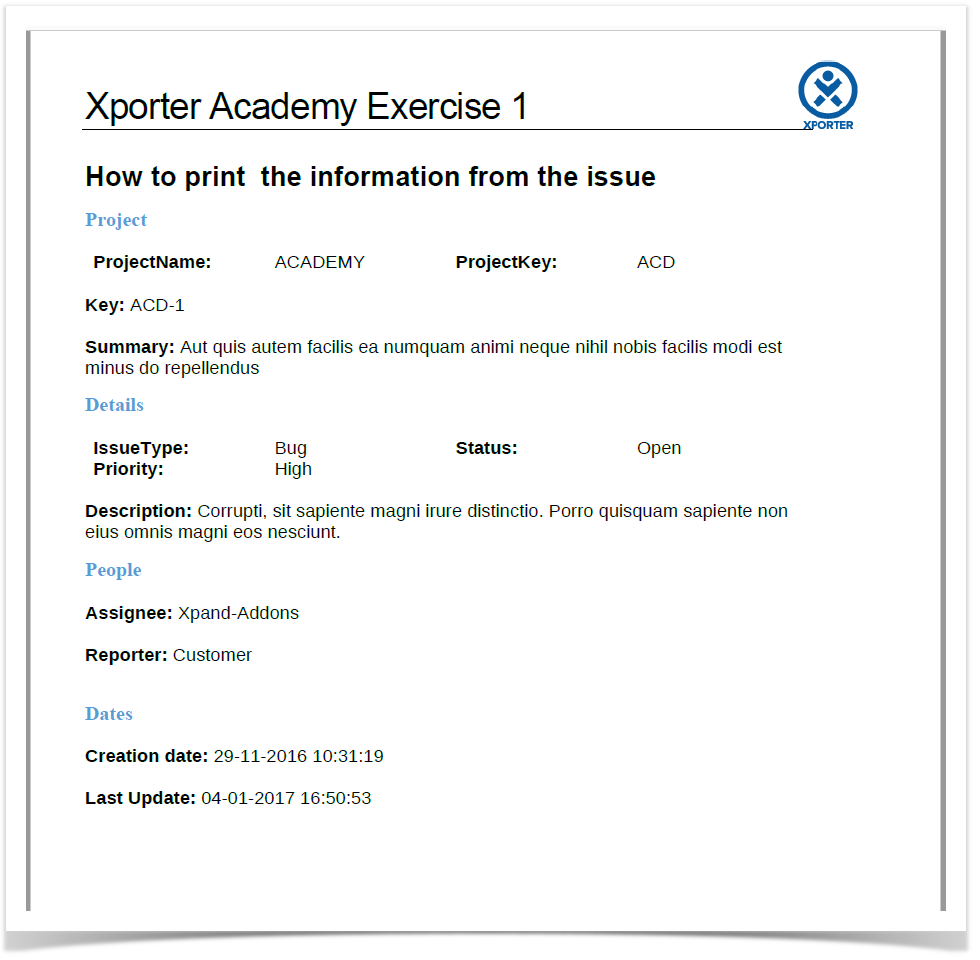
Below is a sample of how the generated file will be populated with the Issue data:
If you like this exercise, please leave a comment or a ![]() . Your feedback is very important to us.
. Your feedback is very important to us.
Thank you in advance.
Enjoy our product. ![]()