Introduction
This is the second exercise of the Basic Level. The main goal of this exercise is to give you an idea of the tasks that you can perform when managing templates.
Beyond installing templates from the Template Store as demonstrated on the previous exercise, you can also create your own templates and upload them to your Jira instance.
Supported template formats
Currently, Xporter for Jira supports templates with the .docx, .docm, .dotx, .dotm, .odt , .rtf, .xlsx and .xlsm extensions.
Navigate to Templates on the Xporter for Jira administration section add-ons page of the Jira Administration and you'll see both templates you've installed in the previous exercise.
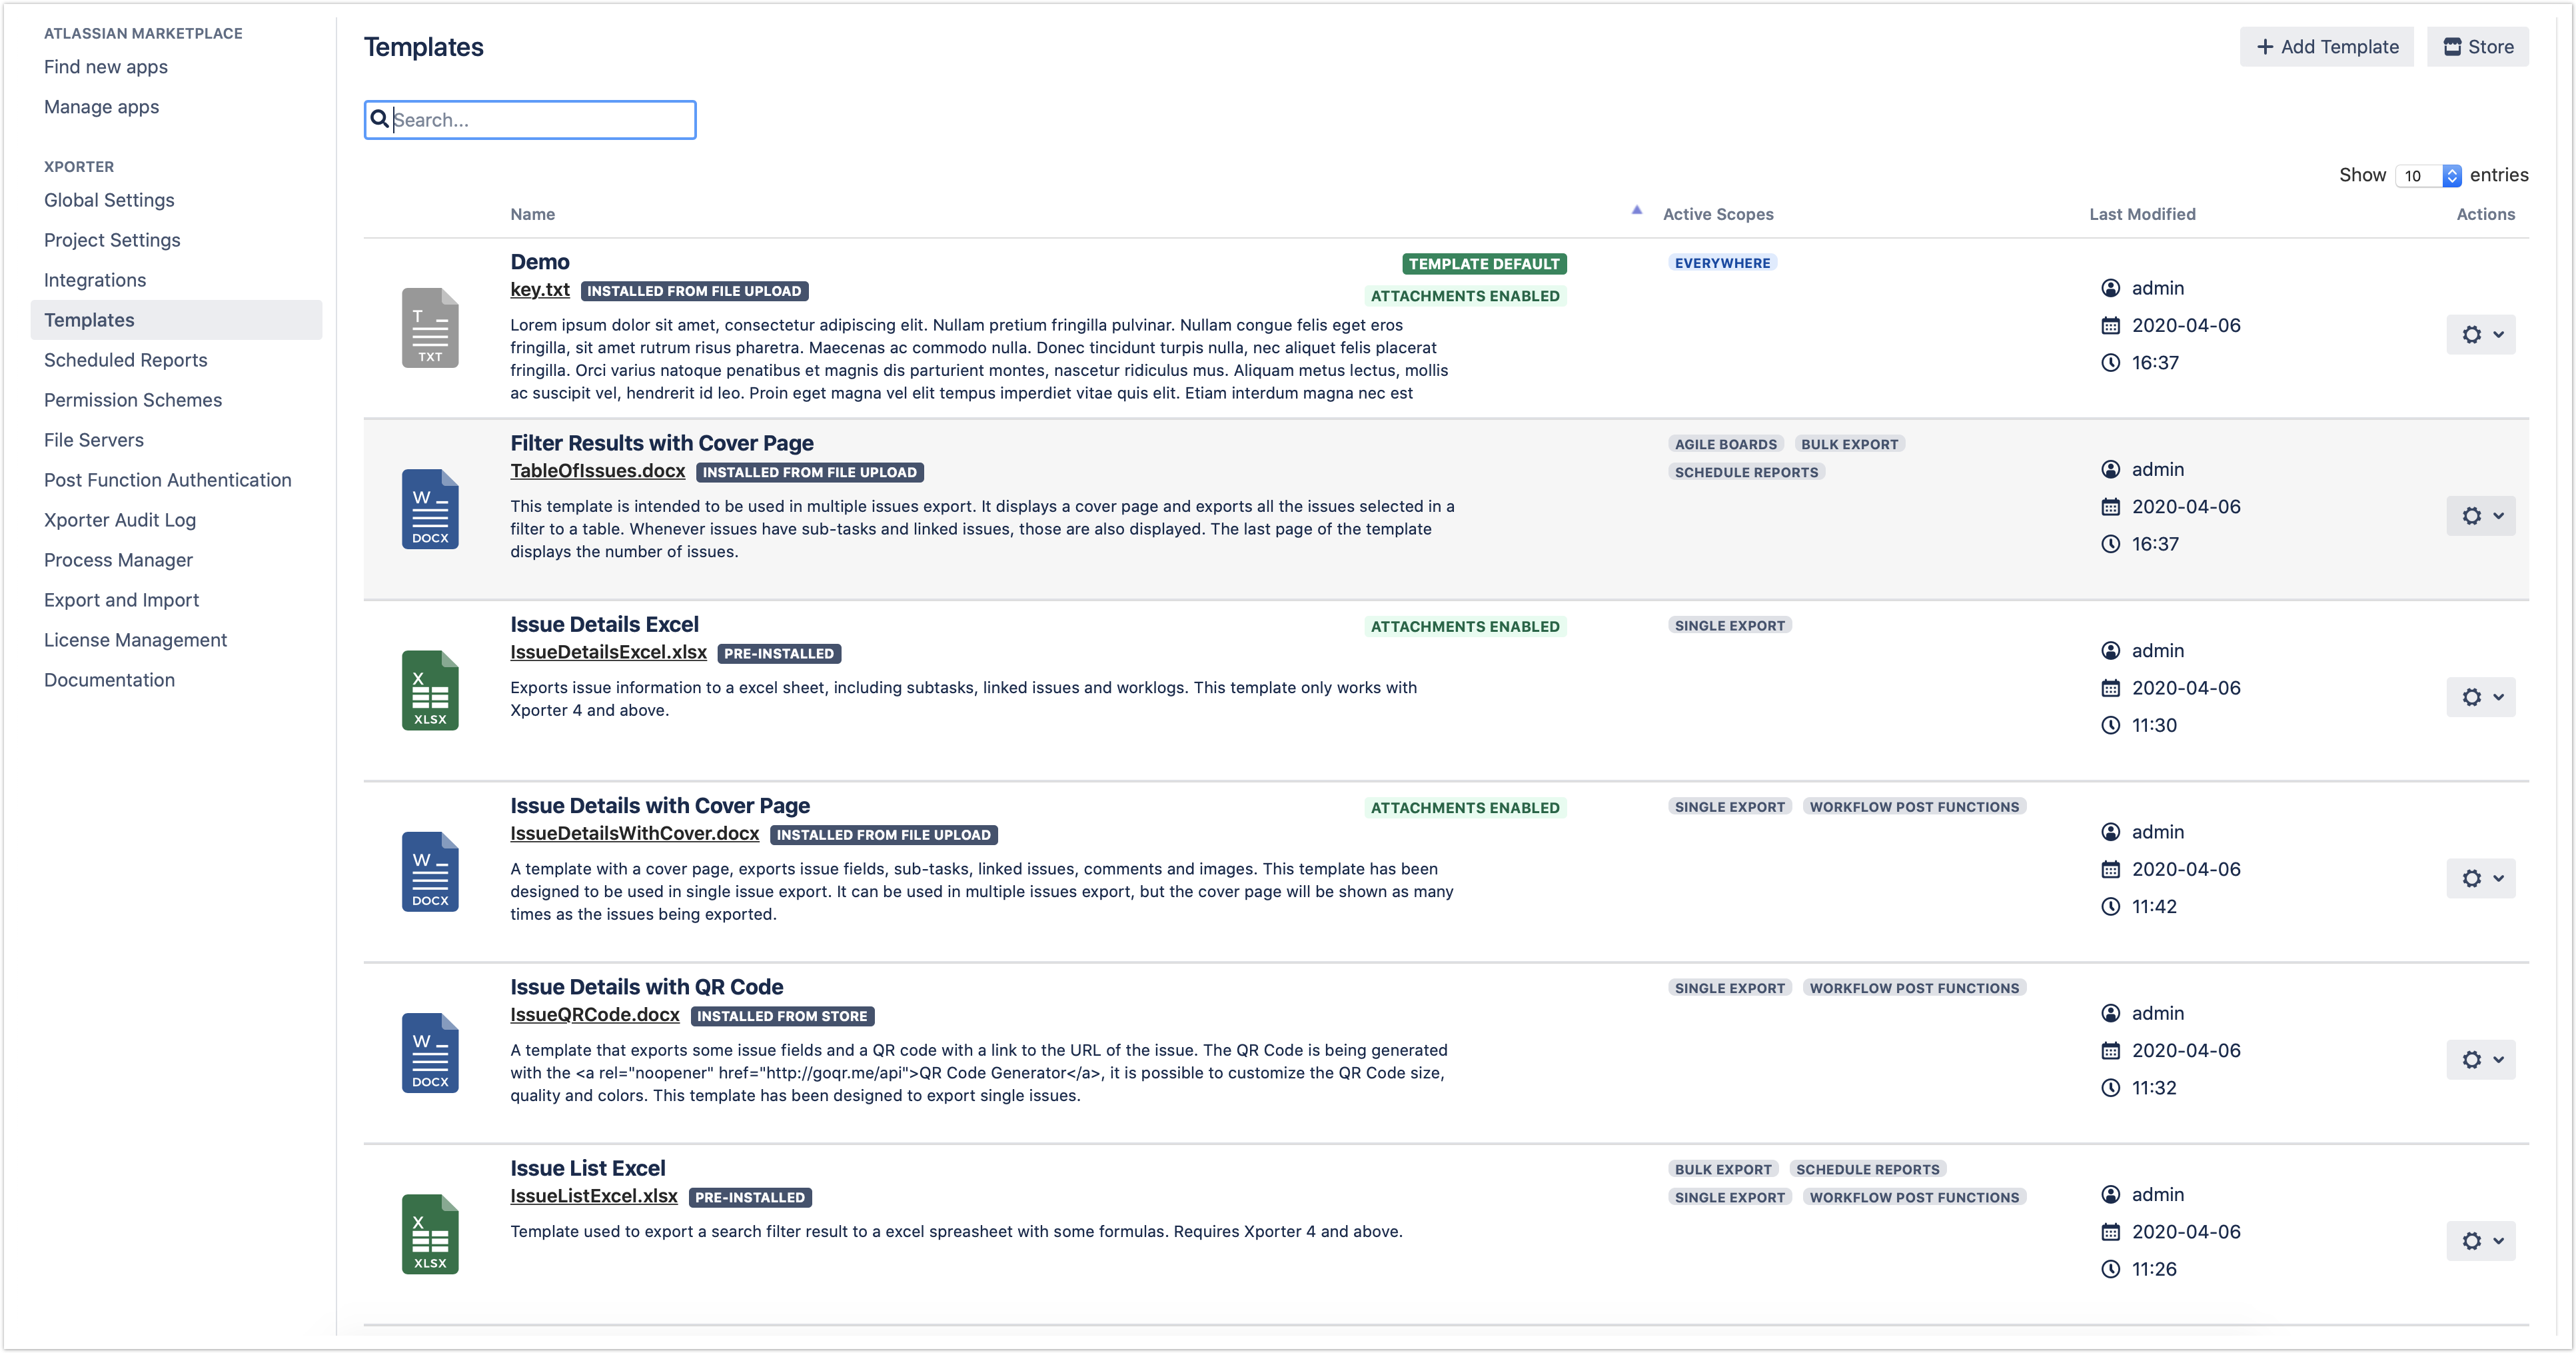
You have available the options to:
- + Add New Template, where you can add a new template;
- Edit, where you can change an existing template's name, description, and file;
- Delete where you can delete an existing template;
- Set as Default, where you can set that template as the default one to appear on the Xporter screens.
- Remove as Default: Allows you to remove a template as the default.
- Download Template: Allows you to download the template file. This operation is available in the hyperlink with the template file name.
If no Template is set as default, the one displayed on the Xporter screens will be the first listed in alphabetical order.
If you click the hyperlink text with template file name next, you'll automatically download the template file.
You'll notice that both templates have the tag Installed from store next to them since they were installed from the Template Store. User-installed templates will have the Installed from file upload tag instead.
The Exercise(s)
1) Adding a New Template
In order to add a new template, you must first learn how to create your first template. To do so, follow Exercise 1 - How to get Issue data printed on document.
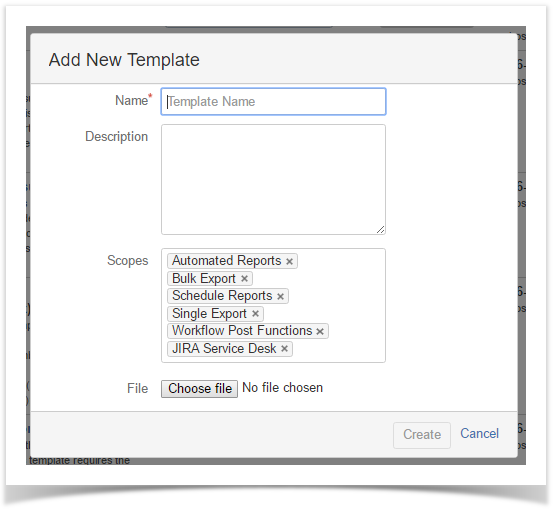
Once your template is created, on Templates, click the + Add New Template button, a pop-over dialog will be displayed. On the File entry, navigate to your template file and select Open. When the message File ready to be uploaded is displayed at the bottom of the pop-over, click the Create button. An alert message will be displayed under the Name field informing you it is required.
The Scopes area will be filled with all the available contexts. Remove and add all of them again simply by selecting from the dropdown.
Name your template as you wish. Click the Create button again, and you're done.
Note that its entry will have the Installed from file upload tag as well as Everywhere under the Active Scopes column.
If either the template name or file name is the same as an already installed template, an Error! message will be displayed when clicking the Create button.
If you try to add a template file with an unsupported extension, an Error! message will be displayed informing you of the supported extensions.
2) Editing a Template
On your newly created template entry, click the Edit button on the Operations column, and a pop-over dialog will be displayed.
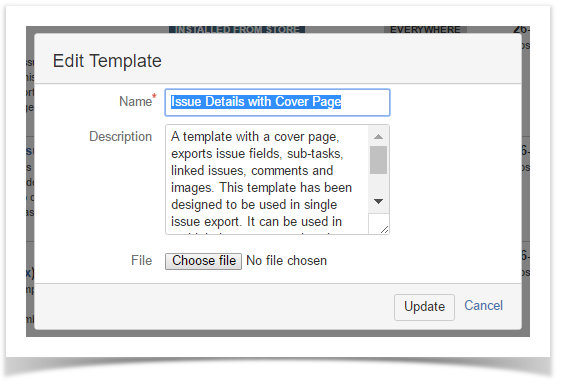
Input a Description to your template and click Update. Now, your template entry will have its description exhibited as well.
You can change the Name, Description, and File of your template when editing it. This applies to both templates Installed from the store or Installed from a file upload.
3) Deleting a Template
On one of the template entries with the tag Installed from store next to them, click the Delete button on the Operations column. A prompt dialog will be displayed asking if you're sure you want to delete the template. Click Confirm, and that template entry will be removed.
4) Assigning a Template Scope
On the entry of your created template, click the Scopes button on the Operations column. A pop-over dialog will be displayed.
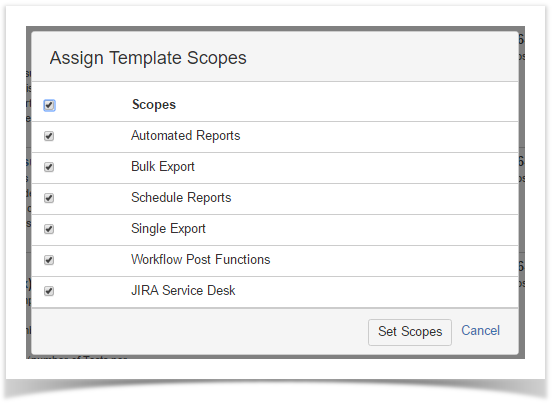
On it, unselect all the options except Single Export, click Set Scopes. The Single Export tag will now be displayed under the Active Scopes.
If you now try to export a single issue, your template will be available in the template selected; however, when you are doing a bulk export, it won't be available at all.
5) Setting a Template as Default
On the entry of your created template, click Set as Default on the Operations column, and the Default label will be displayed next to that template entry. Also, if you now try to export a single issue or a bulk of issues, your template will appear selected automatically on the template selector.
Permission Schemes detail
If you have a Permission Scheme active, and your default template isn't included in it, then it won't be displayed on the template selector at all. The one displayed on the Xporter screens will be the first available template of that Permission Scheme listed in alphabetical order.
6) Downloading one of your templates
If you want to edit the template file of one of your templates, click the hyperlink with the template file name next to the Template entry and you'll download the template file.
This Exercise is now complete. Proceed to Exercise 3 to learn how to use the Template Store.
If you like this exercise, please leave a comment or a ![]() . Your feedback is very important to us.
. Your feedback is very important to us.
Thank you in advance.
Enjoy our product. ![]()