In this exercise, you'll learn how to set which Profile details from User Picker fields will be printed using Xporter.
To start, we are going to create two Jira custom fields to print user details:
- Create a User Picker (multiple users) custom field, and name the first one as MultiUserPicker.
- Create a User Picker (single user) custom field, and name it as Picker.
On the issue, assign a user to each Custom User Picker field to populate it.
For more details about formatting User Picker fields, refer to this documentation..
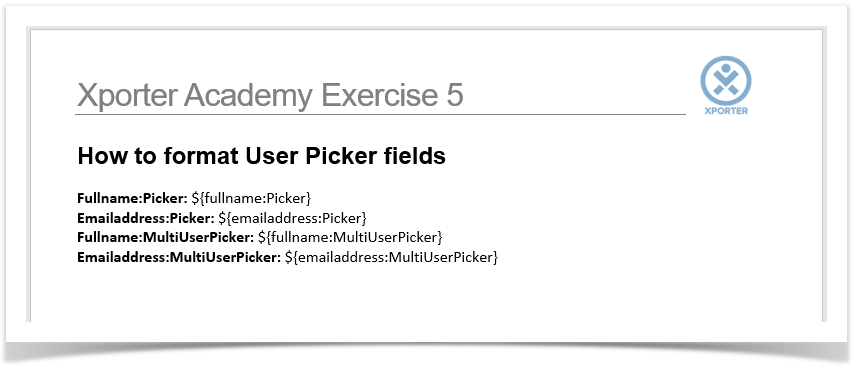
Whether you are exporting a Single User Picker or a Multiple User Picker custom fields, you can output the Full Name using the fullname function:
${fullname:<Field name>}
|
You can also output the email using the emailaddress function:
${emailaddress:<Field name>} |
If you just define the custom field name, like ${Picker} or ${MultiUserPicker}, you will get the username(s) printed.
The custom fields with the notation are listed below.
Below is a sample of how the mappings will be displayed in a Word template:
This Template has:
- a Header with an Image
- Headings
- Text styling
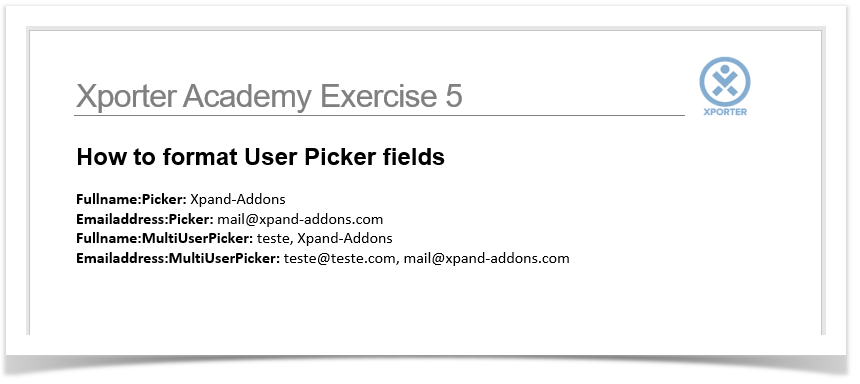
Below is a sample of how the generated file will be populated:
If you like this exercise, please leave a comment or a ![]() . Your feedback is very important to us.
. Your feedback is very important to us.
Thank you in advance.
Enjoy our product. ![]()