Introduction
Xporter for Jira is now available on the Jira Service Desk Customer Portal, which allows you to export a template from it.
Prerequisites:
- Jira Service Desk 3.2.0
- Xporter 5.0.0
For more information about the Jira Service Desk, please refer to the Atlassian documentation here.
Before you can export in the JSD Customer Portal using the Export menu, configure the Xporter app first.
How to perform
1) Configure Global Settings
Please go to the Integration page on the JIRA Administration section, and check the Jira Service Desk section.
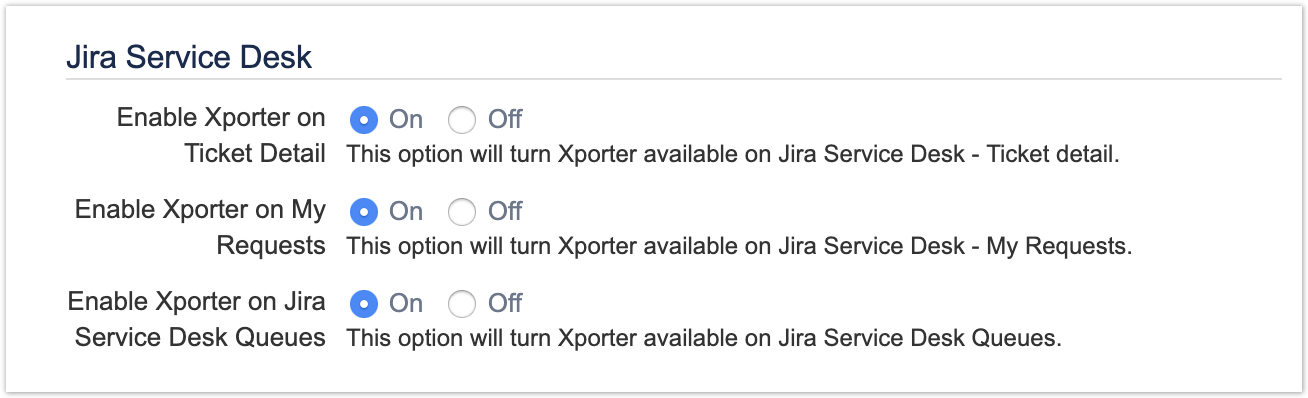
- Enable Xporter on Ticket Detail:
- Enable Xporter on my Requests:
- Enable Xporter on JIRA Service Desk Queues

2) Add template with Jira Service Desk scope

Please be aware that Xporter has two different scopes for JIRA Service Desk:
- JSD Request Detail: Allows you to use the current template on the Service Desk request details.
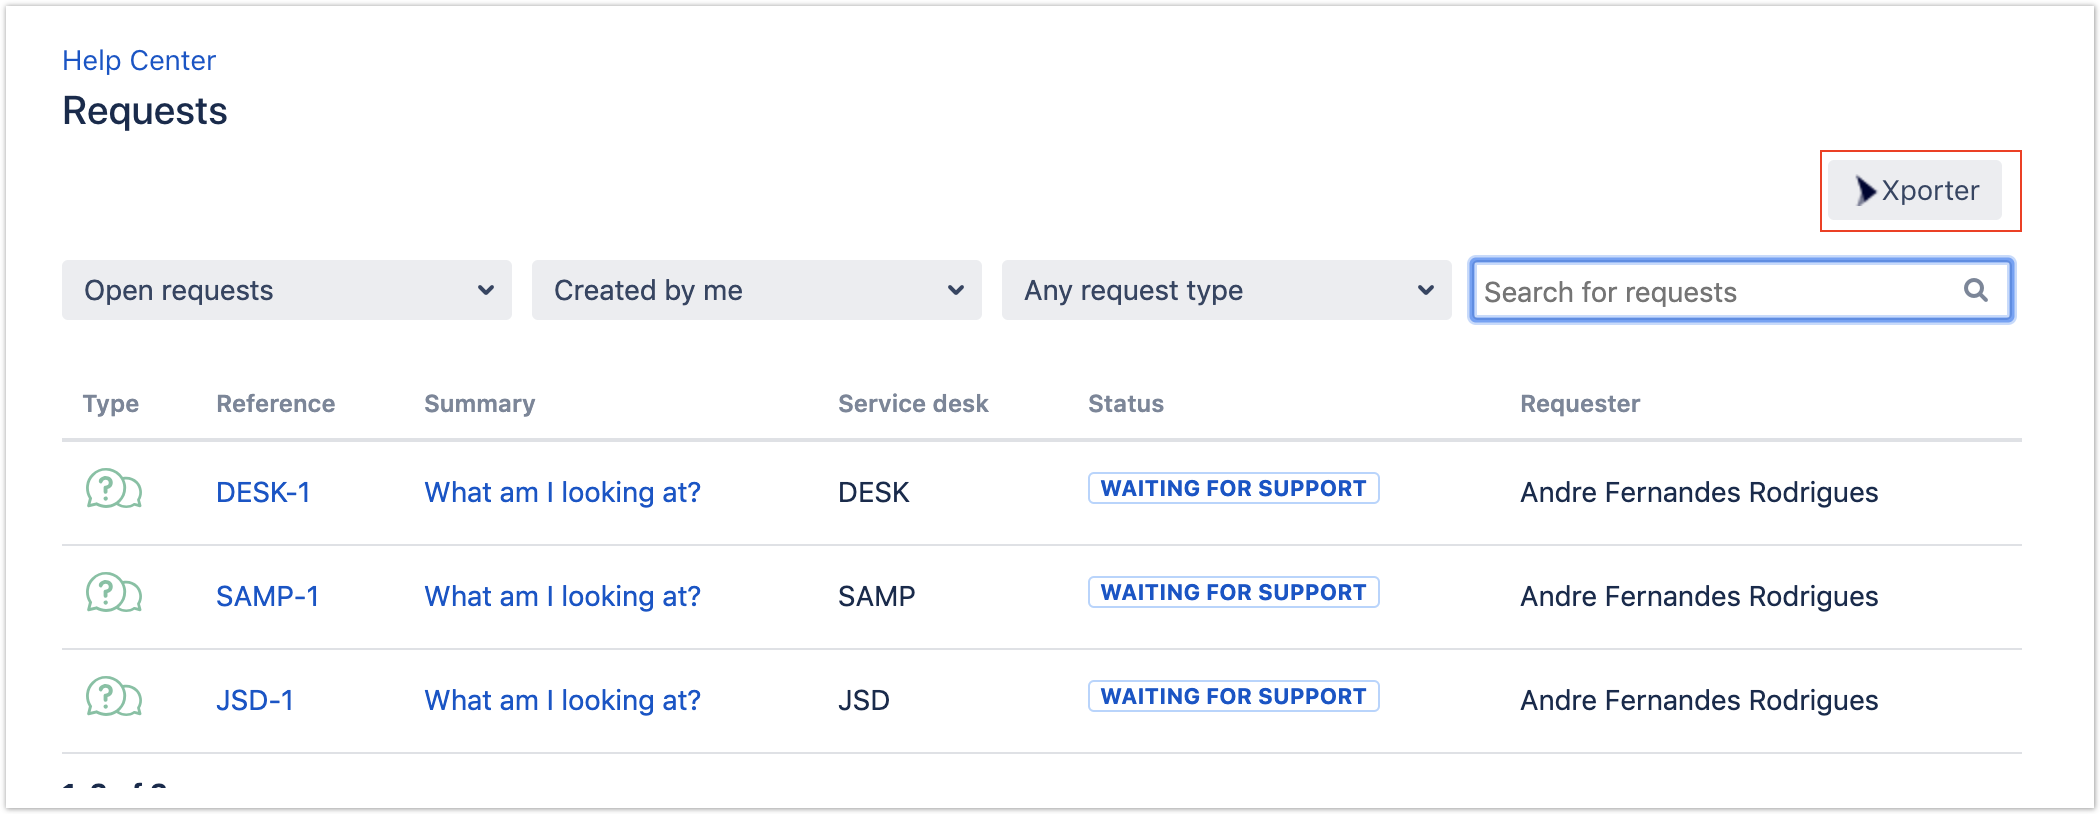
- JSD Request List: Xporter allows you to use the current template on the Service Desk customer portal where all the requests are listed. Furthermore, Xporter also will be available on the approvals list.

3) Permissions
For more information, please check our documentation here.
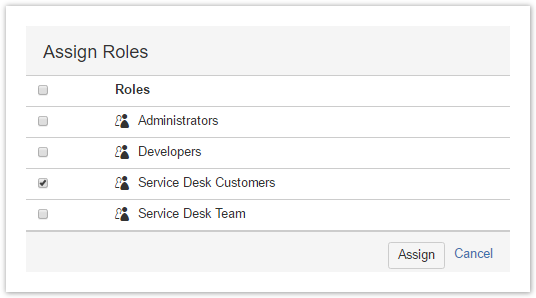
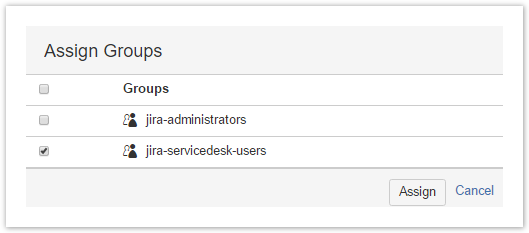
On the Permission Schemes in the Xporter for Jira administration section Apps page of the Jira Administration, click the Permissions link. You should see link Assign.
- Click on Assign Roles and choose Service Desk Customers
- Click on Assign Groups and choose jira-servicedesk-users
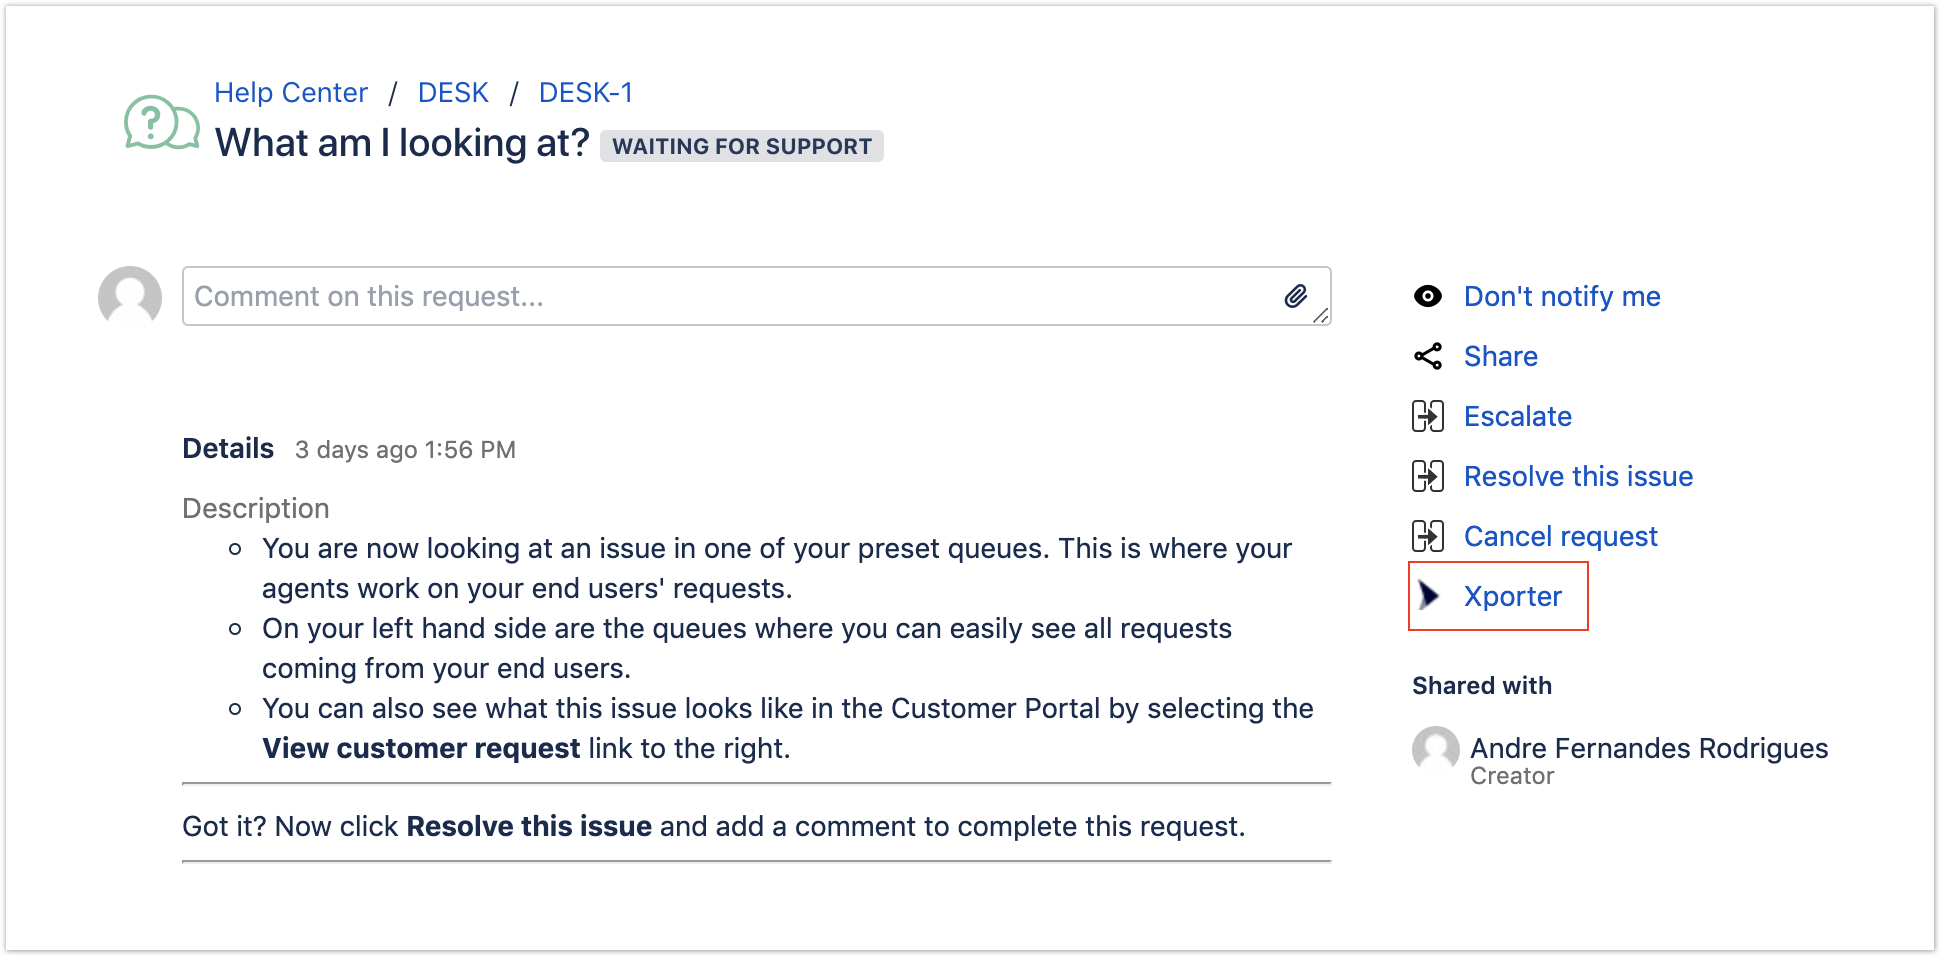
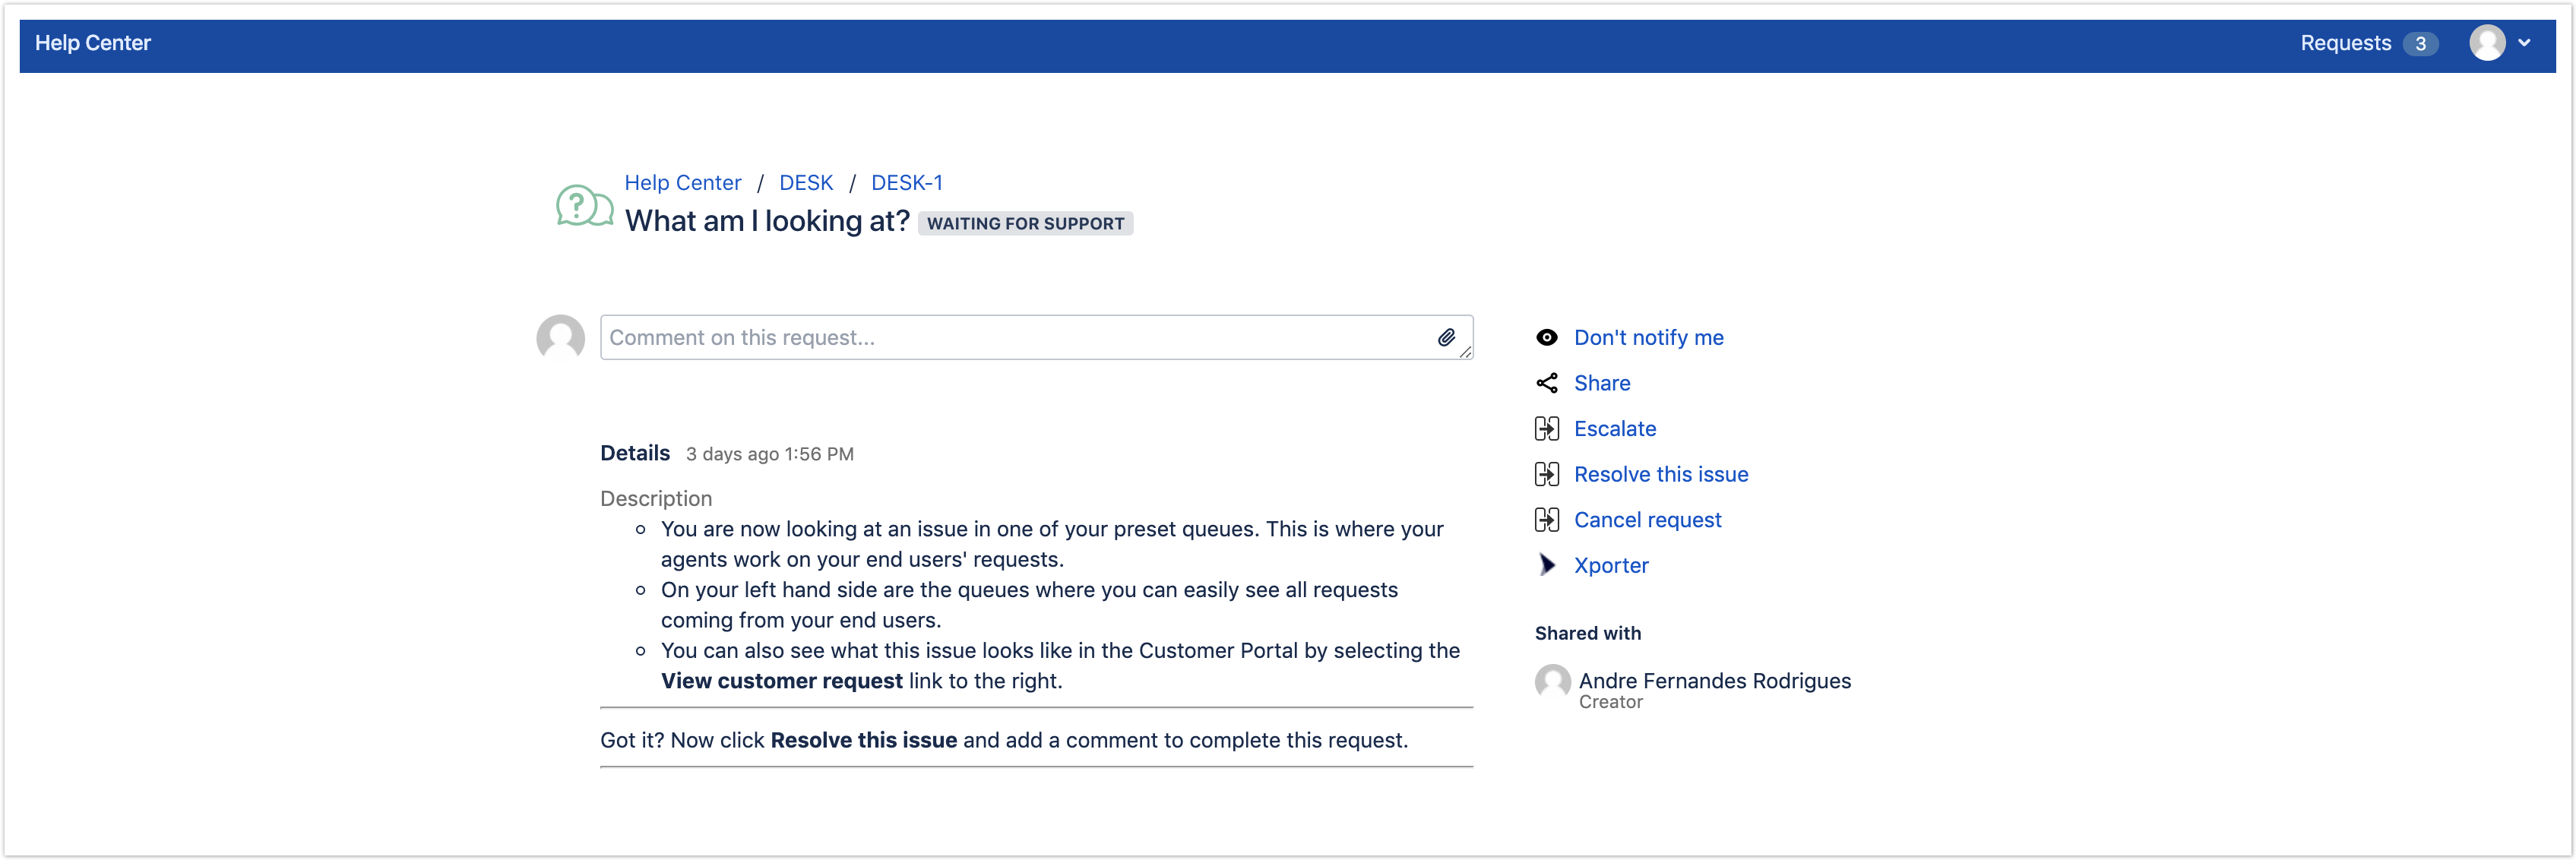
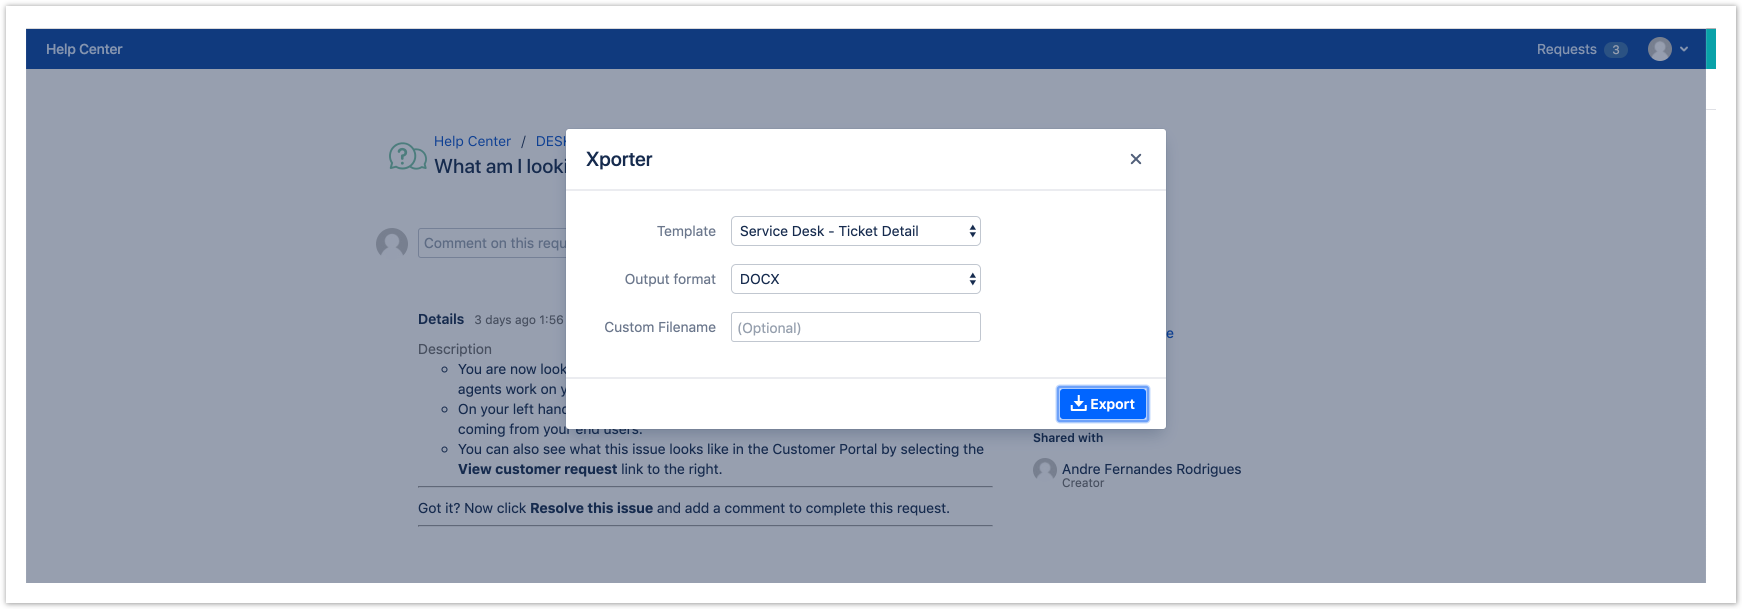
4) Customer Portal
If you have access to the customer portal of a particular issue, you will be able to export the document.
Getting the value of SLA
You can extract the time of SLA data from the JSD.
Definition
Let's imagine that the SLA is the Time to Resolution custom field. The definition will be:
${Time to Resolution} |
In order to export with friendly value, we must use the "Formatted" word.
${Time to Resolution Formatted} |
That´s it. There´s no special configuration to be made in order for this to work. The time is exported in milliseconds.
Example
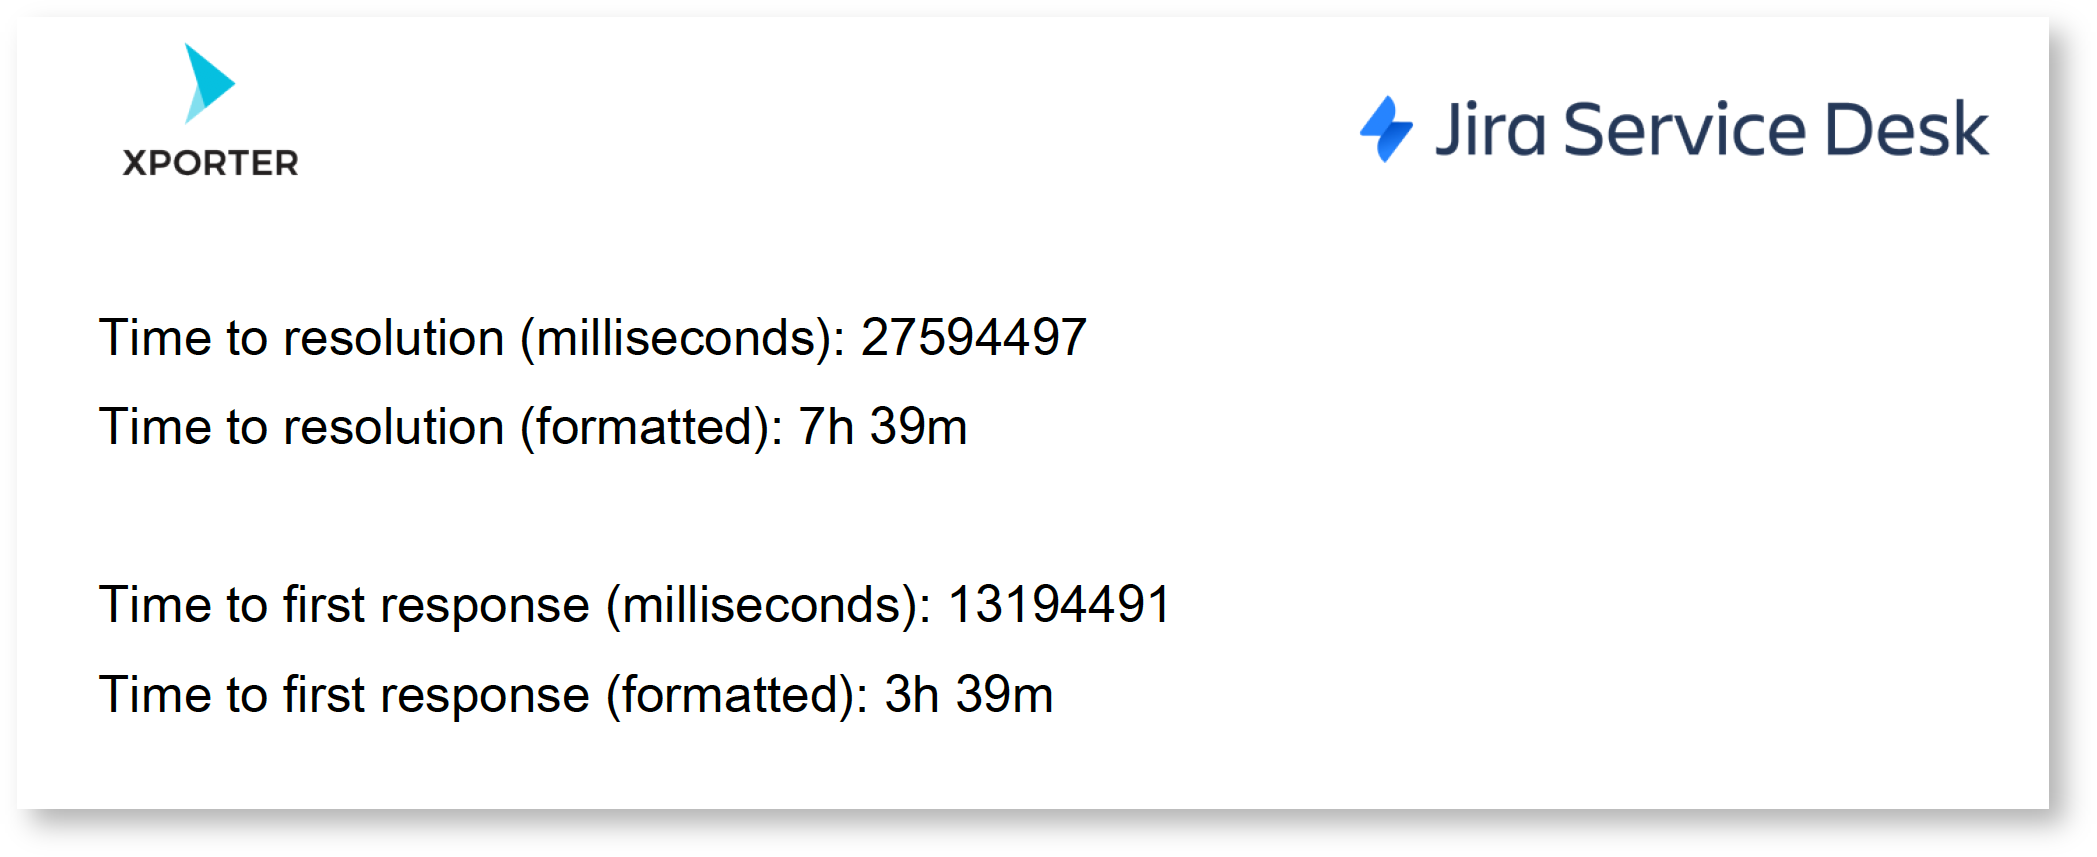
Below we have the Time to first response and Time to resolution.
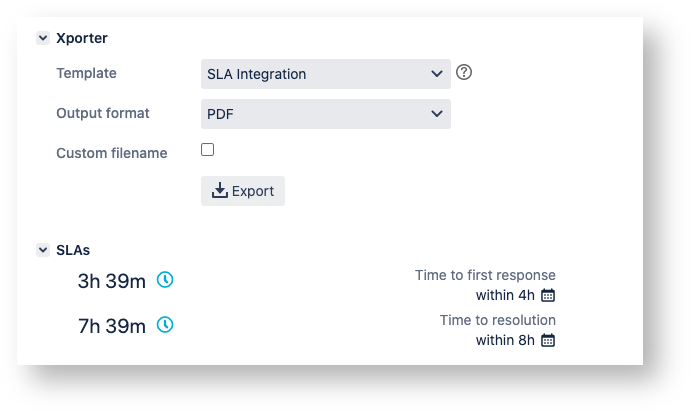
This translates to a Word document template as resolved by Xporter for Jira:
Furthermore, you are able to export more information related to SLA. Each SLA has information on when it started and stopped, and whether it breached the SLA goal. The notation is:
${<SLA custom field>.<Field>} |
| SLA fields | Description |
|---|---|
elapsedTime | Returns the total time the SLA has been running |
| elaspedTime Formatted | Returns the total time the SLA has been running formatted with friendly value |
startTime | Returns the date when the SLA started |
stopTime | Returns the date when the SLA stopped |
goalDuration | Returns the date with the SLA duration |
| goalDuration Formatted | Returns the date with the SLA duration formatted with friendly value |
breached | Returns a boolean if the SLA is breached |
paused | Returns a boolean if the SLA is paused |
withinCalendarHours | Returns a boolean if the SLA is within calendar hours |
The field ${Time to resolution} will be responsible to return the remaining time of the SLA custom field
Export Internal Comments
Xporter V5.3.0 and higher allows you to export the internal value of a comment.
This can also be used to filter the internal comments.
Definition
#{for comments} ${Comments[n].Internal} #{end} |
How to use to filter comments
To return only the Internal Comments:
#{if (%{${Comments[n].Internal}})} or #{if (%{'${Comments[n].Internal}'.equals('true')})}
To retrive only the public comments:
#{if (%{!${Comments[n].Internal}})} or #{if (%{'${Comments[n].Internal}'.equals('false')})}
Example:
#{for comments} #{if (%{${Comments[n].Internal}})} Author: ${Comments[n].Author} Body: ${Comments[n].Body} #{end} #{end} |
Export Jira Service Desk Approvals
The Jira Service Desk allows you to add an approval step to a status in a workflow, in case approval is needed for issue types (and their associated request types).
Xporter for Jira allows the exporting of Jira Service Desk Approvals and the relevant information about the approval and the respective approvers.
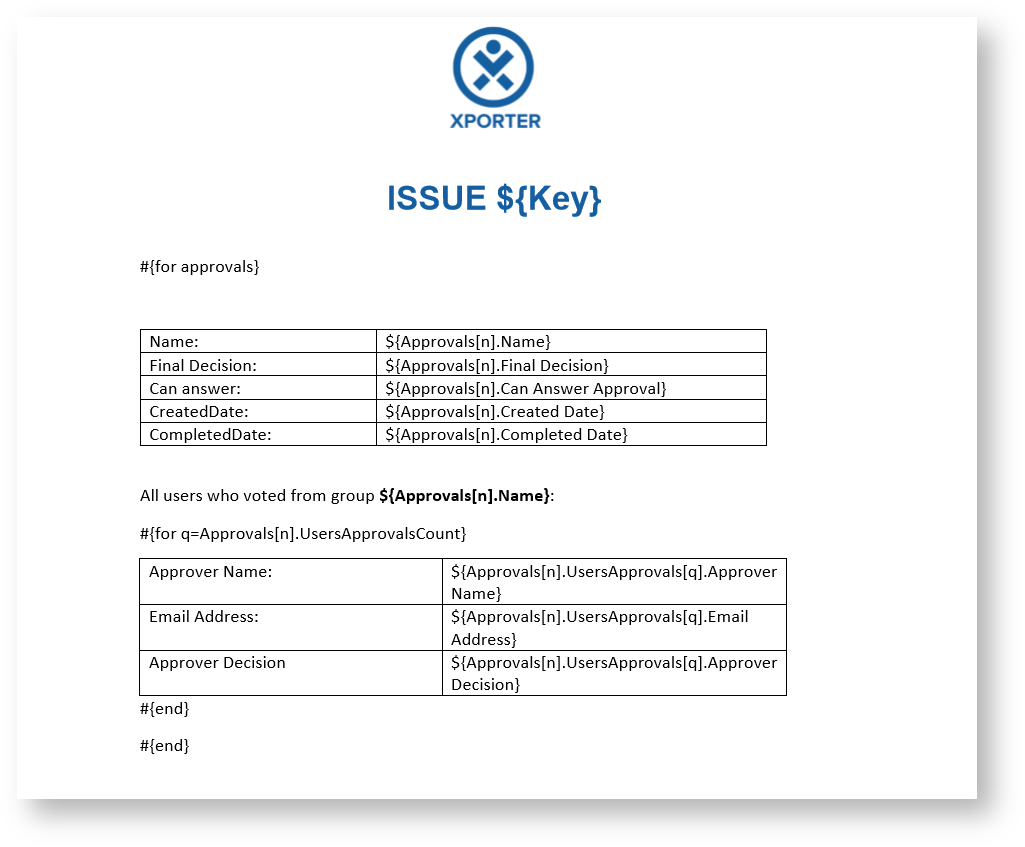
As it is not known in advance how many approvals exist for an issue, you can iterate a section over all the approvals of an issue and all the approvers and respective decision. This allows you to create a table that dynamically grows according to the number of existing approvals. The notation is:
| Approvals Fields | Description |
|---|---|
| Name | The name of the approval |
| Final Decision | The decision about the approval (Approved, Declined or pending) |
| Can Answer Approval | This field returns true or false in order to know if the approval was closed or if stills pending |
Created Date | The date the approval was posted |
Completed Date | The date the approval was completed with all users answers |
In order to extract more information from Approvals, it is possible to get information from the approvers and the decision of each one:
| Users Approvals Field | Description |
|---|---|
| Approver Name | This field returns the name of the approver |
| Email Address | This field returns the email address of the approver |
| Approver Decision | The response of the approver about the approval |
Now, here's an example of an Xporter for Jira template to get all the approvals of an issue and the information about each approver:
Export Jira Service Desk Request Type
Xporter for Jira allows the exporting of Jira Service Desk Request Type (Request a new account, Get IT Help, Report a system problem, etc.)
| Field | Description |
|---|---|
| Request type | This field returns the Request type |
Export Jira Service Desk Customer Status
Xporter for Jira allows the exporting of Jira Service Desk Customer Status
| Field | Description |
|---|---|
| Customer status | This field returns the Customer Status |
Export Requests from an Organization
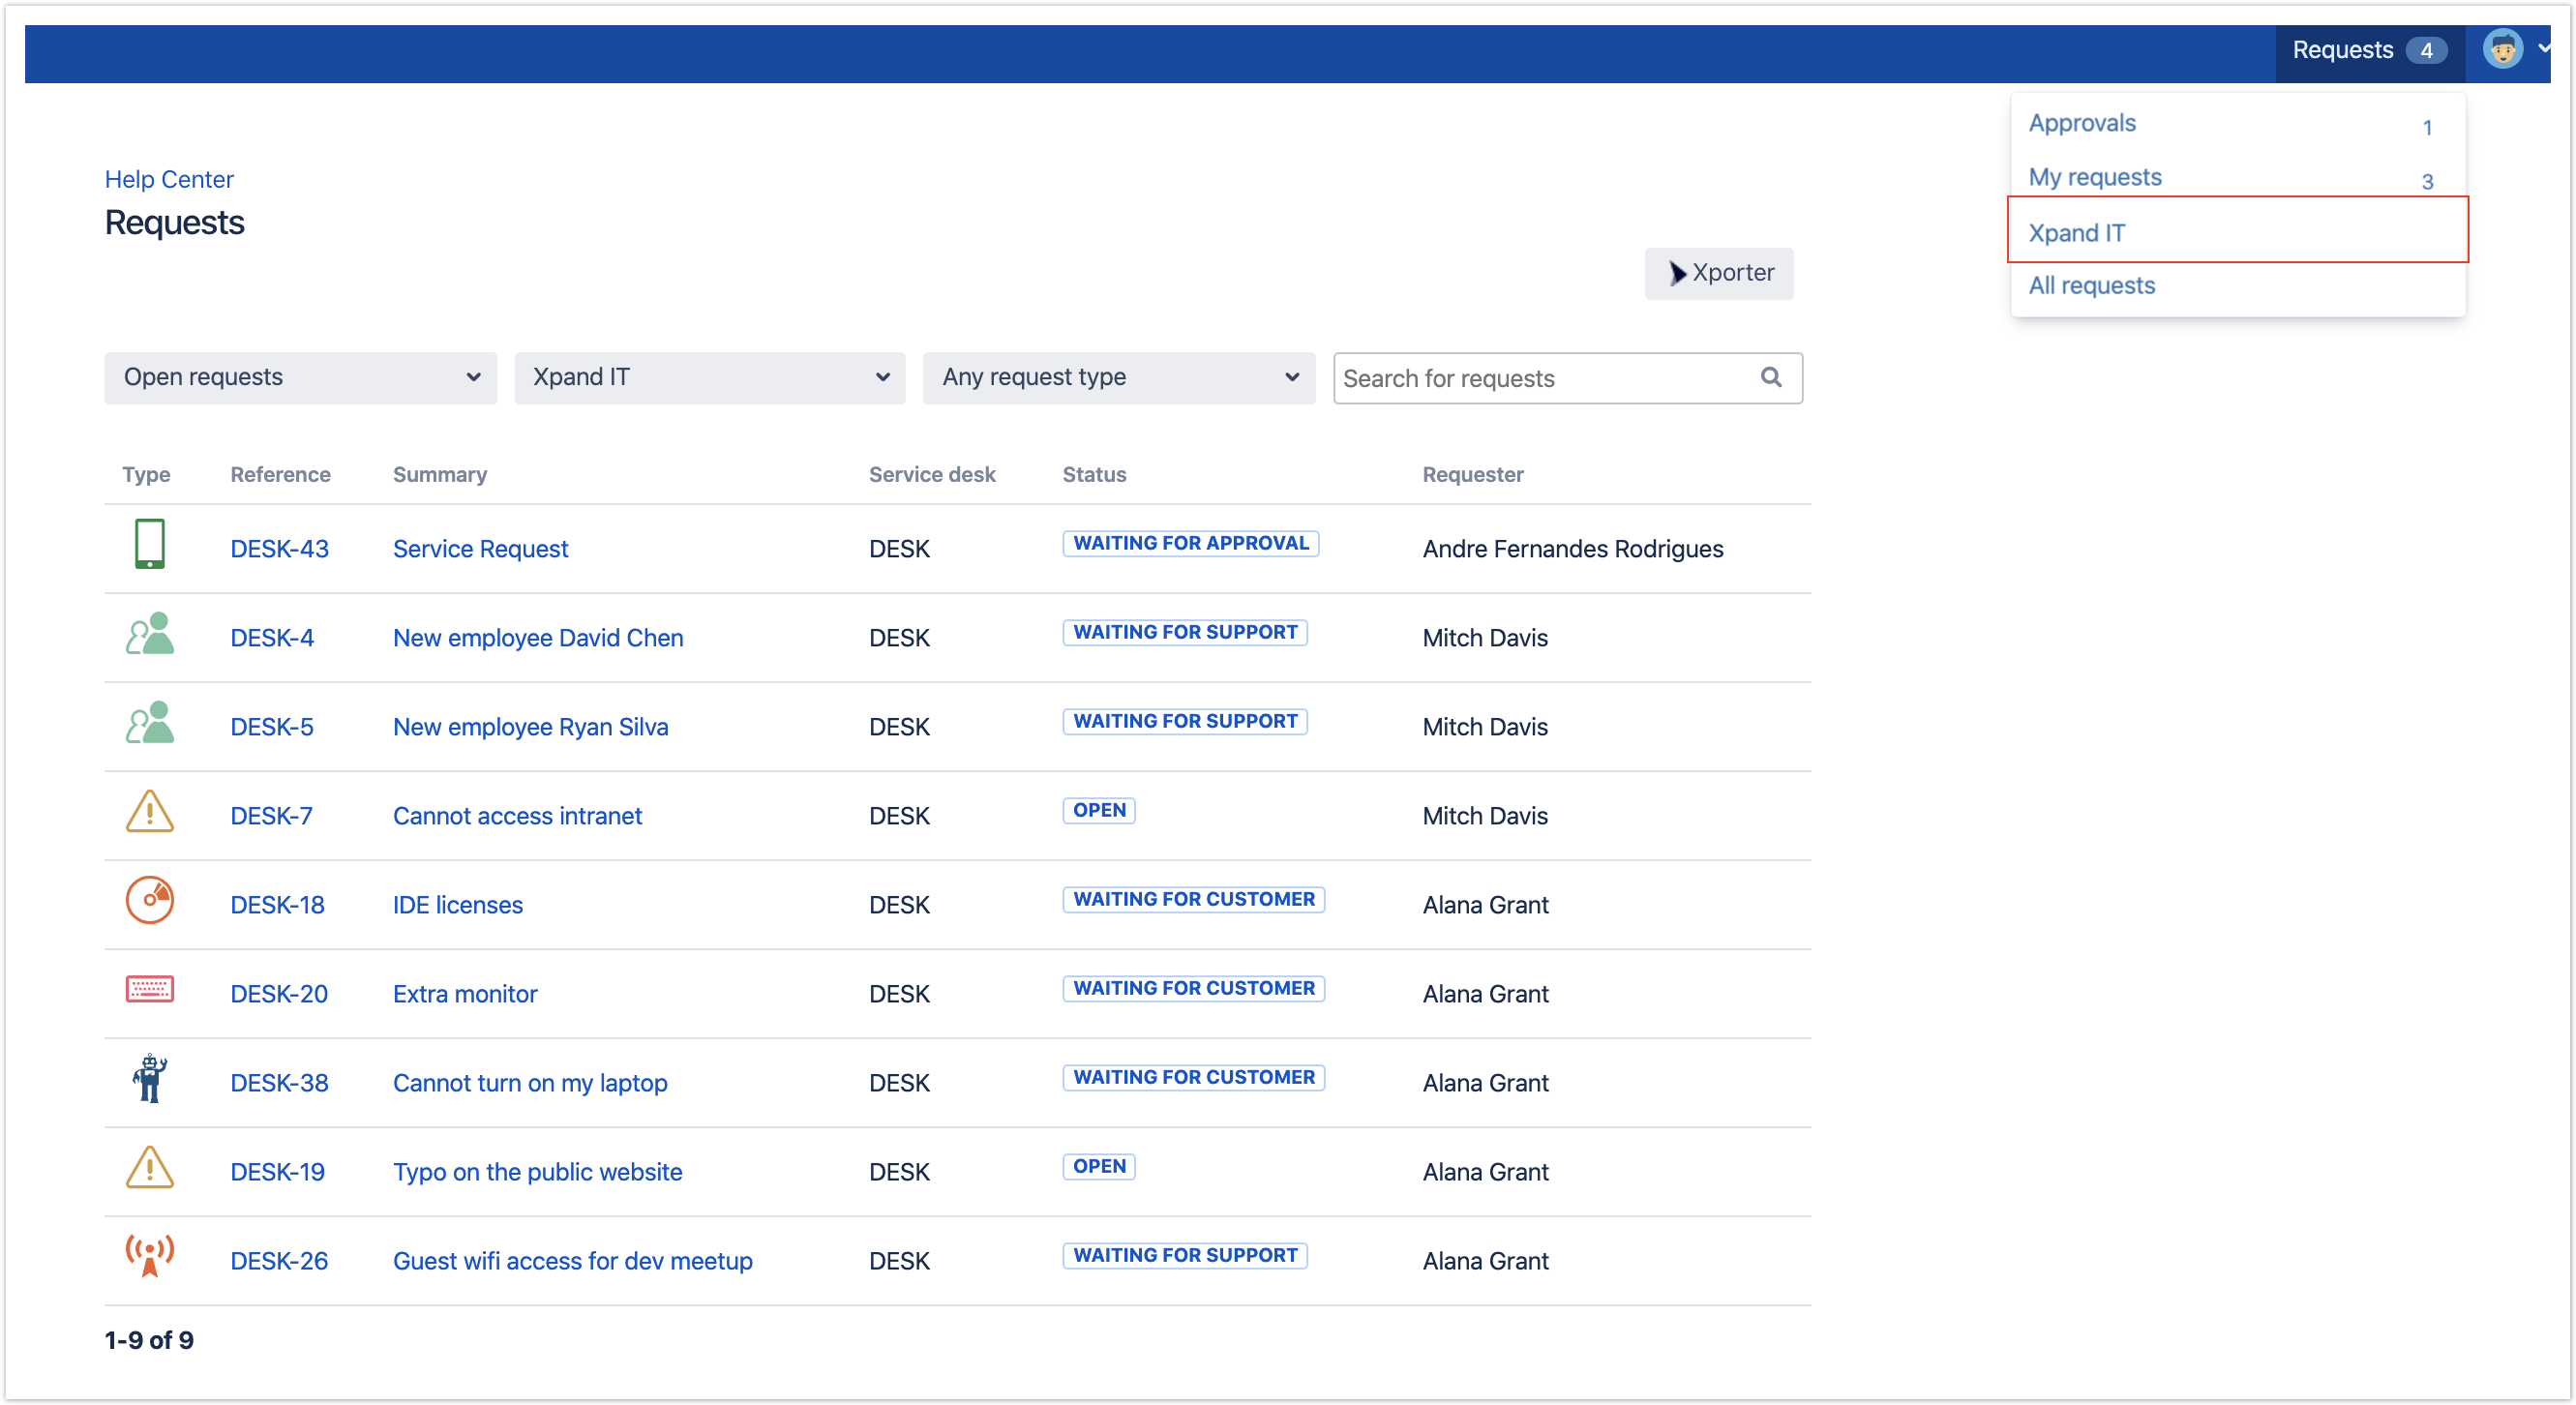
Xporter is available on JIRA Service Desk organizations directly from Customer Portal.
Organizations are groups of customers and customers can be members of multiple organizations.
After raising a request and share the request with the organization the user will be able to view and search the organization's requests from the My Requests page in the portal.
Xporter will allow uses to:
- Export shared requests with the organization.
- Organization member will be able to export the requests
- Requests that are shared with customers who belong to the same organization.
Note:
A user that belongs to an organization can only export issues that were created after the user was added to the organization.
The user can export the displayed issues only if he has an open ticket also listed.