Xporter provides a Workflow Post Function that allows administrators to define multiple actions that will be performed during transitions in Jira Workflows.
The Xporter Post Function allows you to generate a document during transitions in JIRA Workflows and to define which actions you want to perform.
Xporter Post Function Configuration
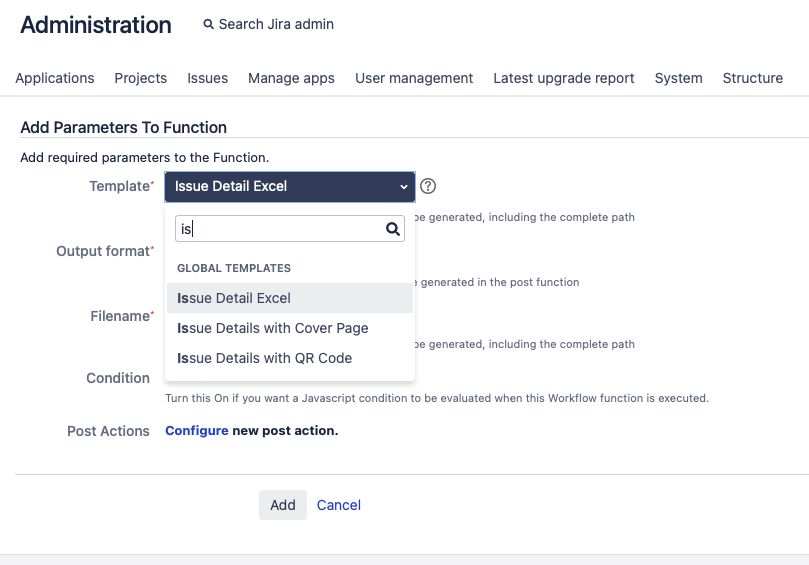
To configure the Xporter workflow post-function you must:
- Select the template to use.
- Select the output format.
- Provide the name of the file you want to generate.
- Select if the Xporter Post Function should have a Javascript condition to be evaluated when this Workflow function is executed (Workflow Post Functions: JavaScript conditions)
If the Include Attachments option is turned on, the file will be generated with the issue's attachments.
The mappings that you can include are the same mappings that are used inside the templates with the same notation.
You can also use the following Xporter format functions:
- Fields with HTML
- Formatting Date Fields
- Formatting Number Field
- Formatting User Picker Fields
- Escaping fields
Please note that you cannot use JavaScript with these mappings!
Actions available on Xporter Post Function
The Xporter Post Function provides four different actions and each of them will have their own specification.
The administrator will have the possibility to have more than one action configured to different receivers or to upload the document generated into multiple File servers.
Be aware, the filename can be modified on each action and it can be specified a custom name.
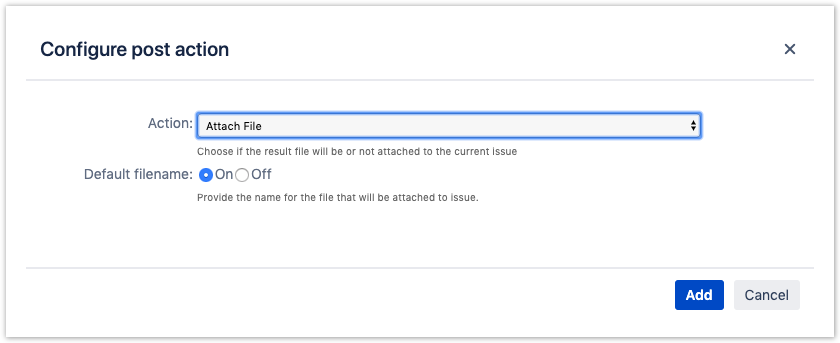
Attach File
The document generated can be attached to the issue who performed the transition.
Save on Jira host
This action will allow the administrators to save the report on the JIRA machine
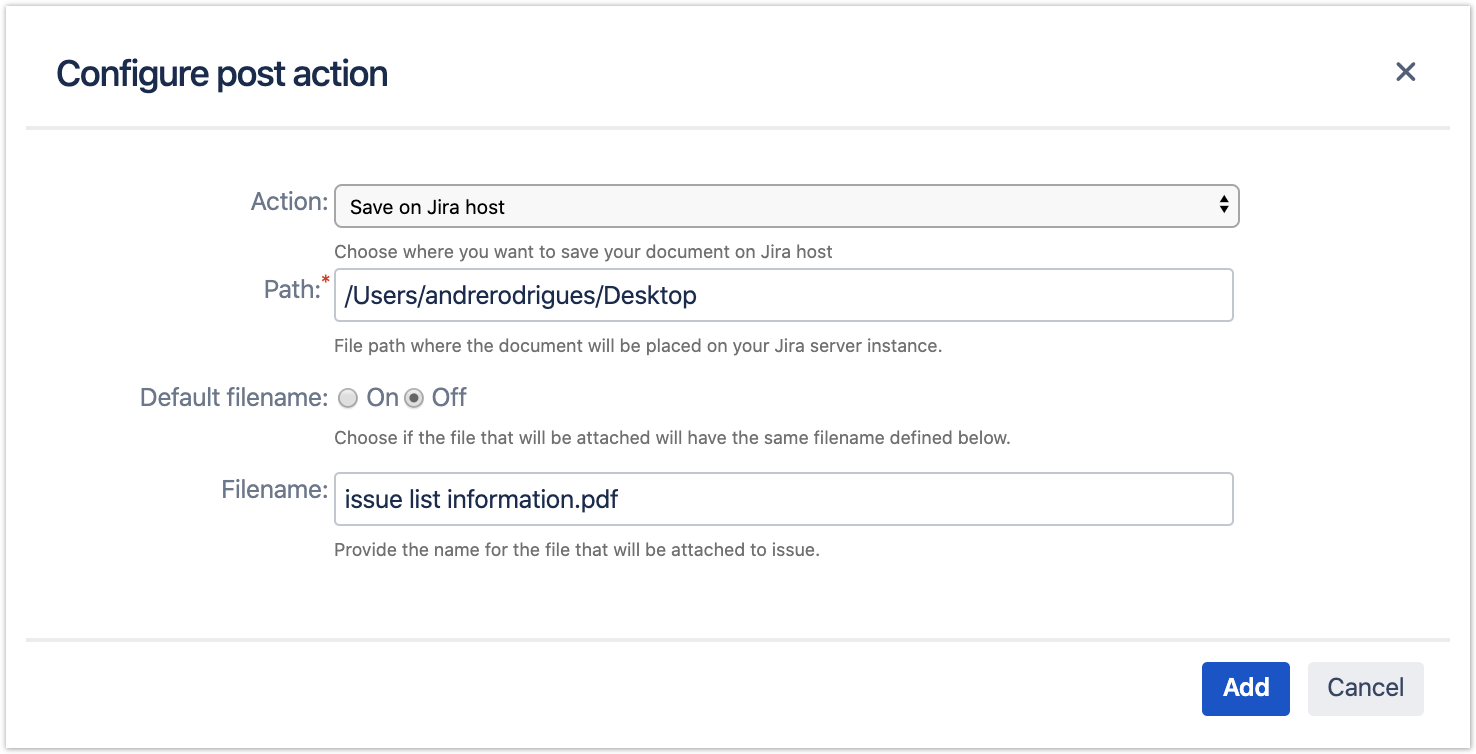
Be aware, the path defined will be accepted only if the SO user has permissions to write on the respective folder.
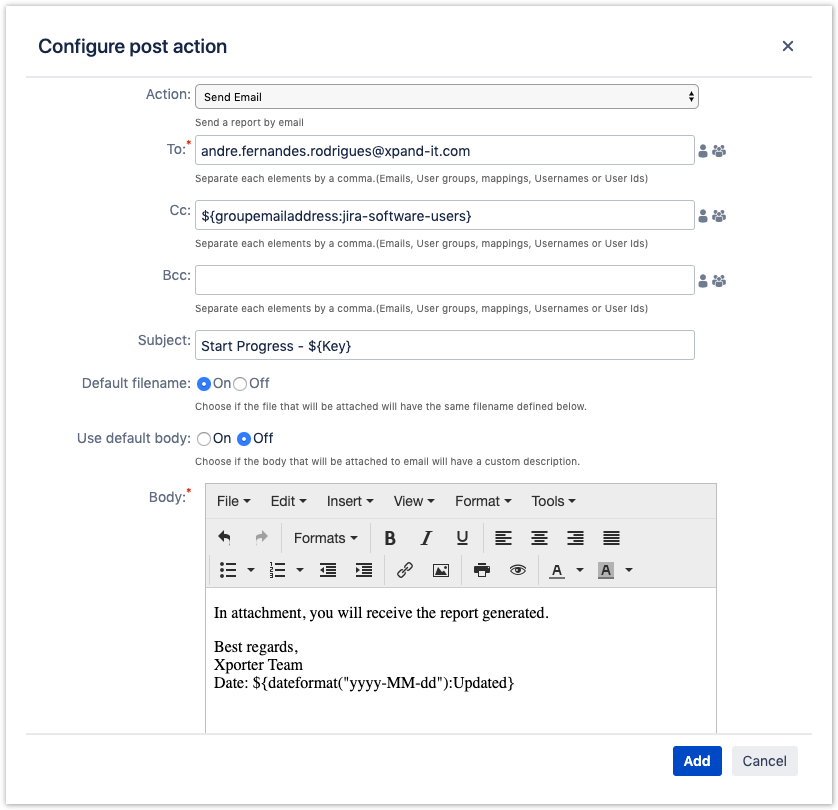
Send the report generated by email
Another important action is sending emails with attached reports or rendering a template in the body of the post function.
You just need to enable the option to use the default body and your post function will have the template rendered.
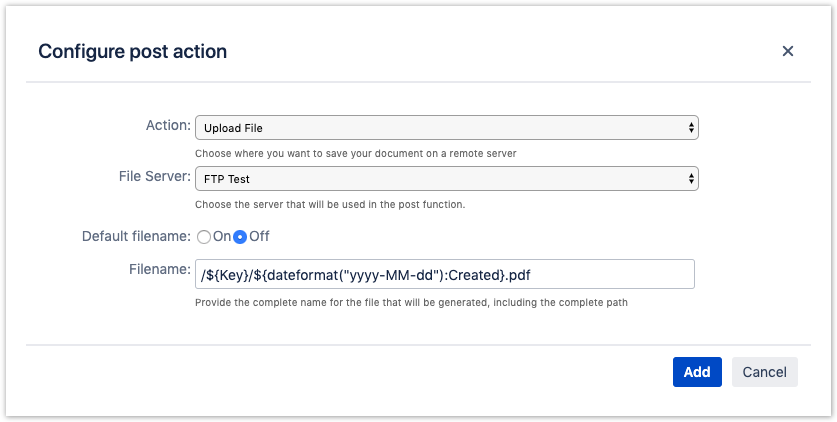
Upload File
Choose if you want to upload the generated document to a File Server.
Just pick the Server to which the exported file will be saved and after this, the administrator will have the opportunity to define the path on the filename.
Xporter Post Function Overview
After choosing all the actions that will be performed, Xporter will give you an overview of each action with a description and the filename.
Furthermore, you'll be able to edit the existing actions according to your expectations.
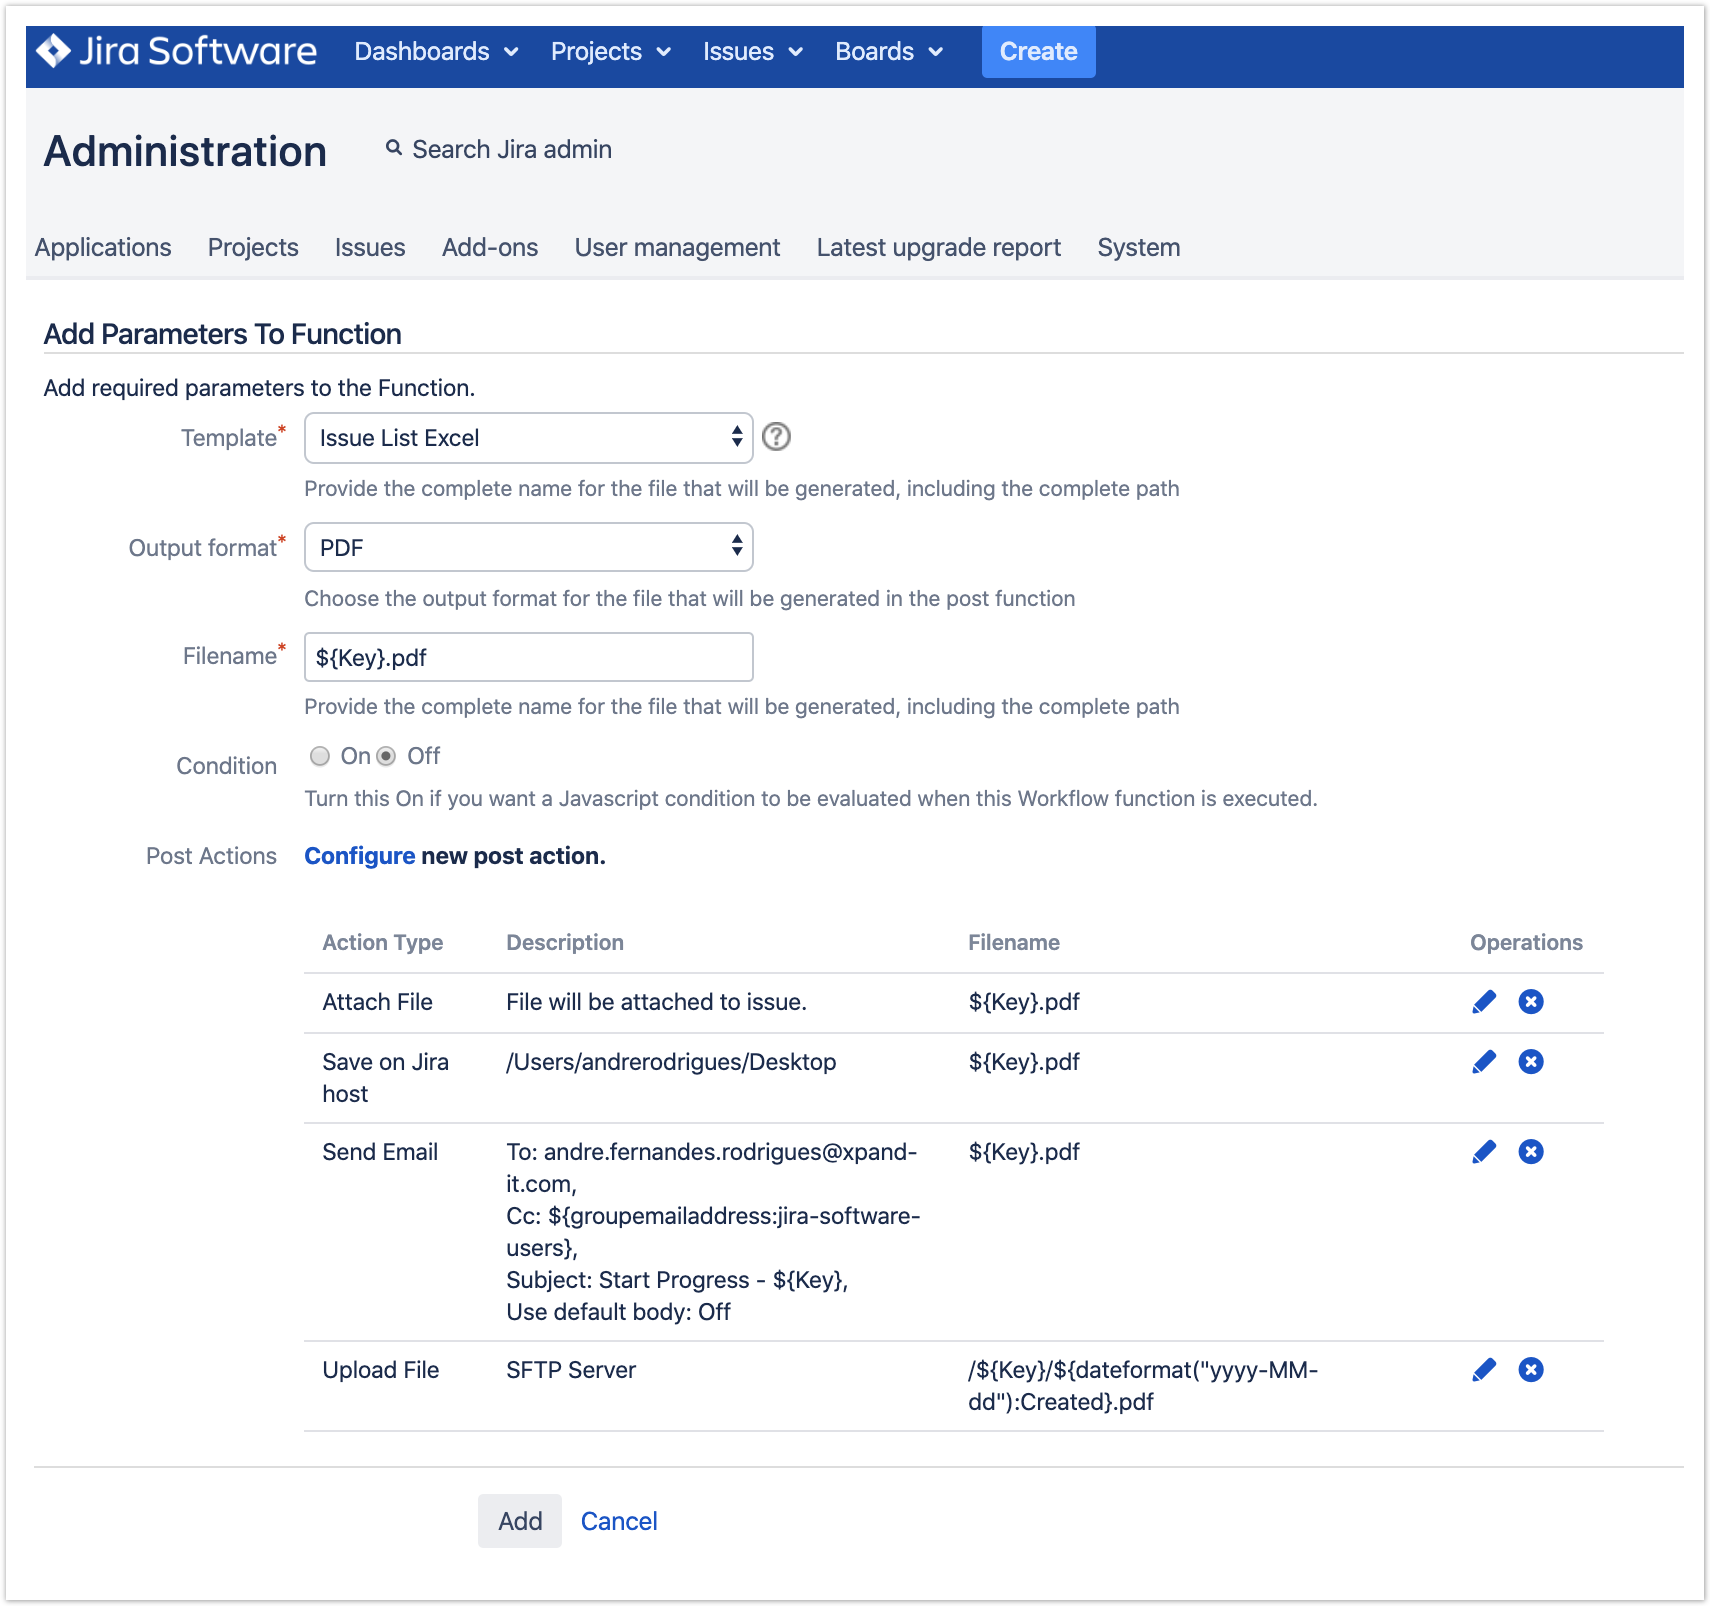
After the configuration process, the post functions of the transition will look like the screenshot below.
Jira Server version:

Workflow Post Functions: JavaScript conditions
Overview
Xporter now supports the evaluation of Javascript conditions to check if the Workflow Post function should be executed on that specific Jira transaction.
Please be careful with dangerous JavaScript expressions. For example, watch out for infinite loops or high computation expressions. This will make Jira take a lot of your precious CPU and you might have to restart it.
This feature is currently only available in Xporter Server version.
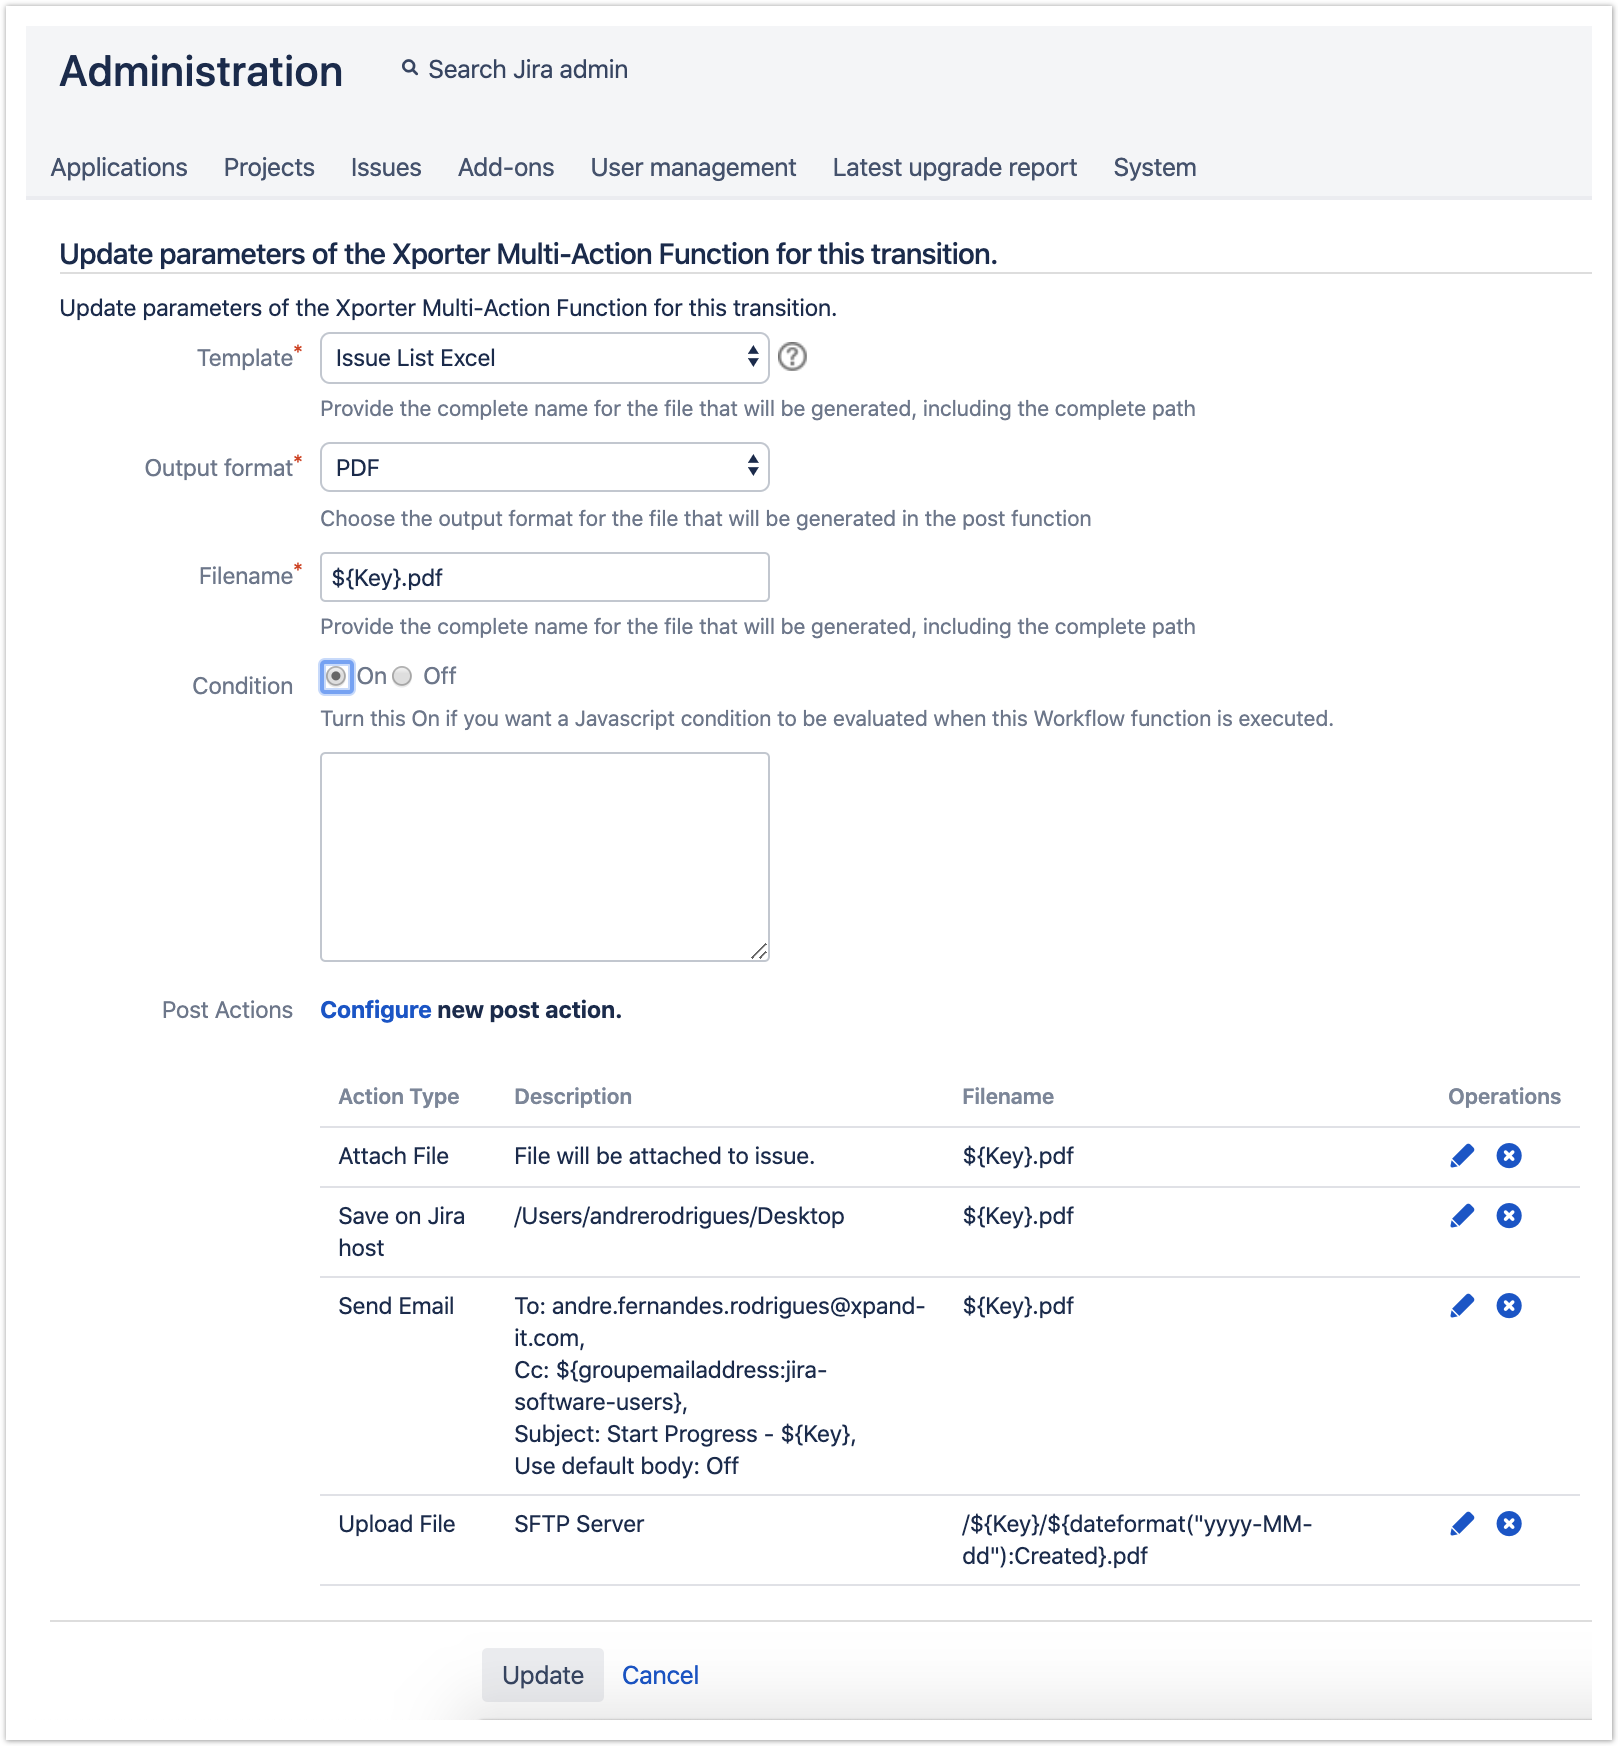
Configuring
To use it:
Activate the Condition option that is present in both Post Functions:
Then, write your JavaScript condition on the text box. Please remember that if you activate this option, your Post Function will only be executed if the JavaScript expression is evaluated to be a True statement.
Use the Mappings the same way you use them in Xporter Templates.
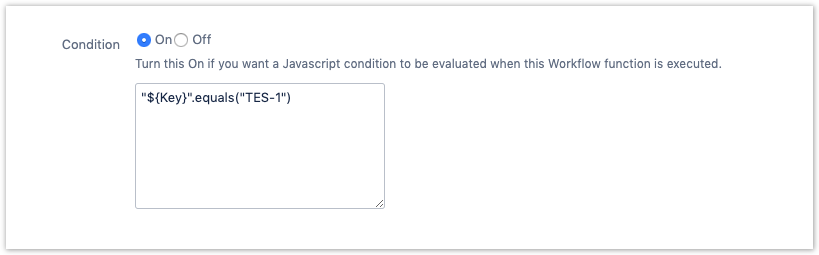
That´s it. For this example, every time I make a Status transaction on an issue, Xporter will check if the Issue Key is "TEST-1" and if it is, it will execute this Post Function.