...
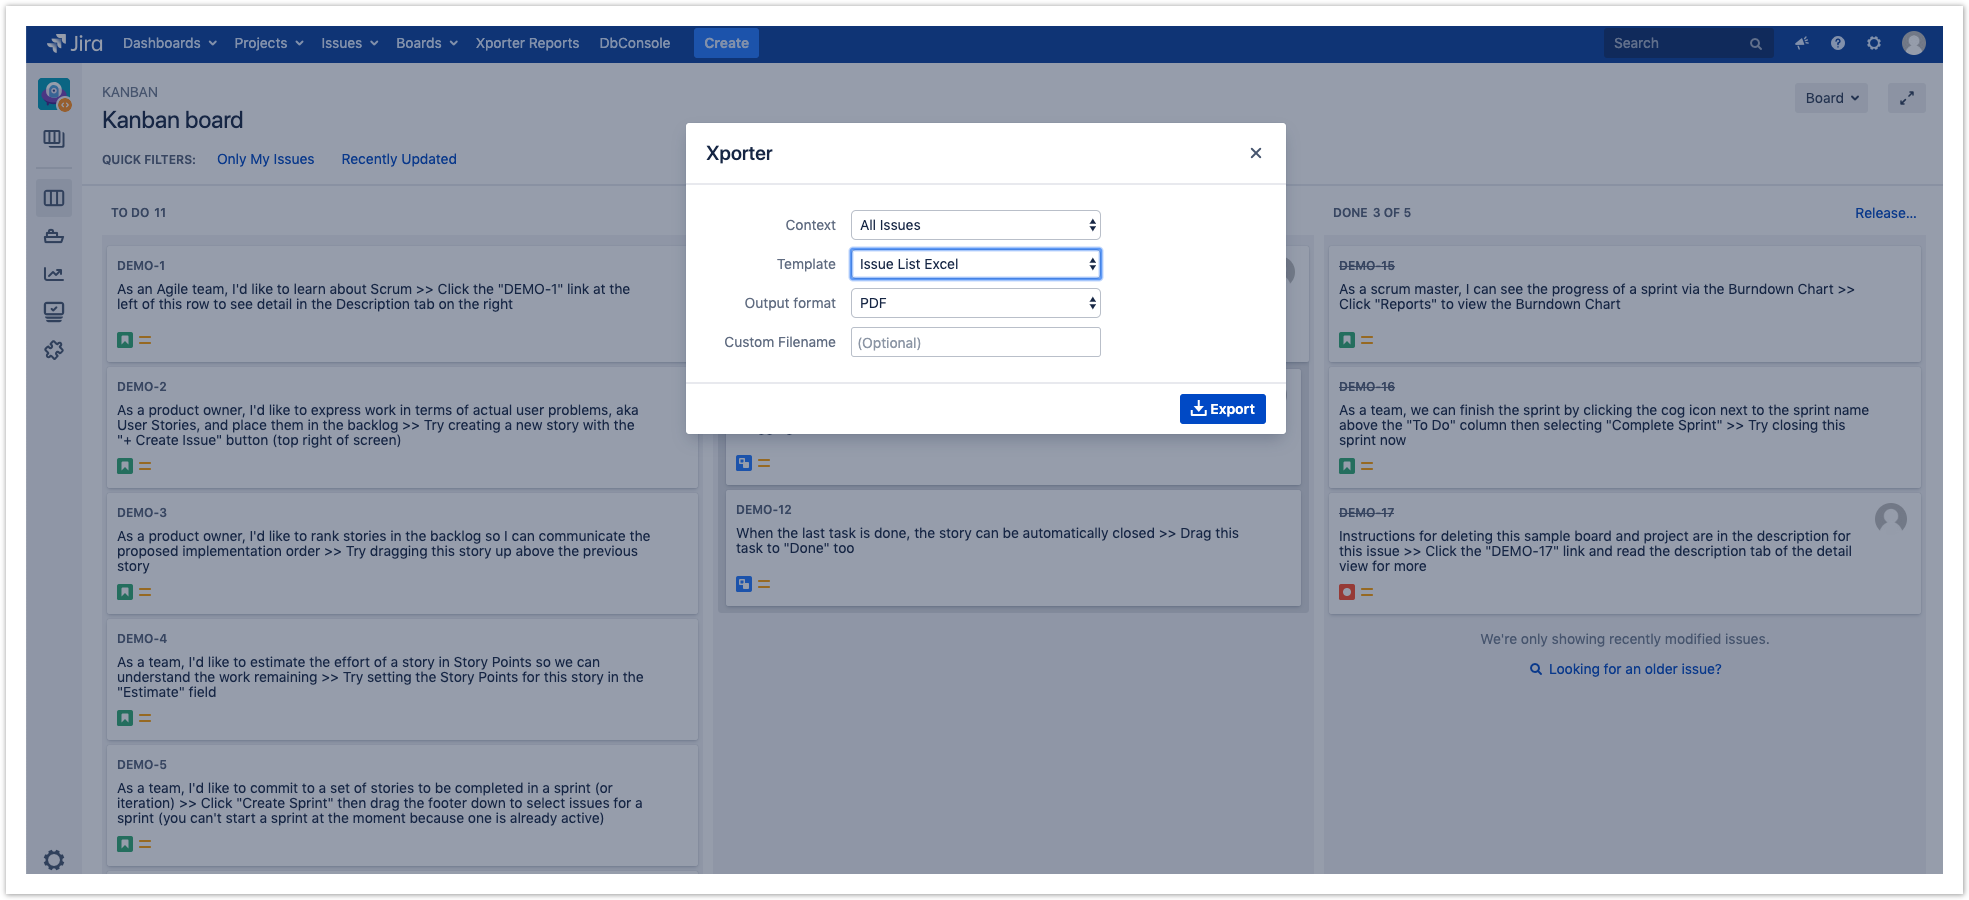
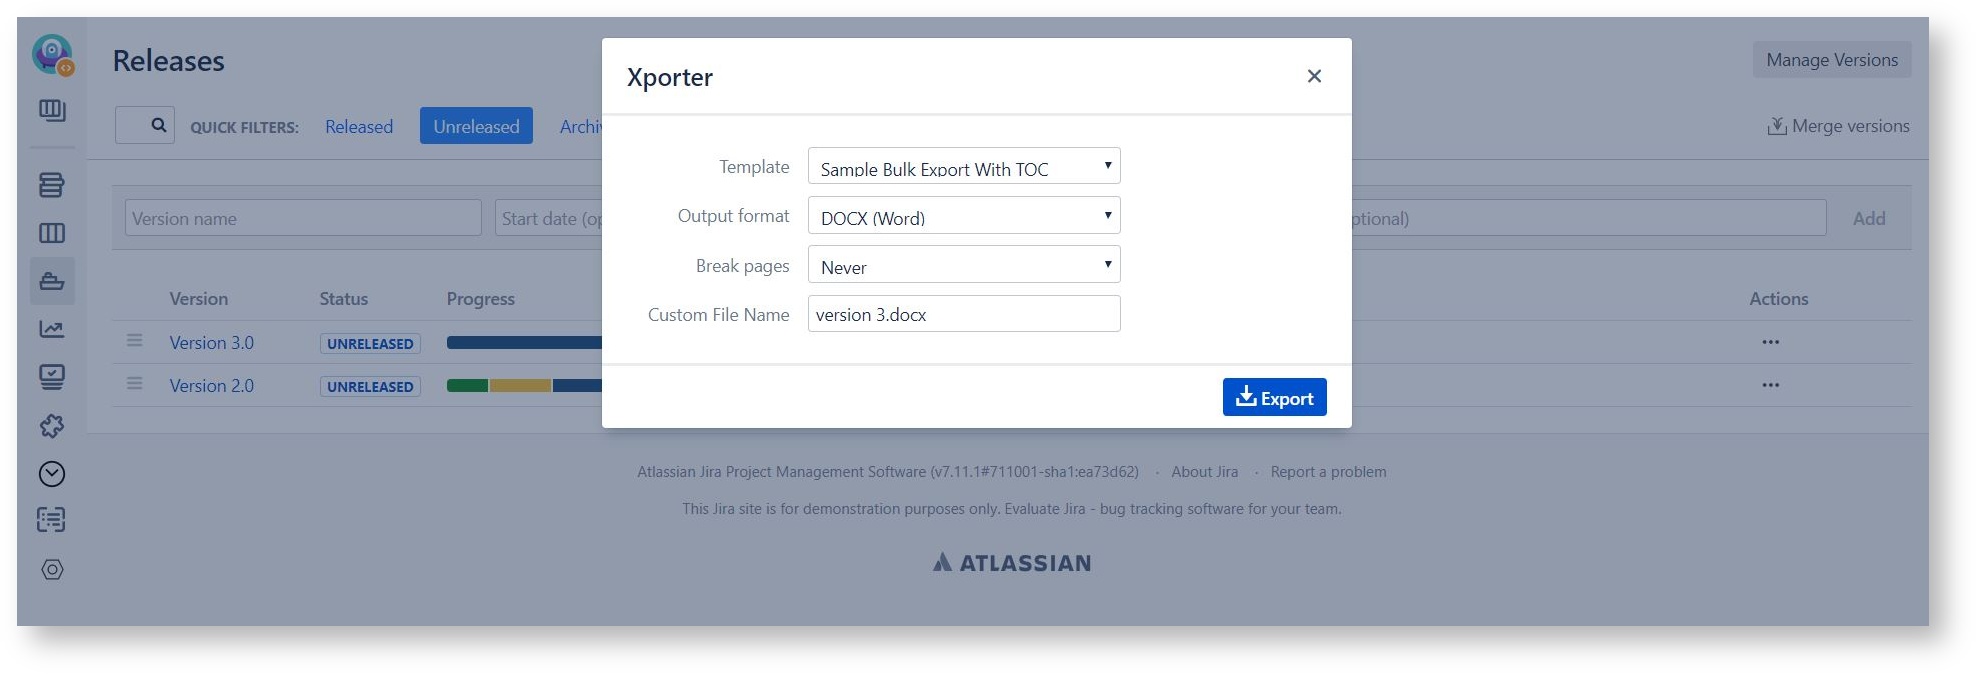
Step 2 - After clicking on the Xporter option, you will have a pop-up that will have a list with all contents available to export, all templates available to use in this context, the export type format and the option that allows you to break a page when changing Issues, Projects, Issue Types or Components. Also, there is an optional field to customize the file name of the report that will be generated. Then, click Export.


Step 3 - Wait for the operation to finish and then click on the link to download your document.
...
After this, click on the Xporter icon of the column you want to export and select the template and the respective output format.
Finally, you need to export and the report generated will be ready to be downloaded.
...
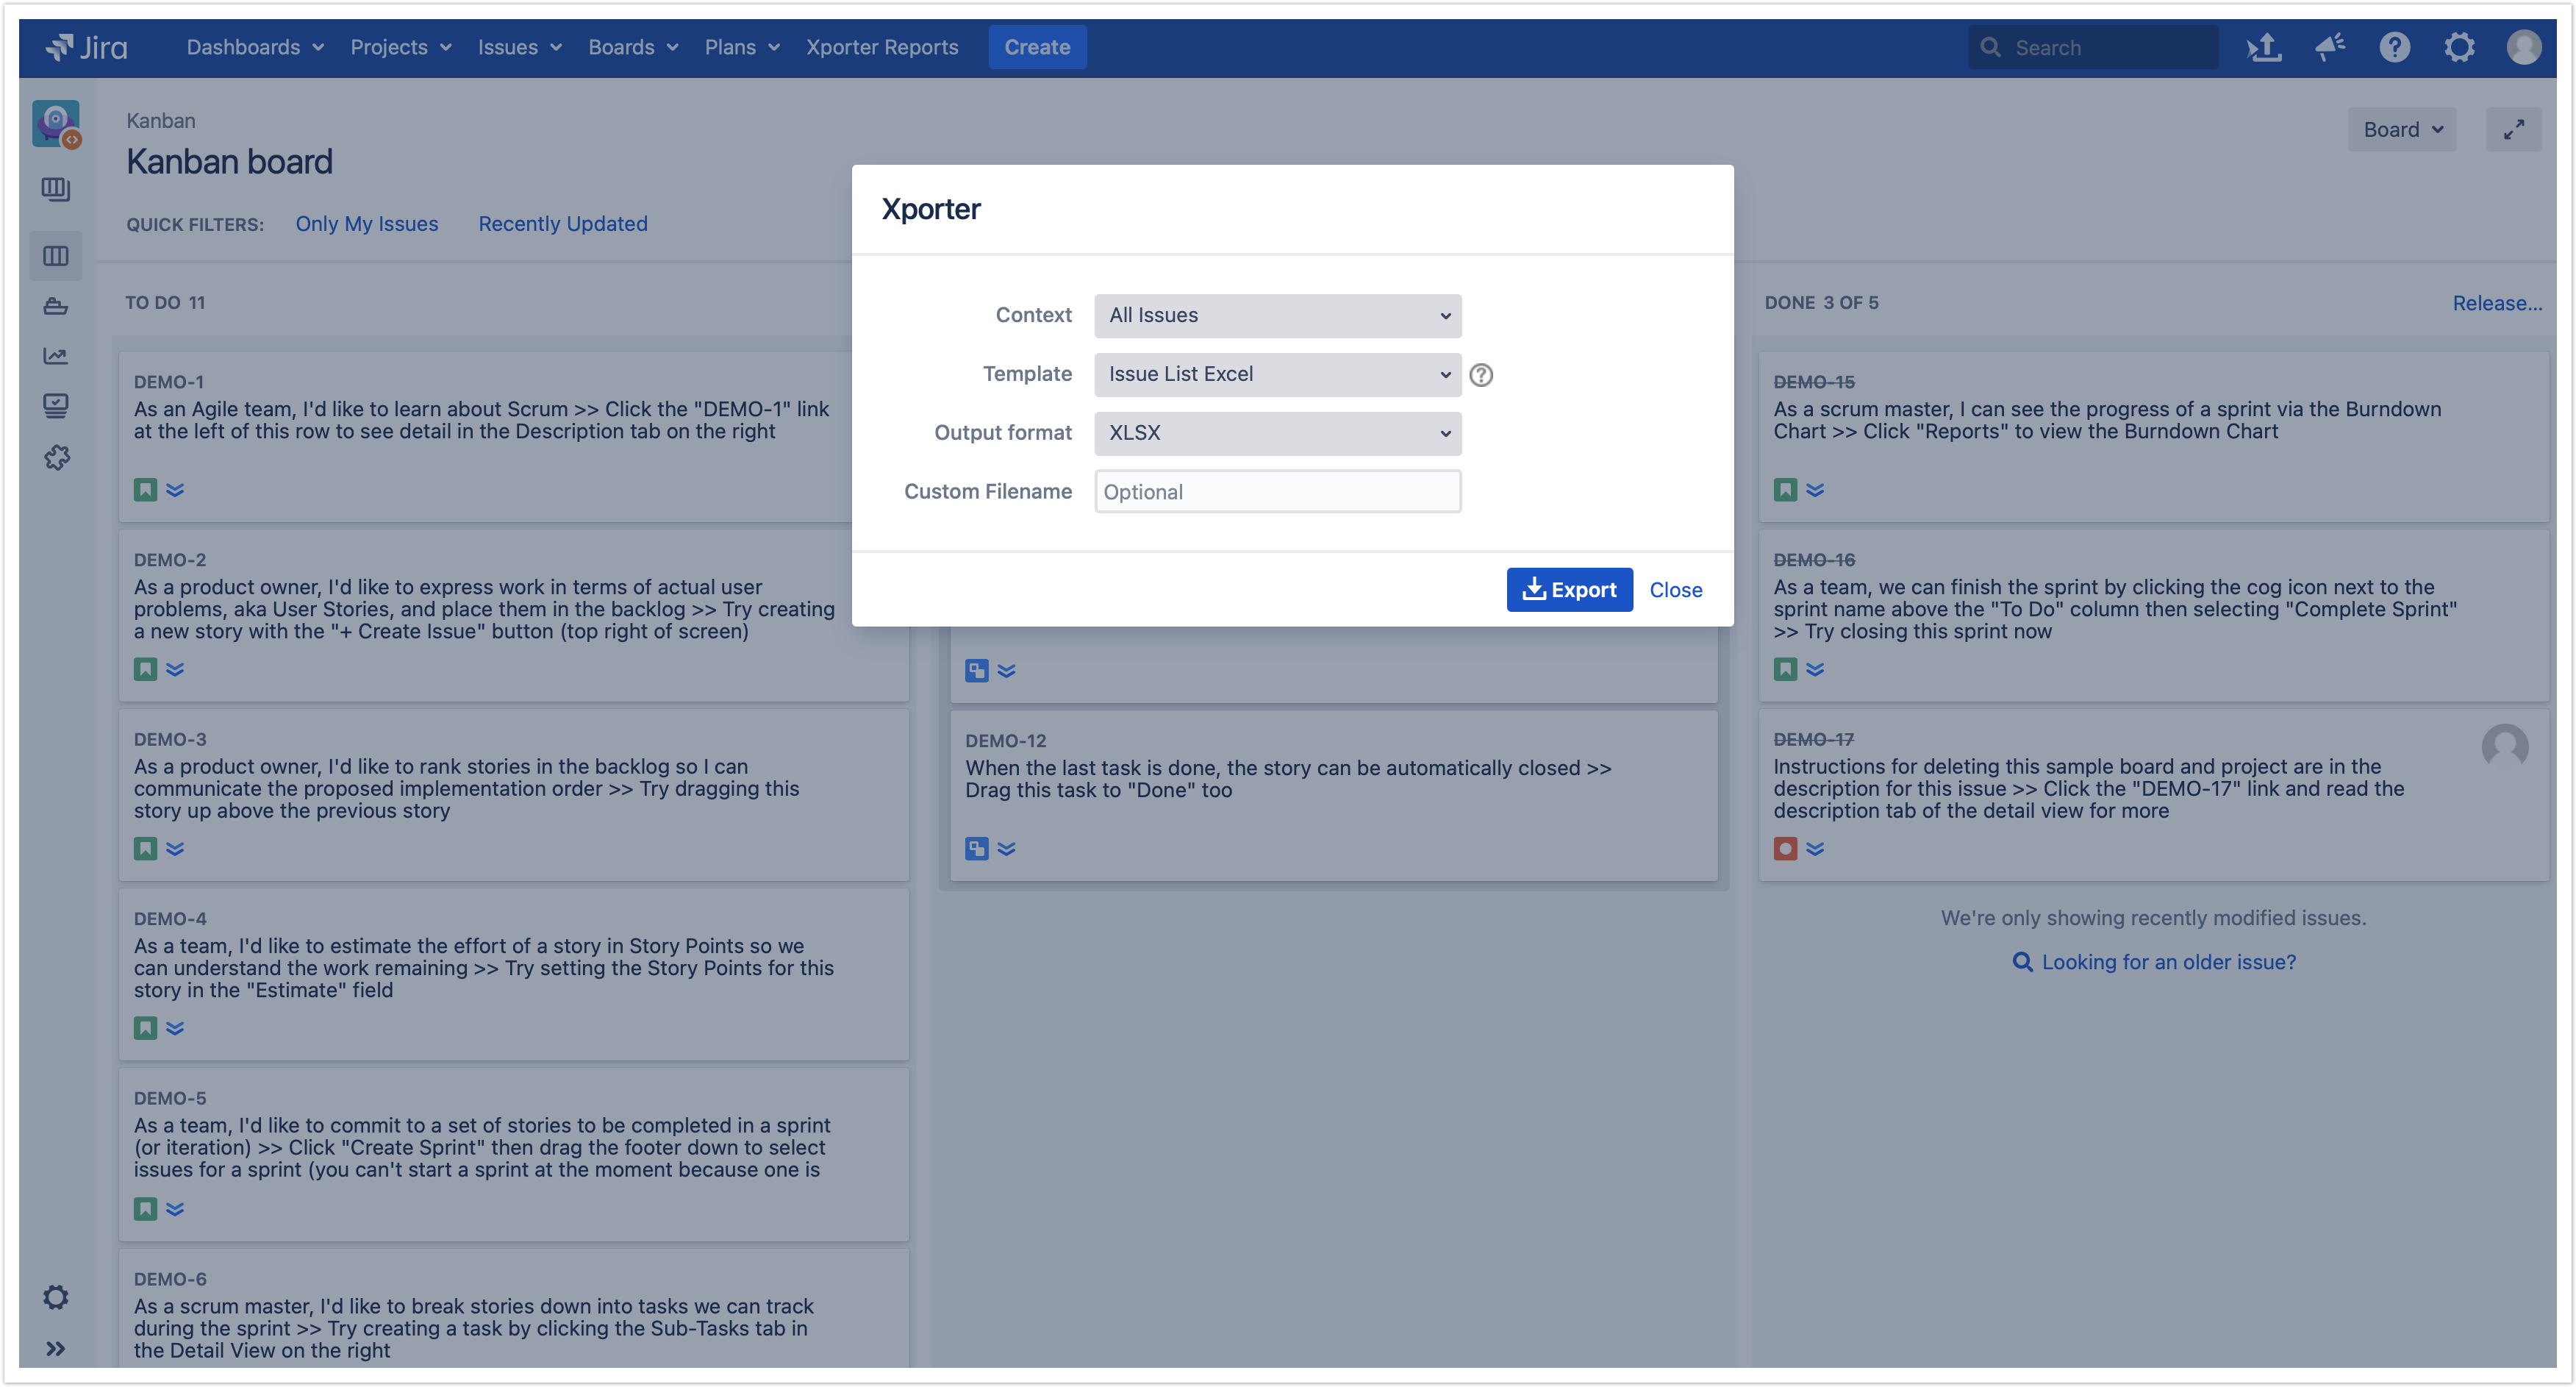
Step 2 - After clicking on the Xporter button, you will have a pop-up that will have a list of all the templates available to use in this context, the export type format and the option that allows you to break a page when changing Issues, Projects, Issue Types or Components. There is also an optional field to customize the file name of the report that will be generated. Then, click Export.
Step 3 - Wait for the operation to finish and then click on the link to download your document.
...
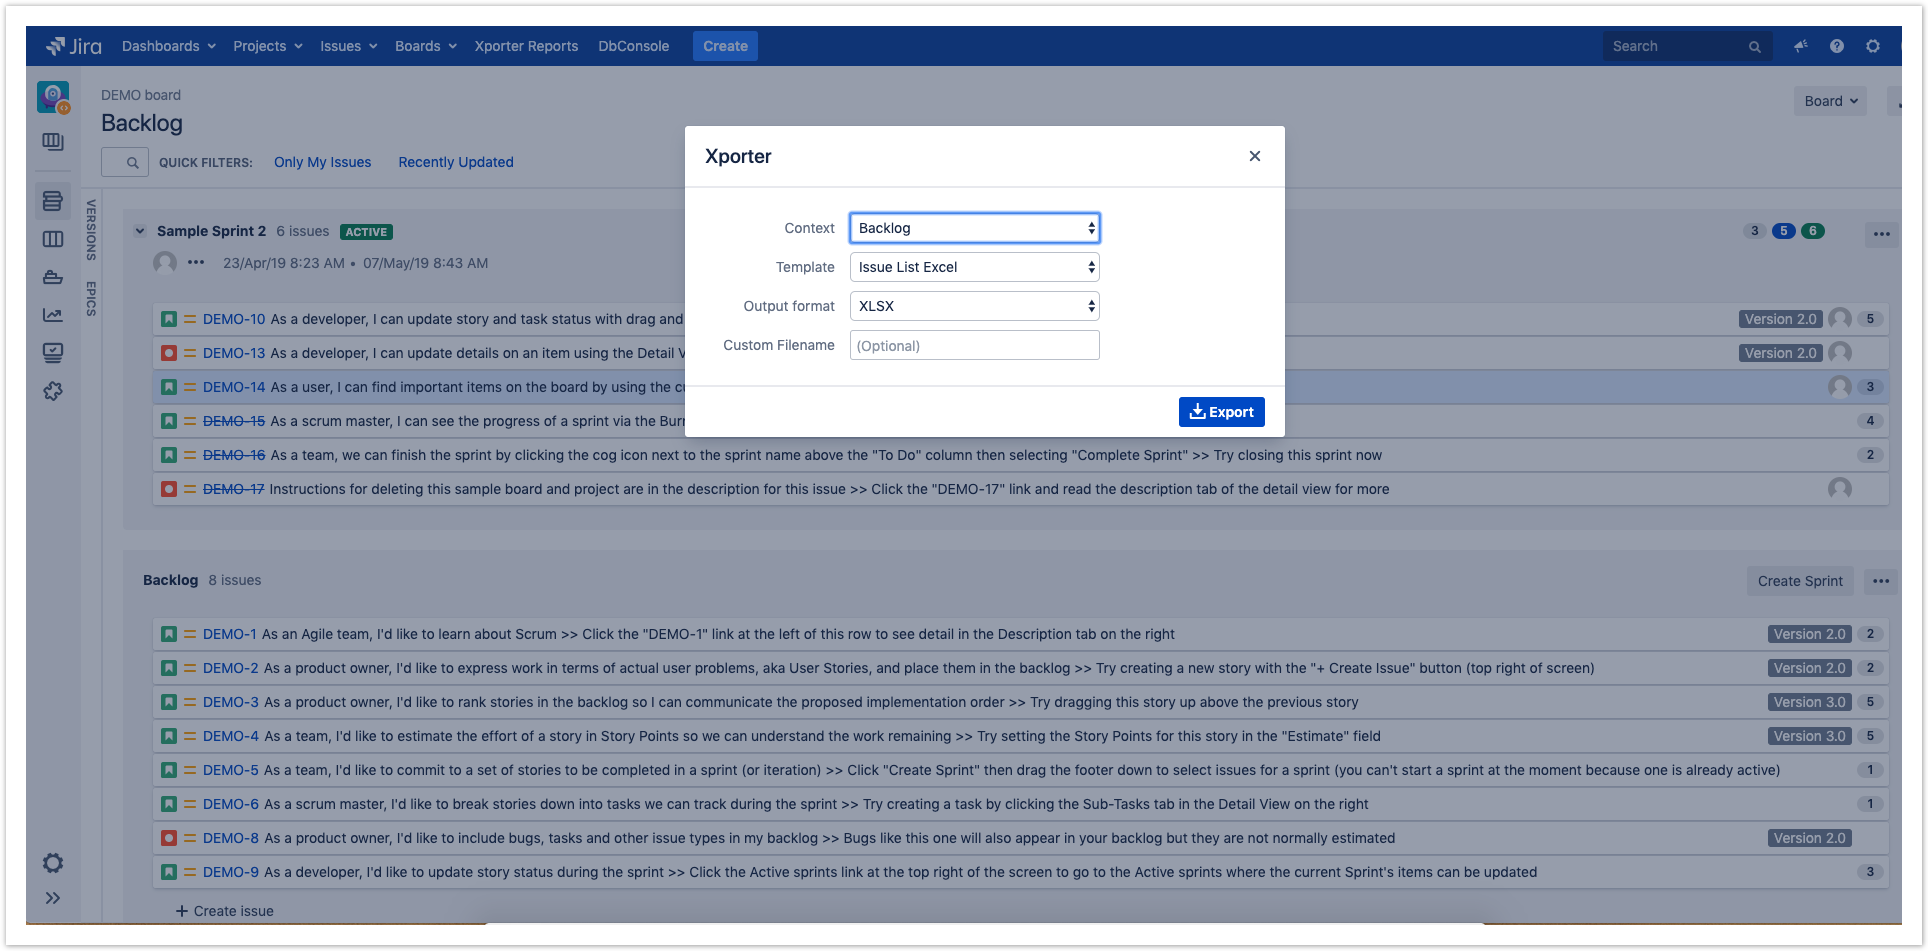
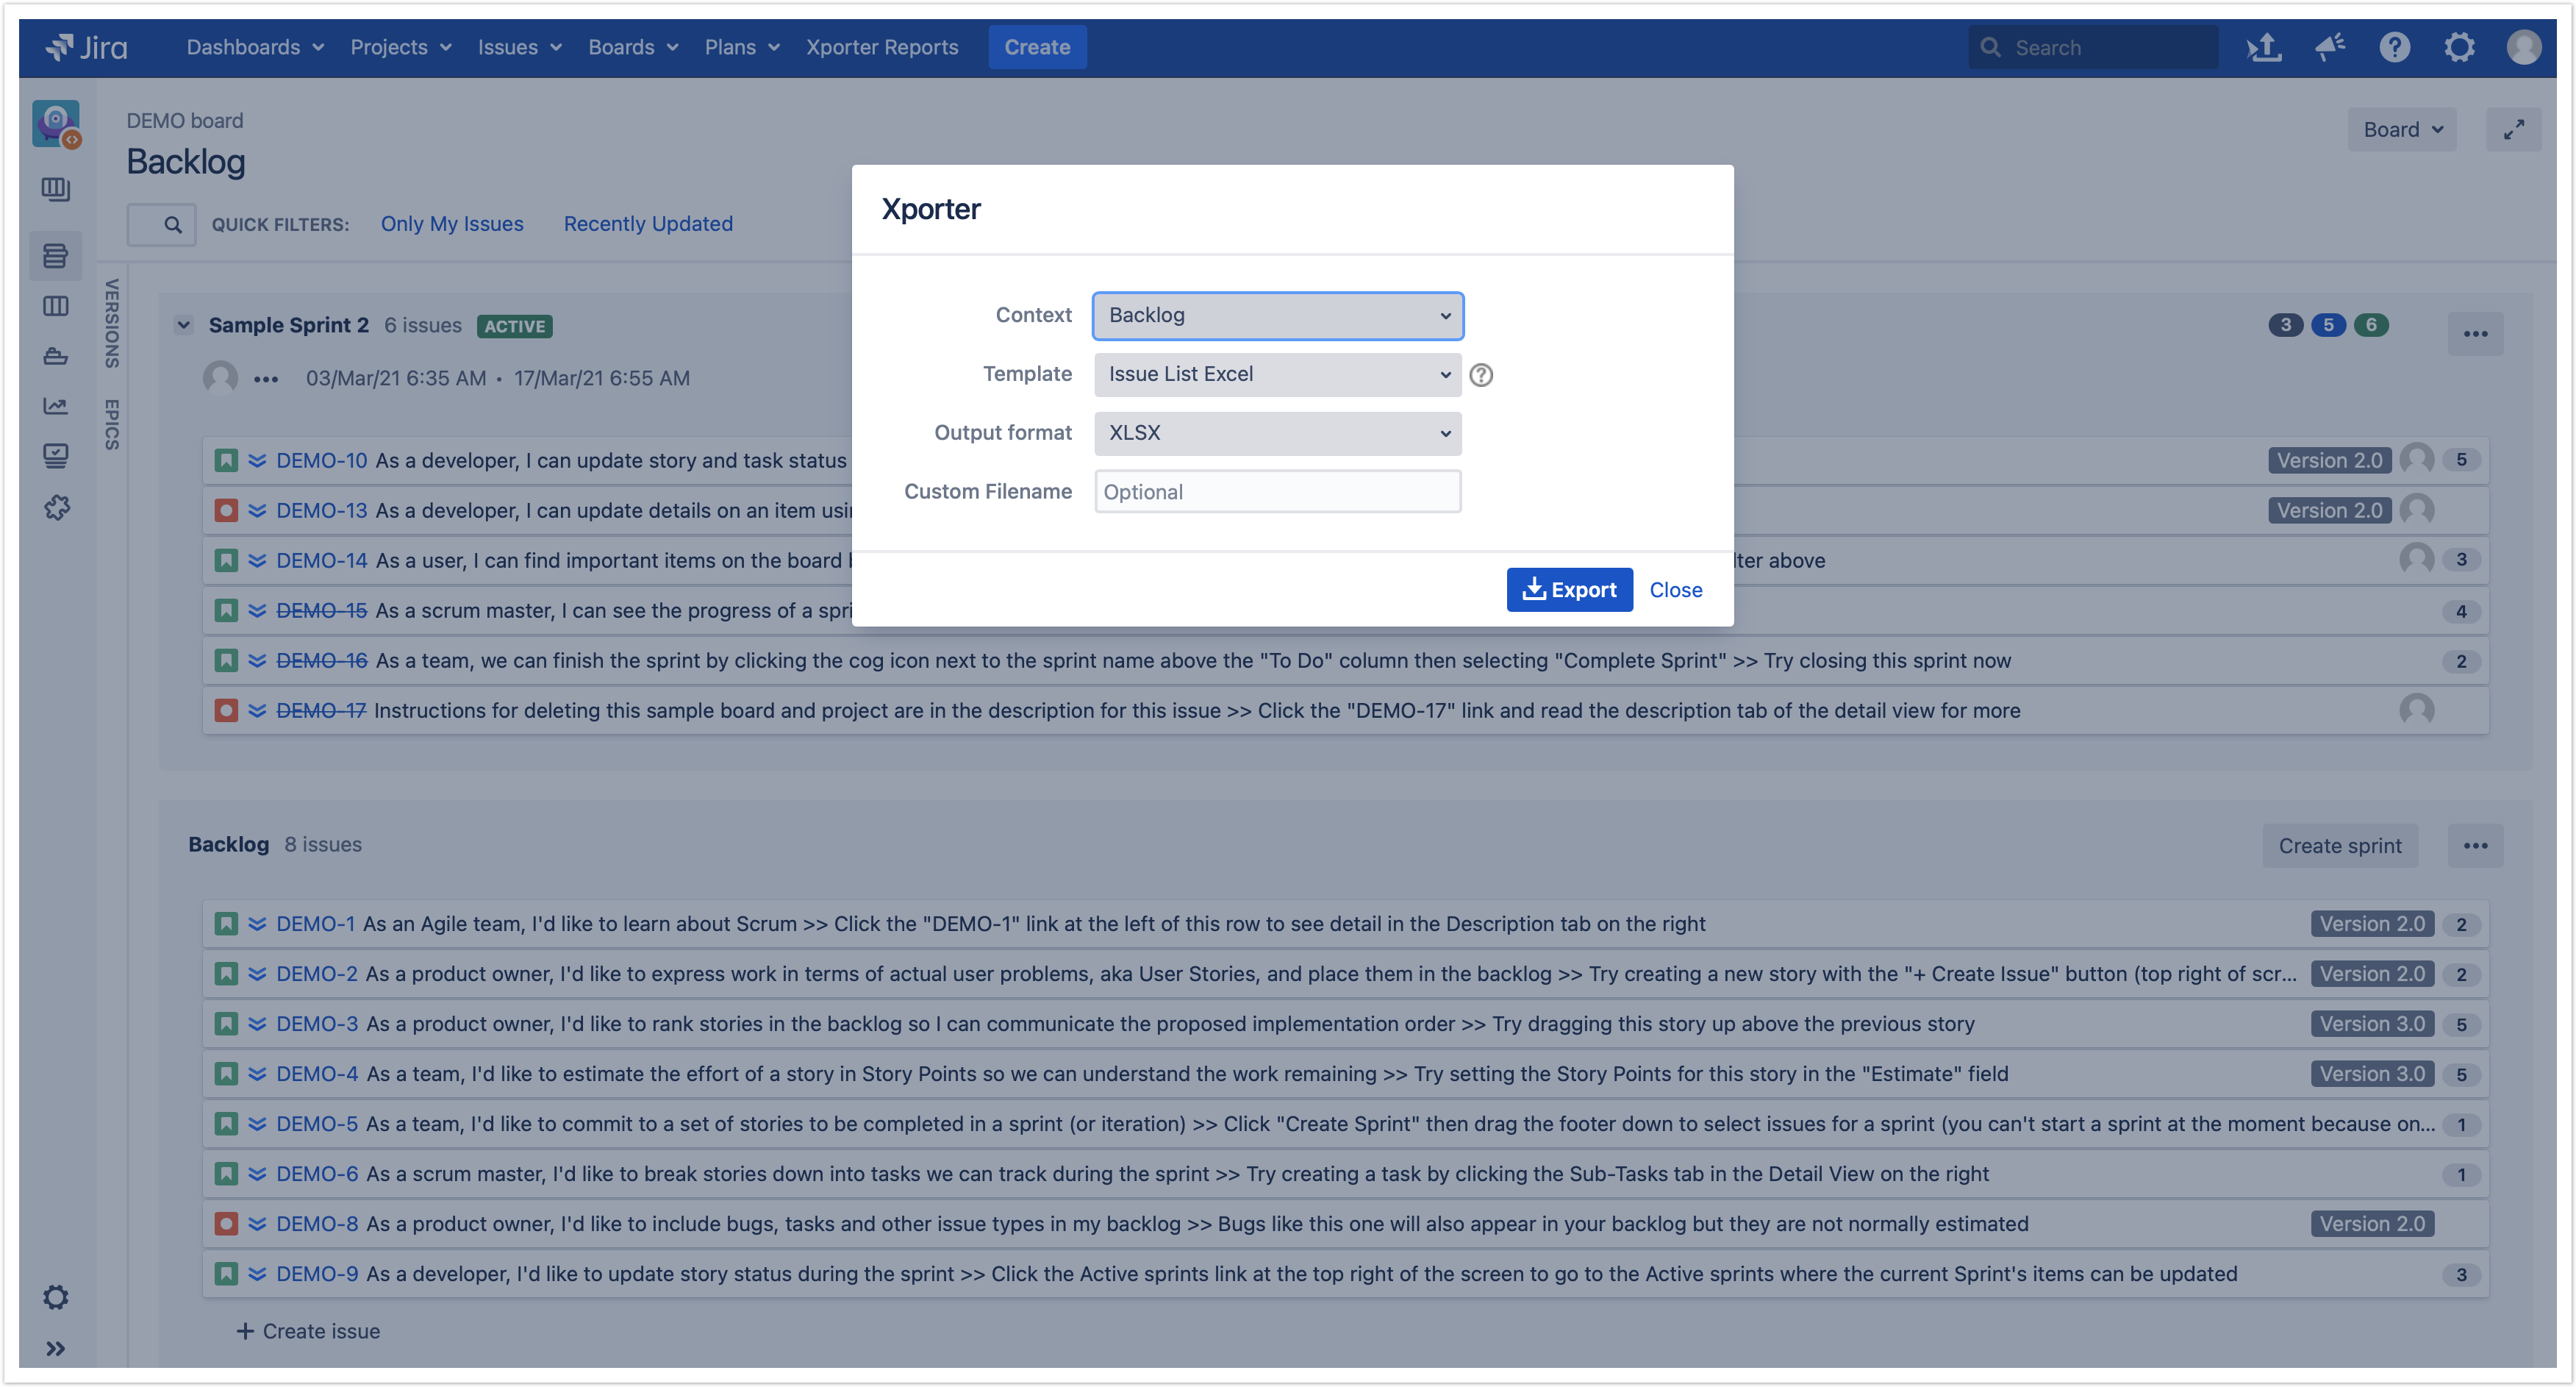
Step 2 - After clicking on the Xporter option, you will have a pop-up that will have a list of all the templates available to use in this context, the export type format and the option that allows you to break a page when changing Issues, Projects, Issue Types or Components. You can also define the custom file name to the report that will be generated. Then, click Export.

Step 3 - Wait for the operation to finish and then click on the link to download your document.
...