Using menu option
You can export the results of a search filter using the Xporter option in the Export menu.
Step 1 - From the menu, select Export, then Xporter for Jira.
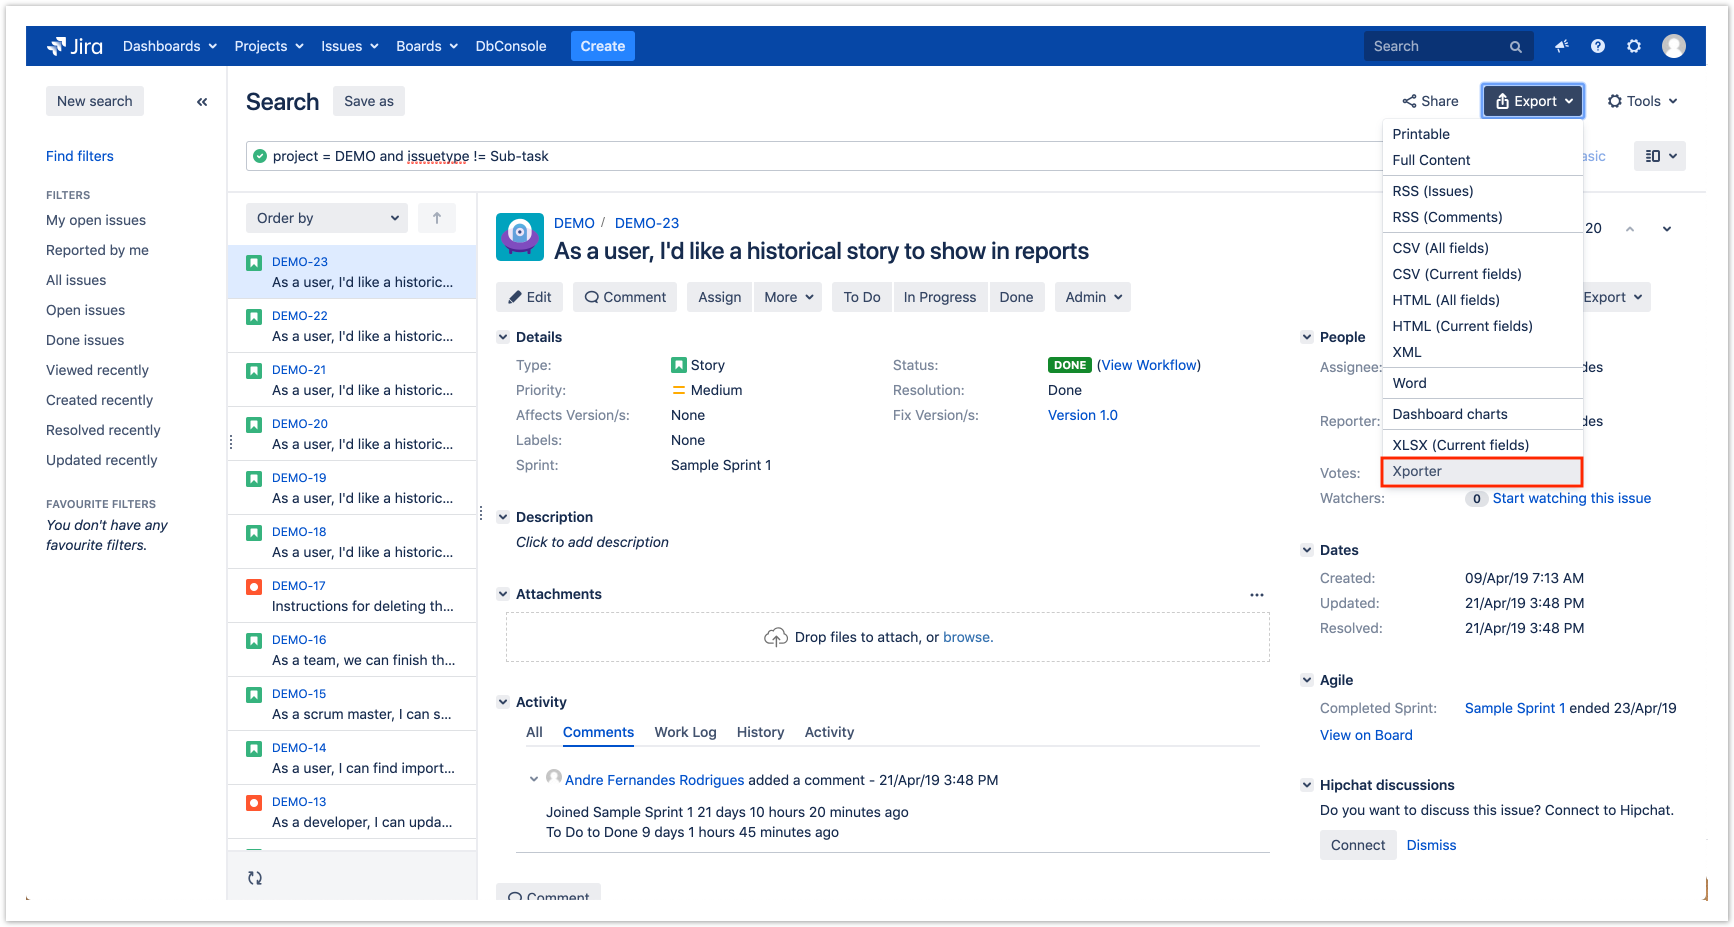
Step 2 - Choose your template, the export type format, and the option that allows you to break a page when changing Issues, Projects, Issue Types or Components. Then, click Export.

You can change the report file name by turning on Use custom file name.
You can include mappings in the filename, the same mappings that are used inside the templates, with a slightly different notation: starting with $ and the name of the field. Examples:
- /jira/document_${Key}.pdf
- /jira/document_${Key}_${UpdatedDate}.pdf
- /jira/document_${Key}_${UpdatedDate}_${Status}.pdf
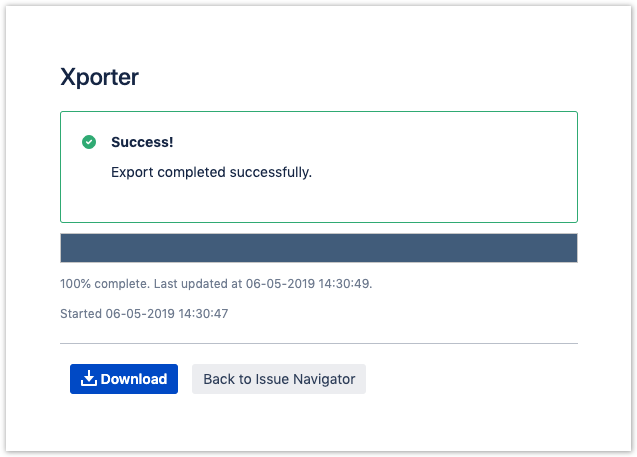
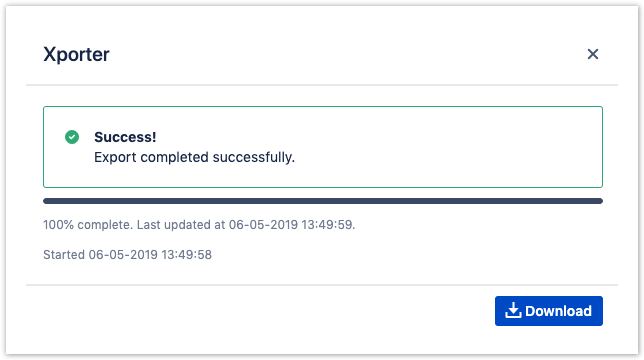
Step 3 - Wait for the operation to finish and then click on the link to download your document.
Using bulk change
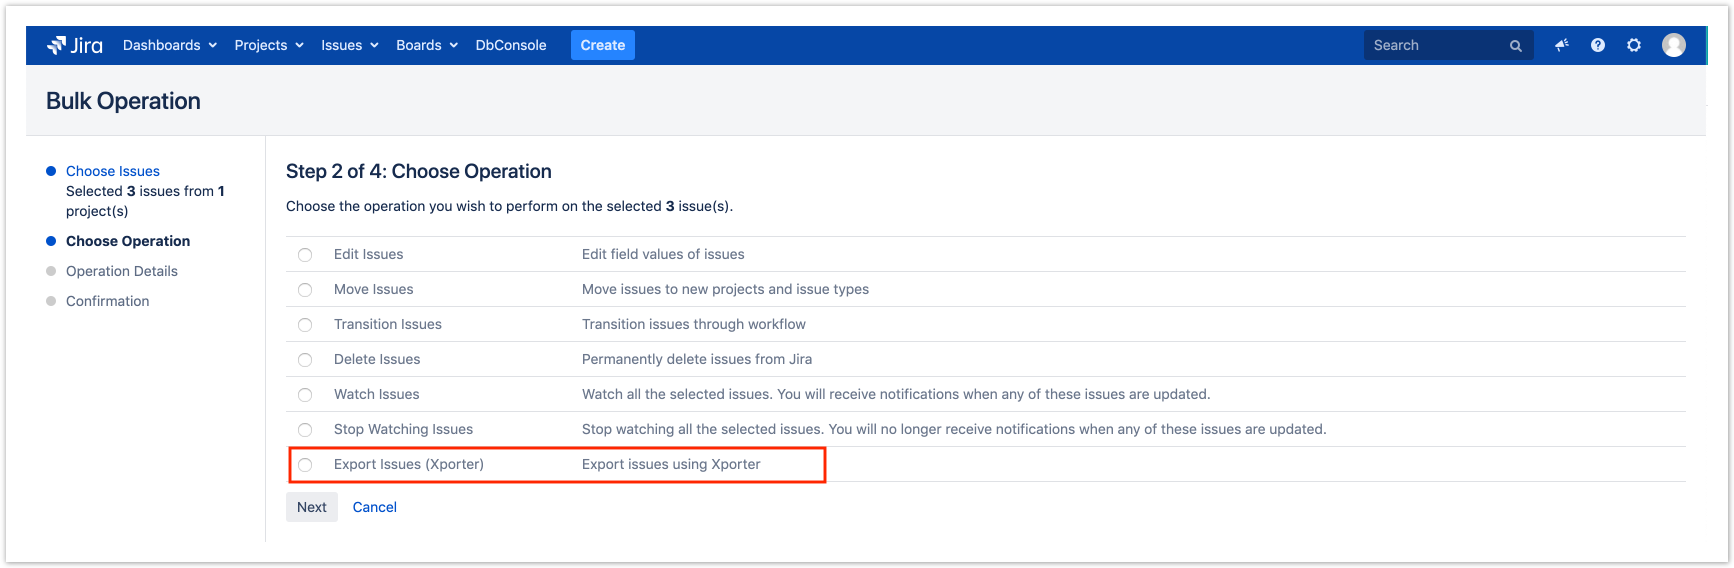
Step 1 - Select the issues that you want to export using a search filter and then click Bulk Change.
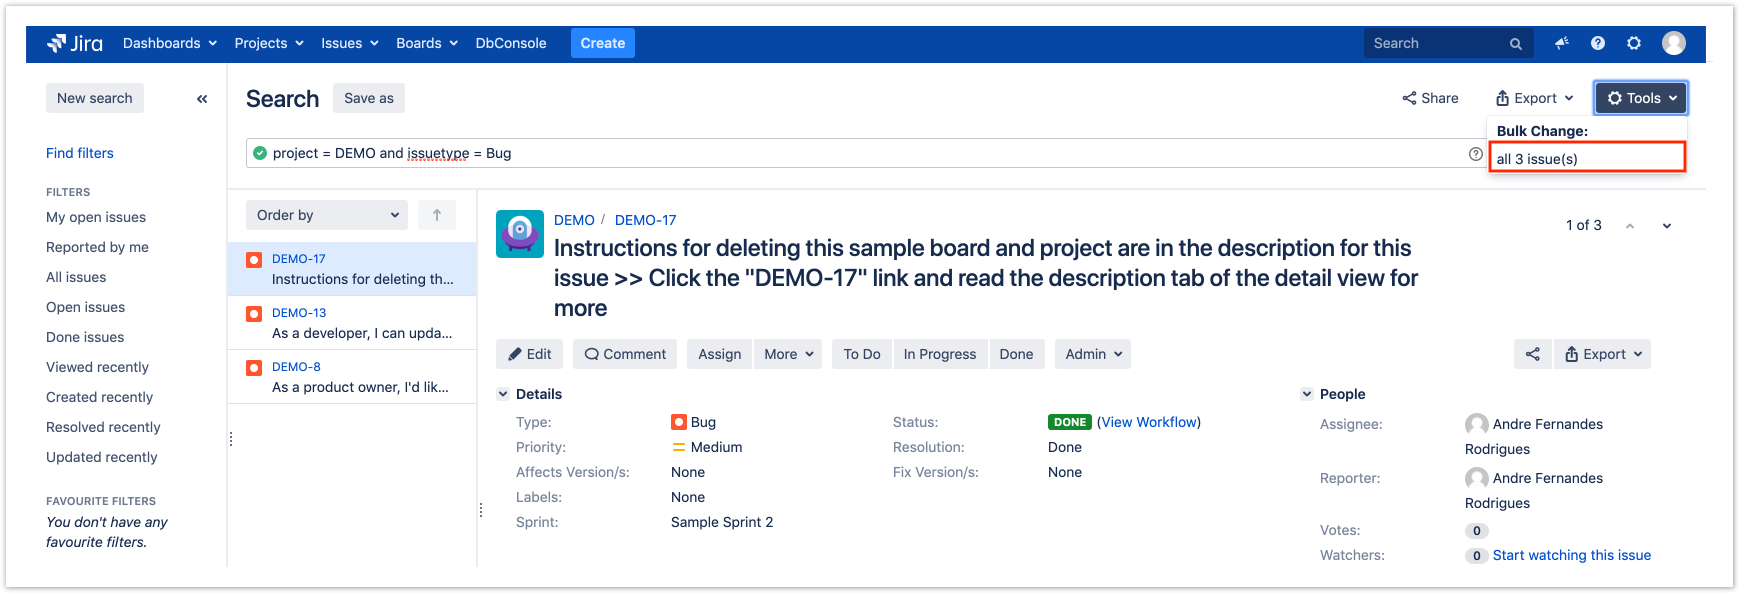
Step 2 - Select the Export Issues (Xporter for Jira) option.
Step 3 - Choose your template, the export type format, and the option that allows you to break a page when changing Issues, Projects, Issue Types or Components. Then, click Export.
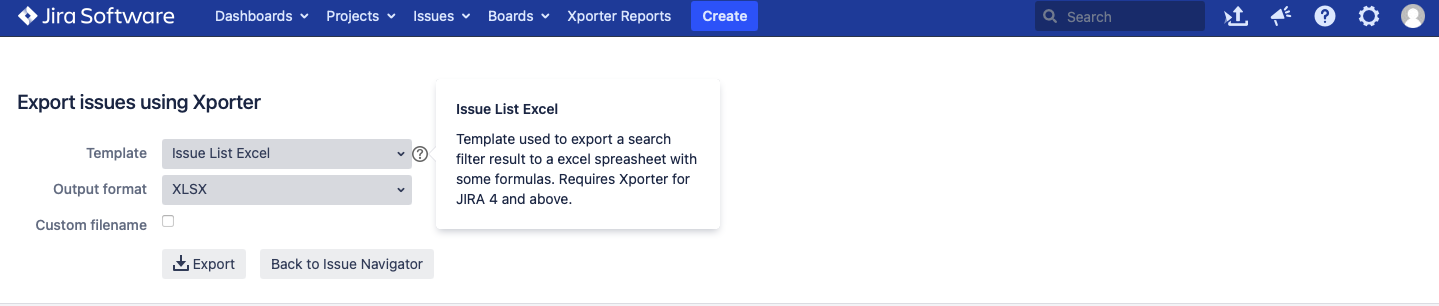
You can change the report file name by turning on Use custom file name.
You can include mappings in the filename, the same mappings that are used inside the templates, with a slightly different notation: starting with $ and the name of the field. Examples:
- /jira/document_${Key}.pdf
- /jira/document_${Key}_${UpdatedDate}.pdf
- /jira/document_${Key}_${UpdatedDate}_${Status}.pdf
Step 4 - Wait for the operation to finish and then click on the link to download your document