Introduction
In this exercise we will introduce Xporter, some available configurations and how we can use it export data from Jira.
Immediately after installing the Xporter app, you will be redirected to Getting Started with Xporter.
Getting Started
Here we show an overview of Xporter and explain a bit of the fundamental concepts.
We cover the general configurations, the templates management and the exporting options.
- Miscellaneous
- Global Permissions
- Xporter Visibility
- Templates
- Exporting
- Single
- Bulk
- Automation
- Others
Configure
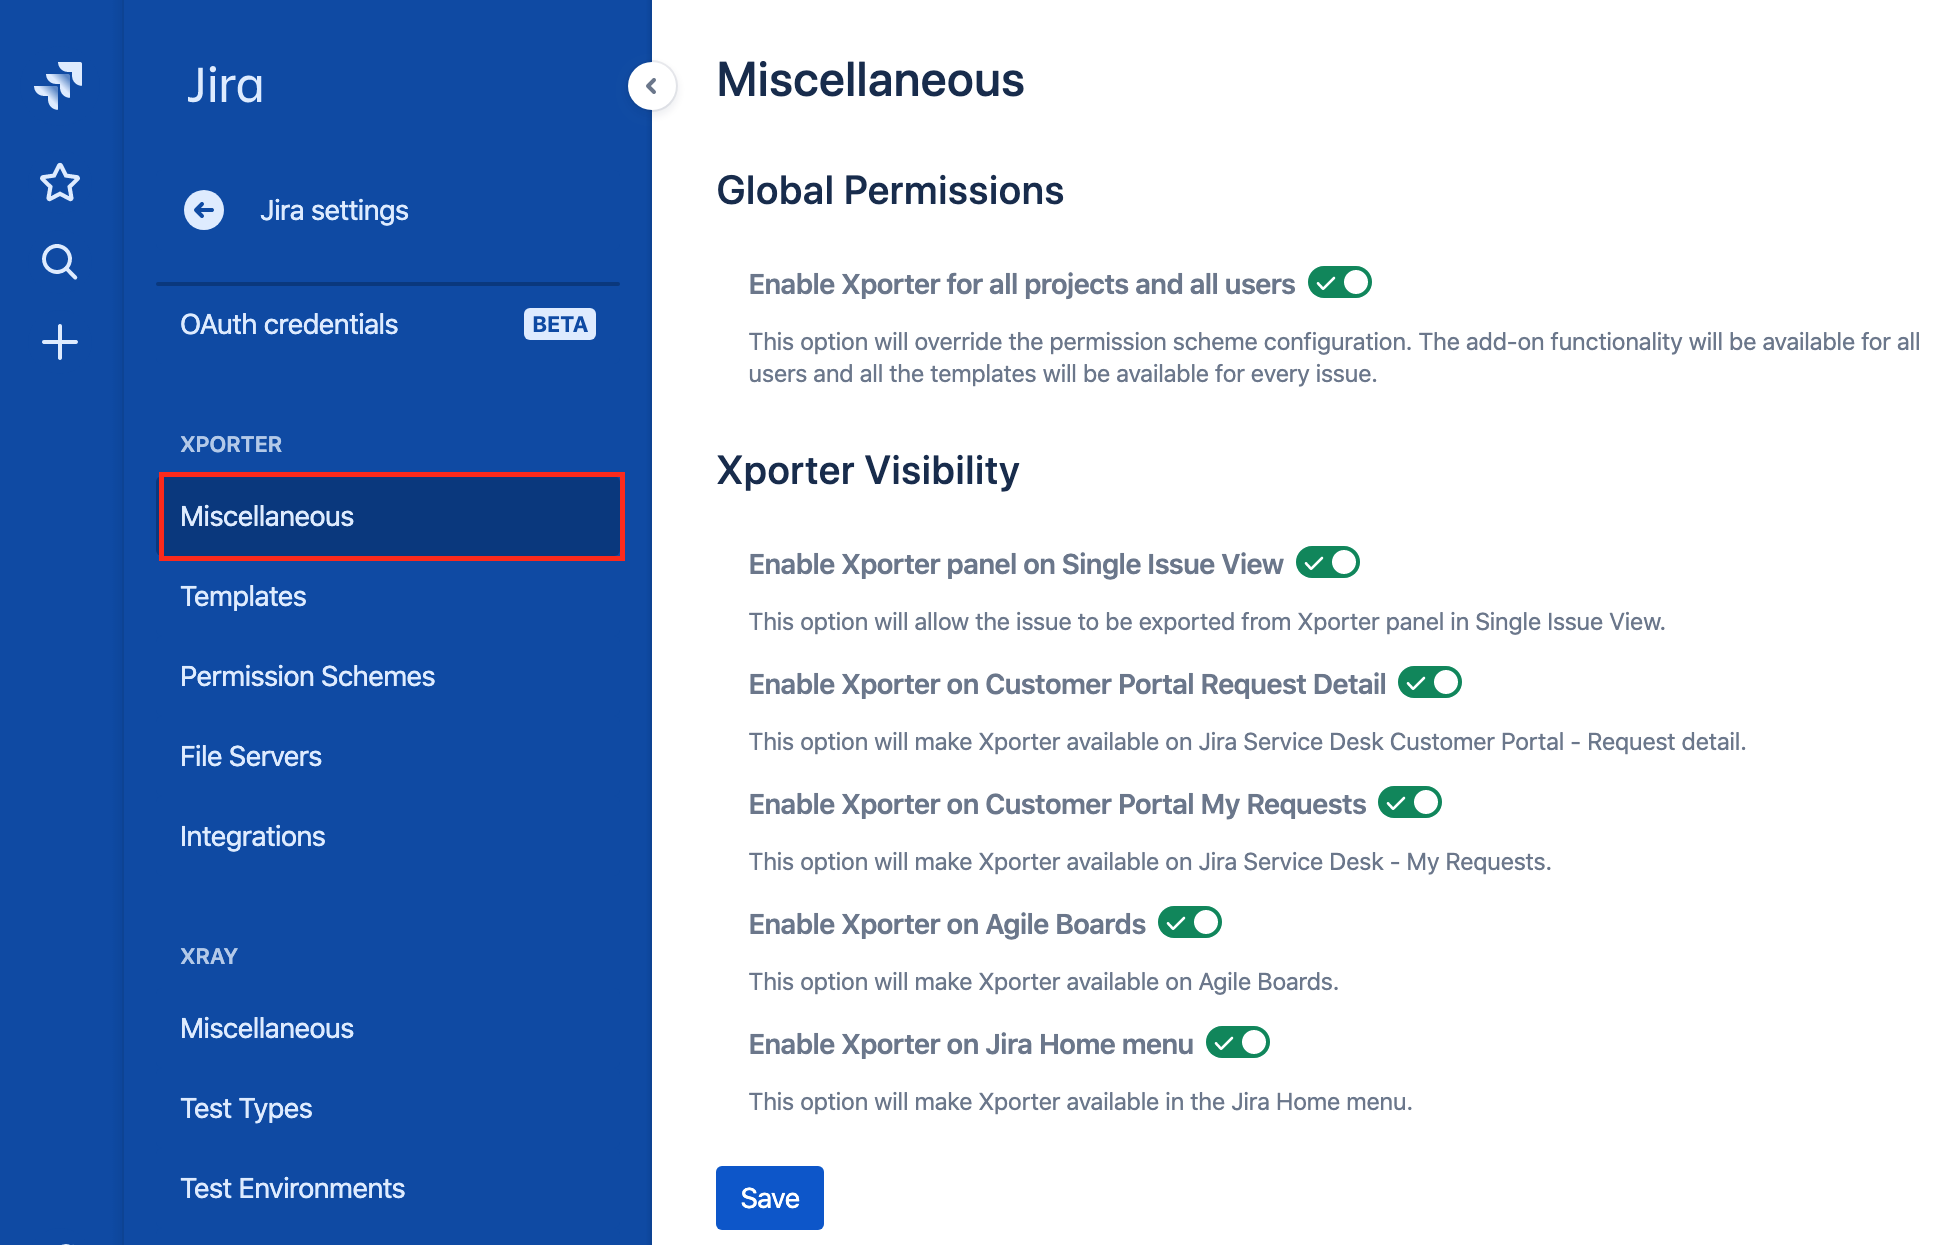
Navigate to Miscellaneous page on Jira Administration, the general configuration page and you'll see its major sections:
- Global Permissions
- Xporter Visibility
The Global Permissions allow administrators to use permission schemes to manage permissions between the Jira users.
This option will override the permission scheme configurations and Xporter functionalities will be available for all users and every issue.
The Xporter Visibility allow administrators to define where Xporter should appear on Jira.
Some locations like Service Desk, Single Issue View or Agile Boards can be hidden with this configuration.
Install the first template
With all the initial setup configuration finished, we just need a template to start exporting some issues.
Luckily, there's a Store on the Templates section on Jira administration displayed on the left sidebar.
Click there and a modal should appear with Template Store.
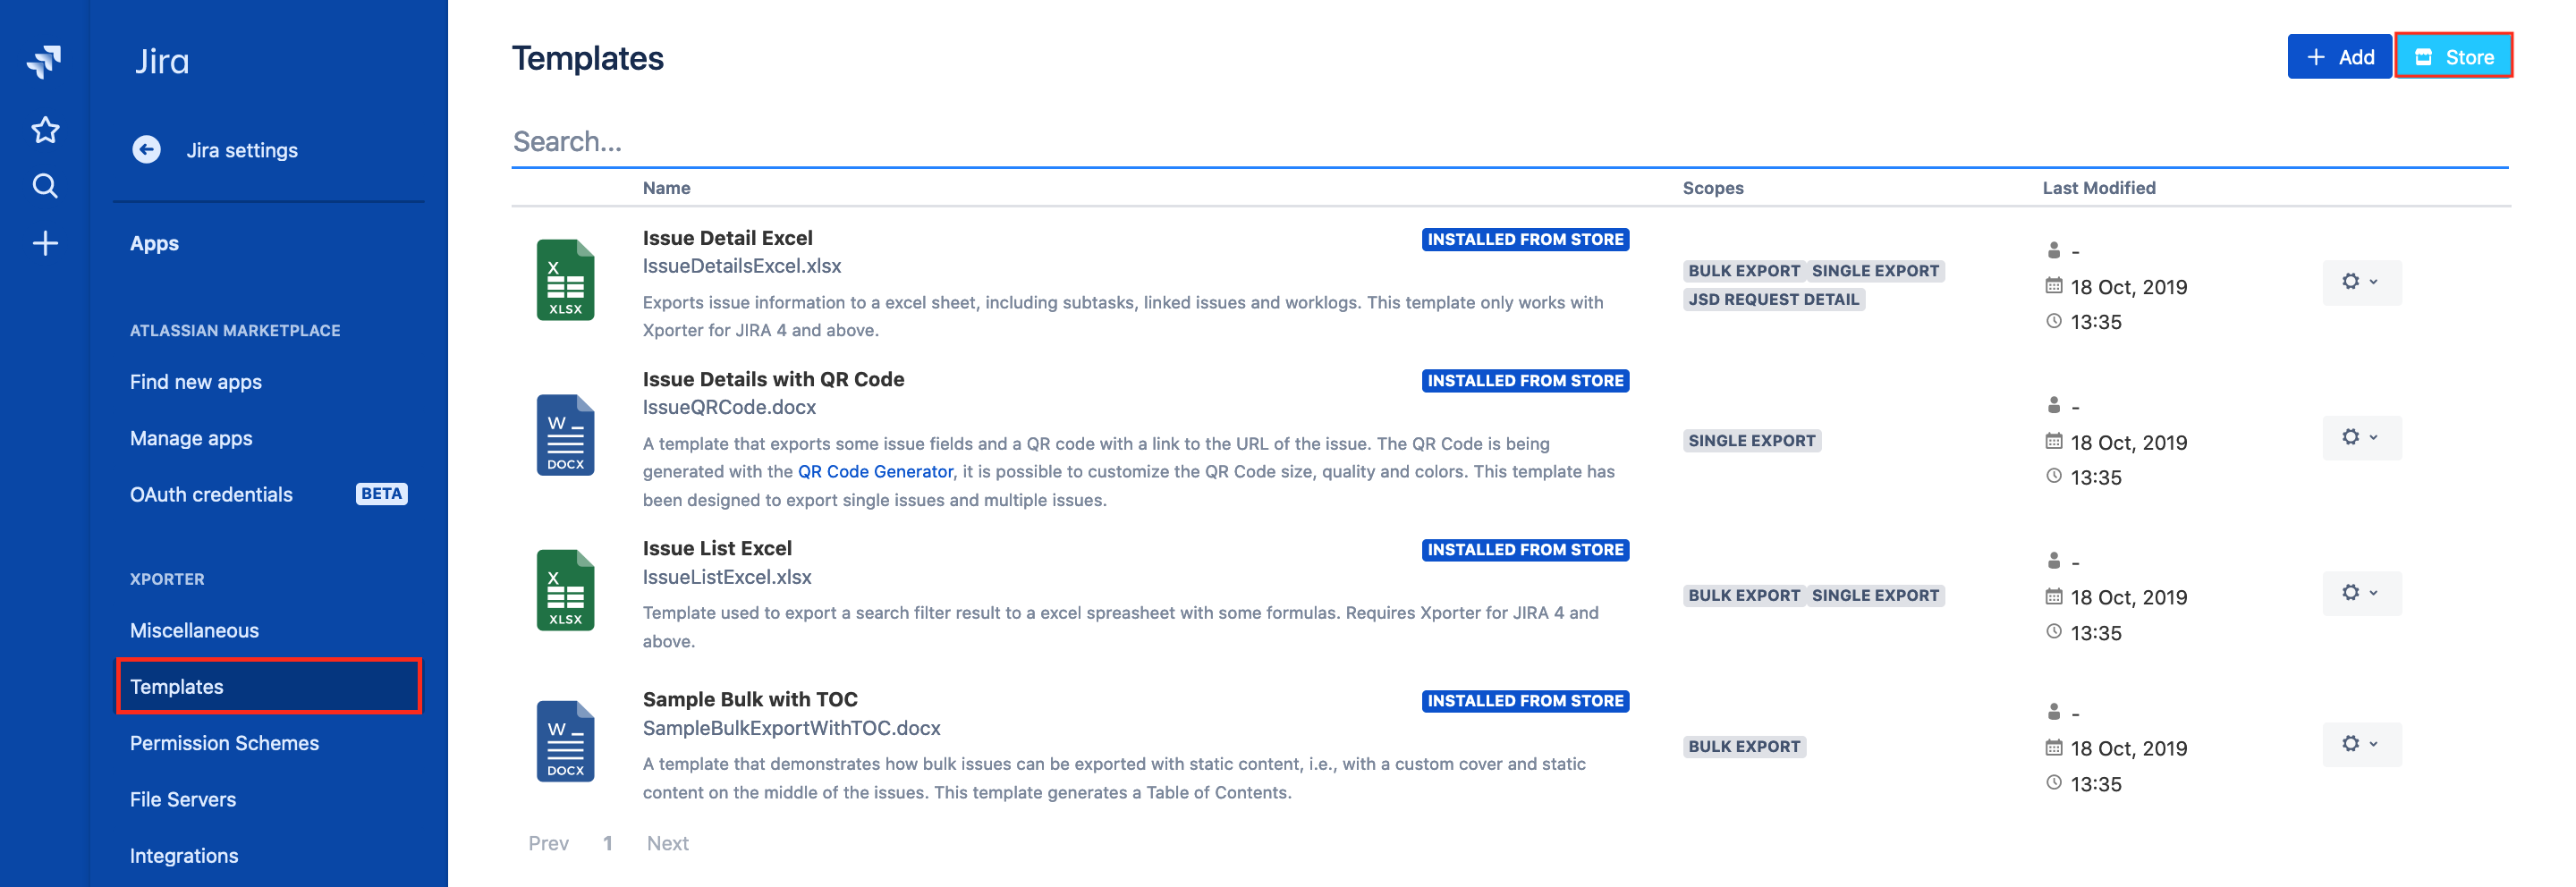
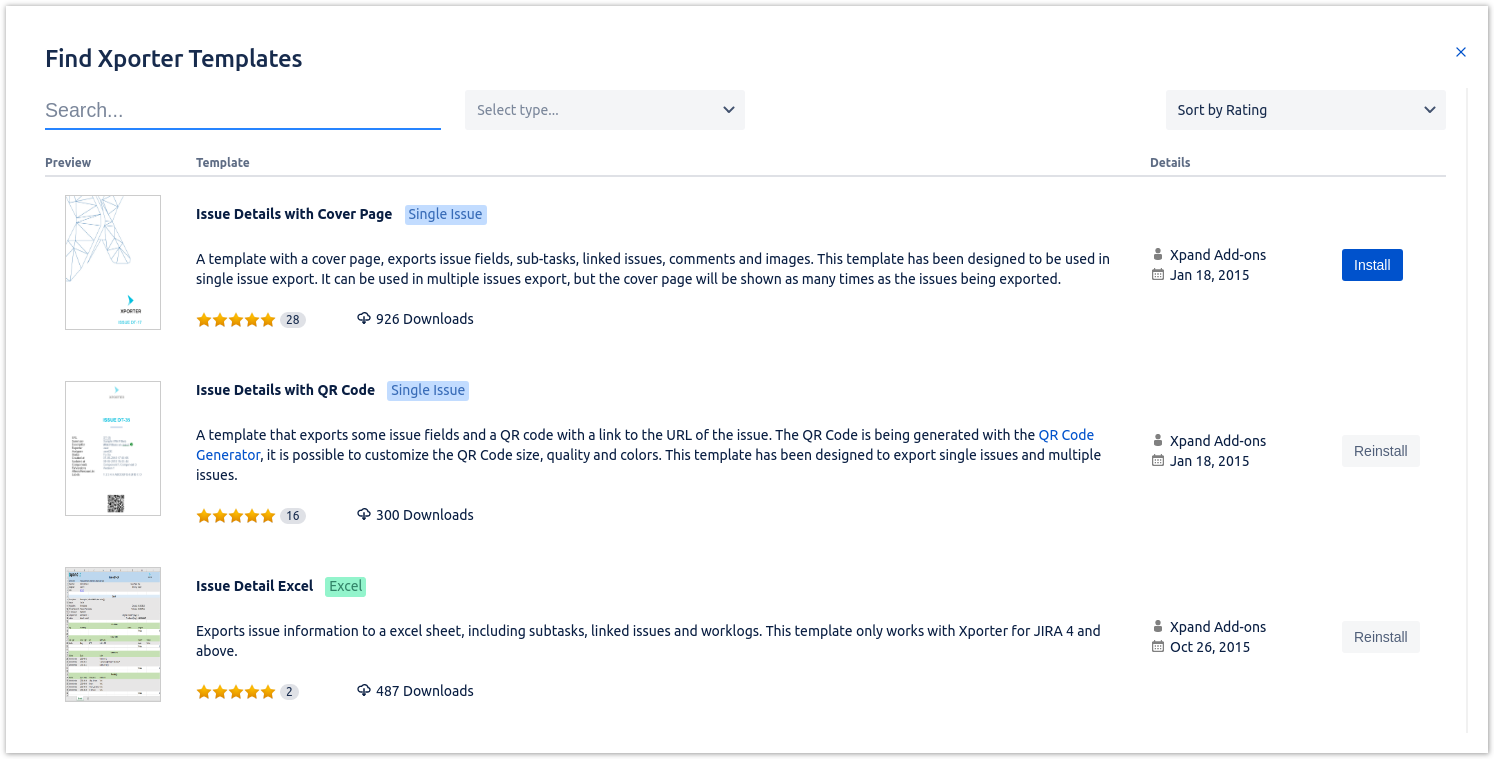
Along with user-created templates, Xporter for Jira provides a Template Store where you can find and install templates provided by our team.
Choose one that you suits yours needs, click Install and you are good to go.
Navigate to the Template Store, search for Issue Details with Cover Page, click Install and repeat the process for Issue Detail Excel.
Exercises
Exporting a Single Issue
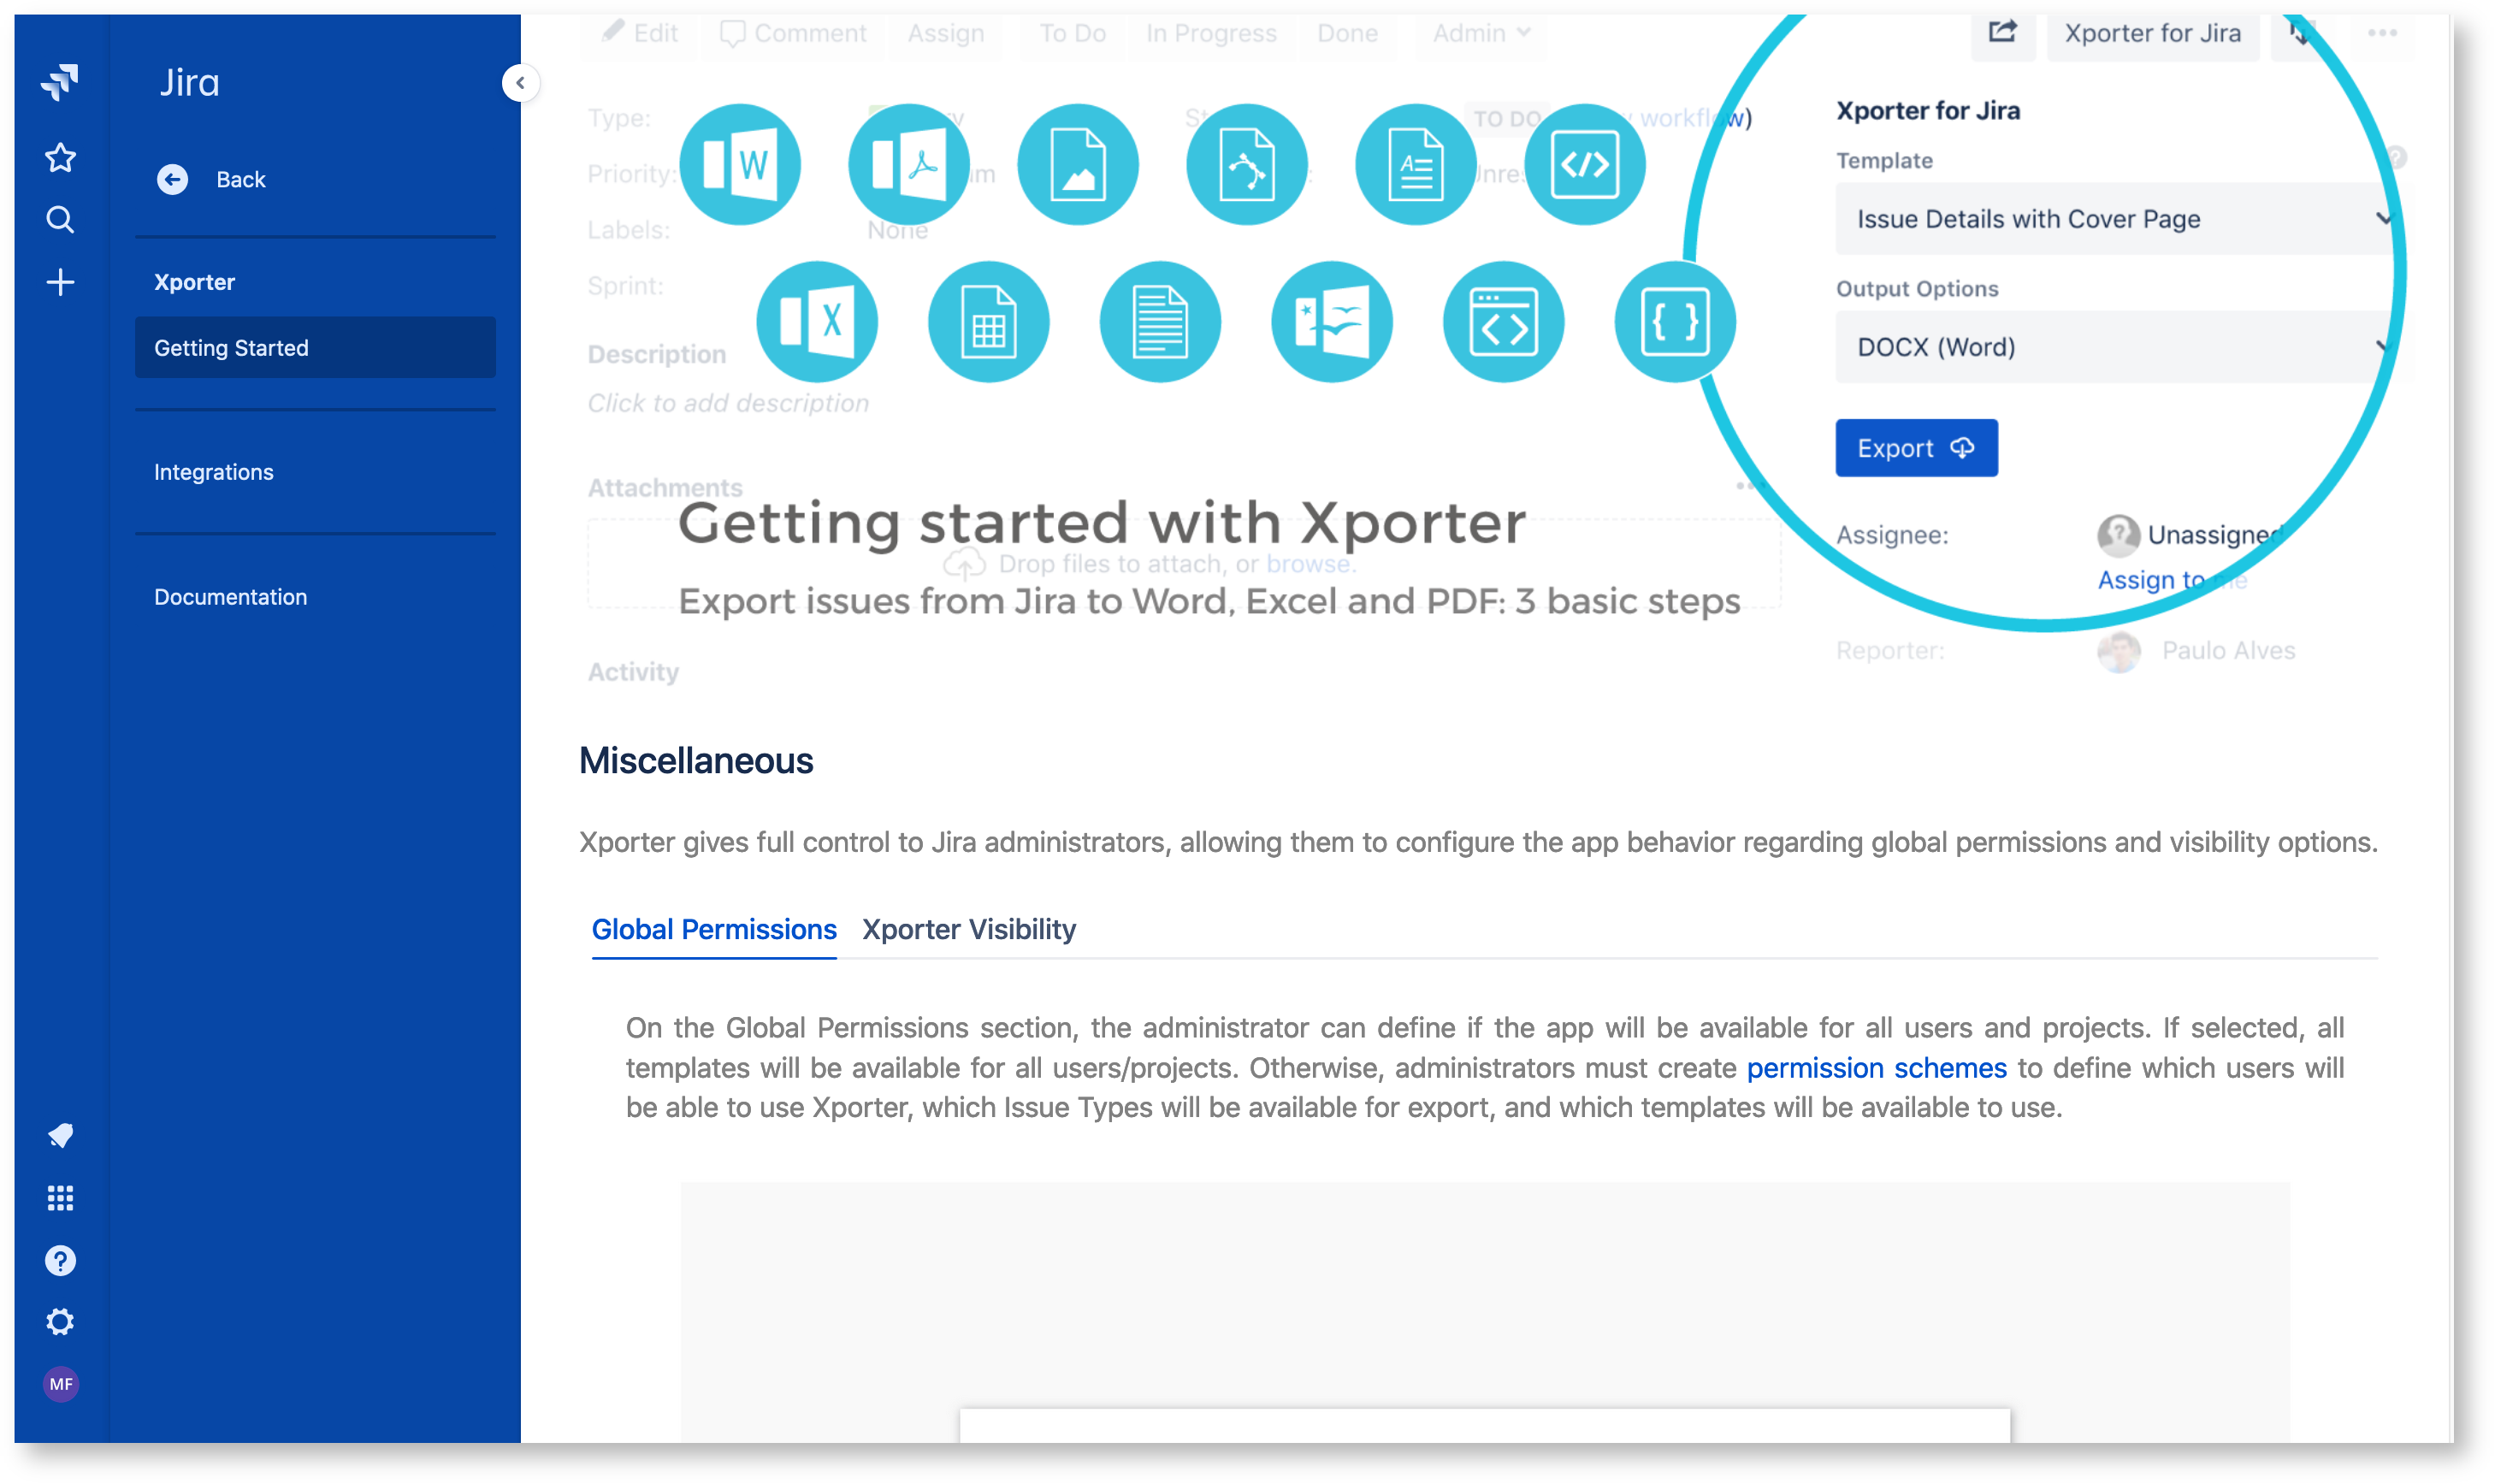
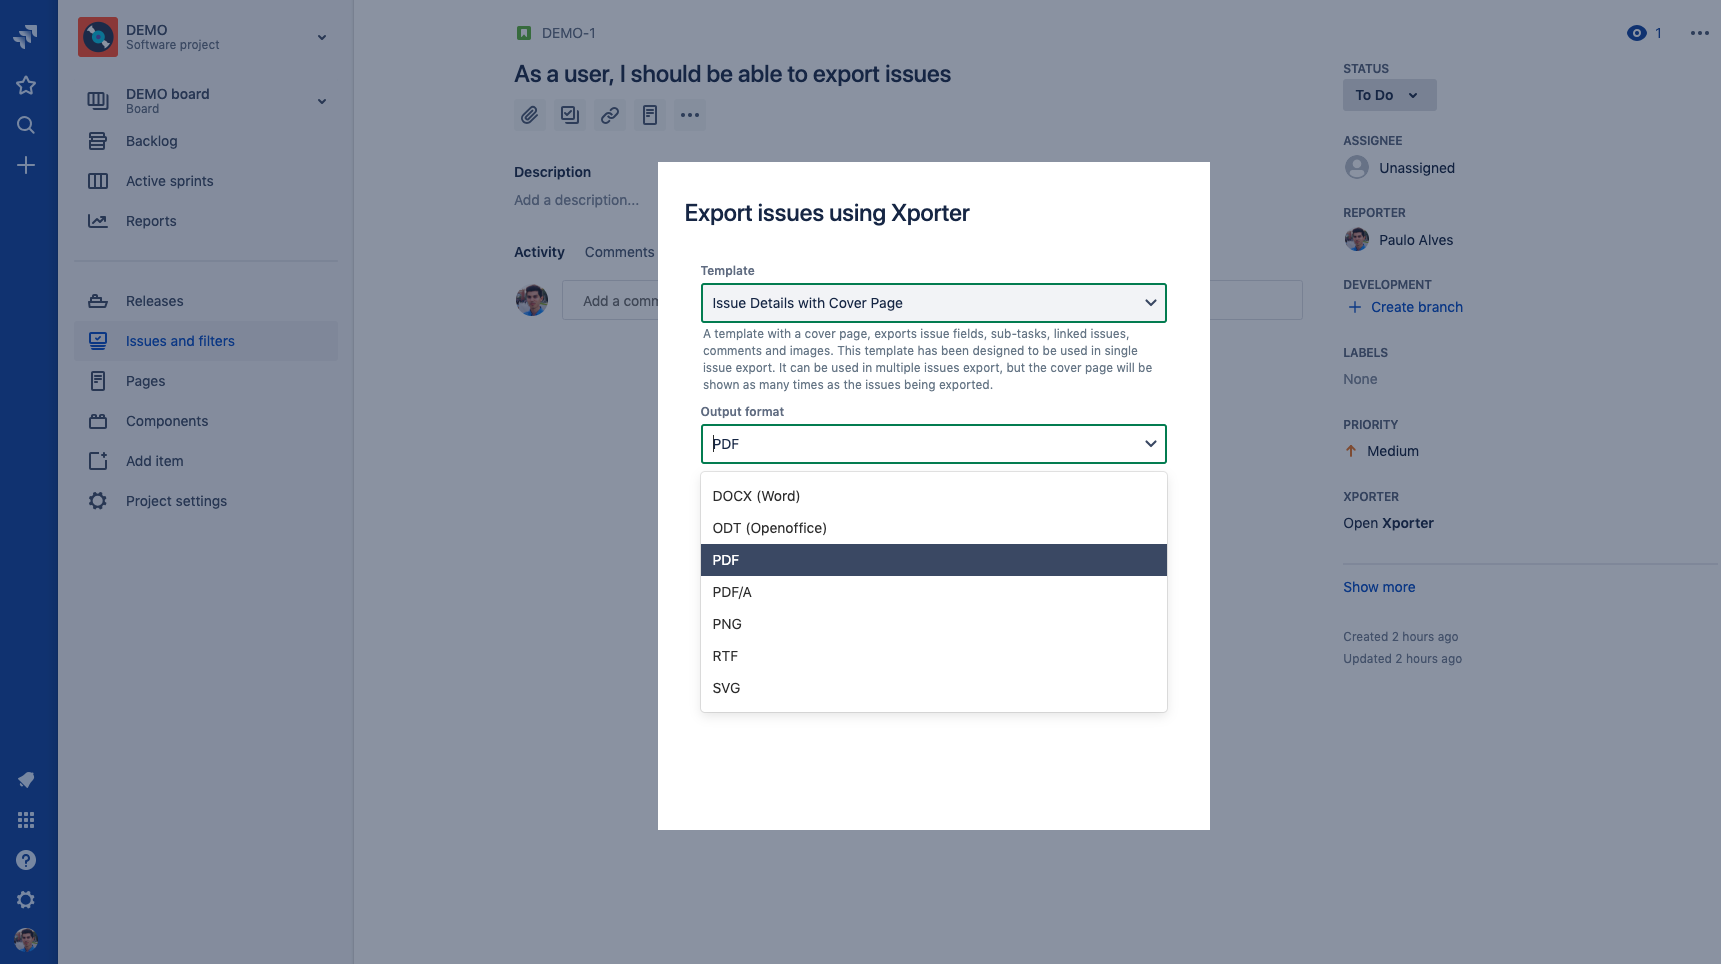
In order to export your first document, just navigate to an issue of your choosing on your Jira instance. There, click in Open Xporter menu and there you can select the Template and Output format of your generated document.
Select the Issue Details with Cover Page template. Since it is a DOCX template, the Output format available options will only display word compatible formats like PDF and DOCX.
Choose Issue Detail Excel instead; that will change to other formats like PDF and XLSX.
Export the issue with the options selected and will automatically download the generated document.
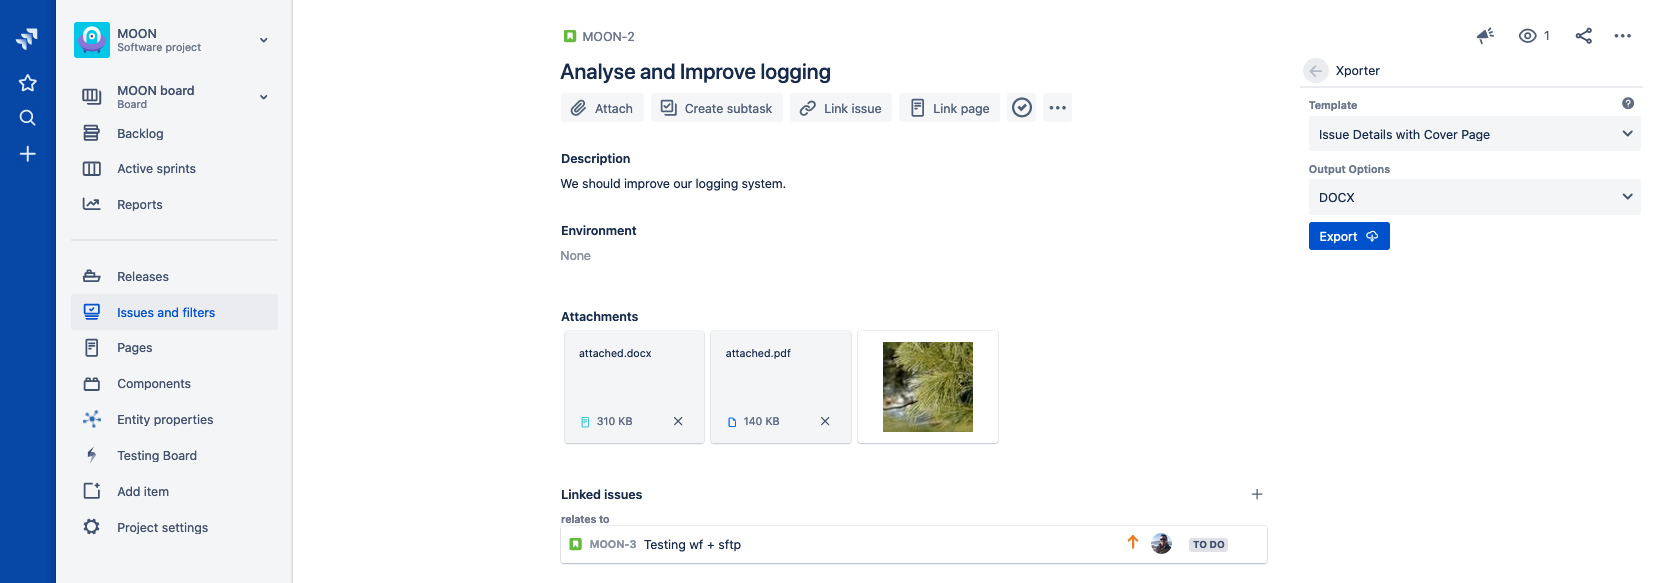
Exporting a Single Issue with attachments
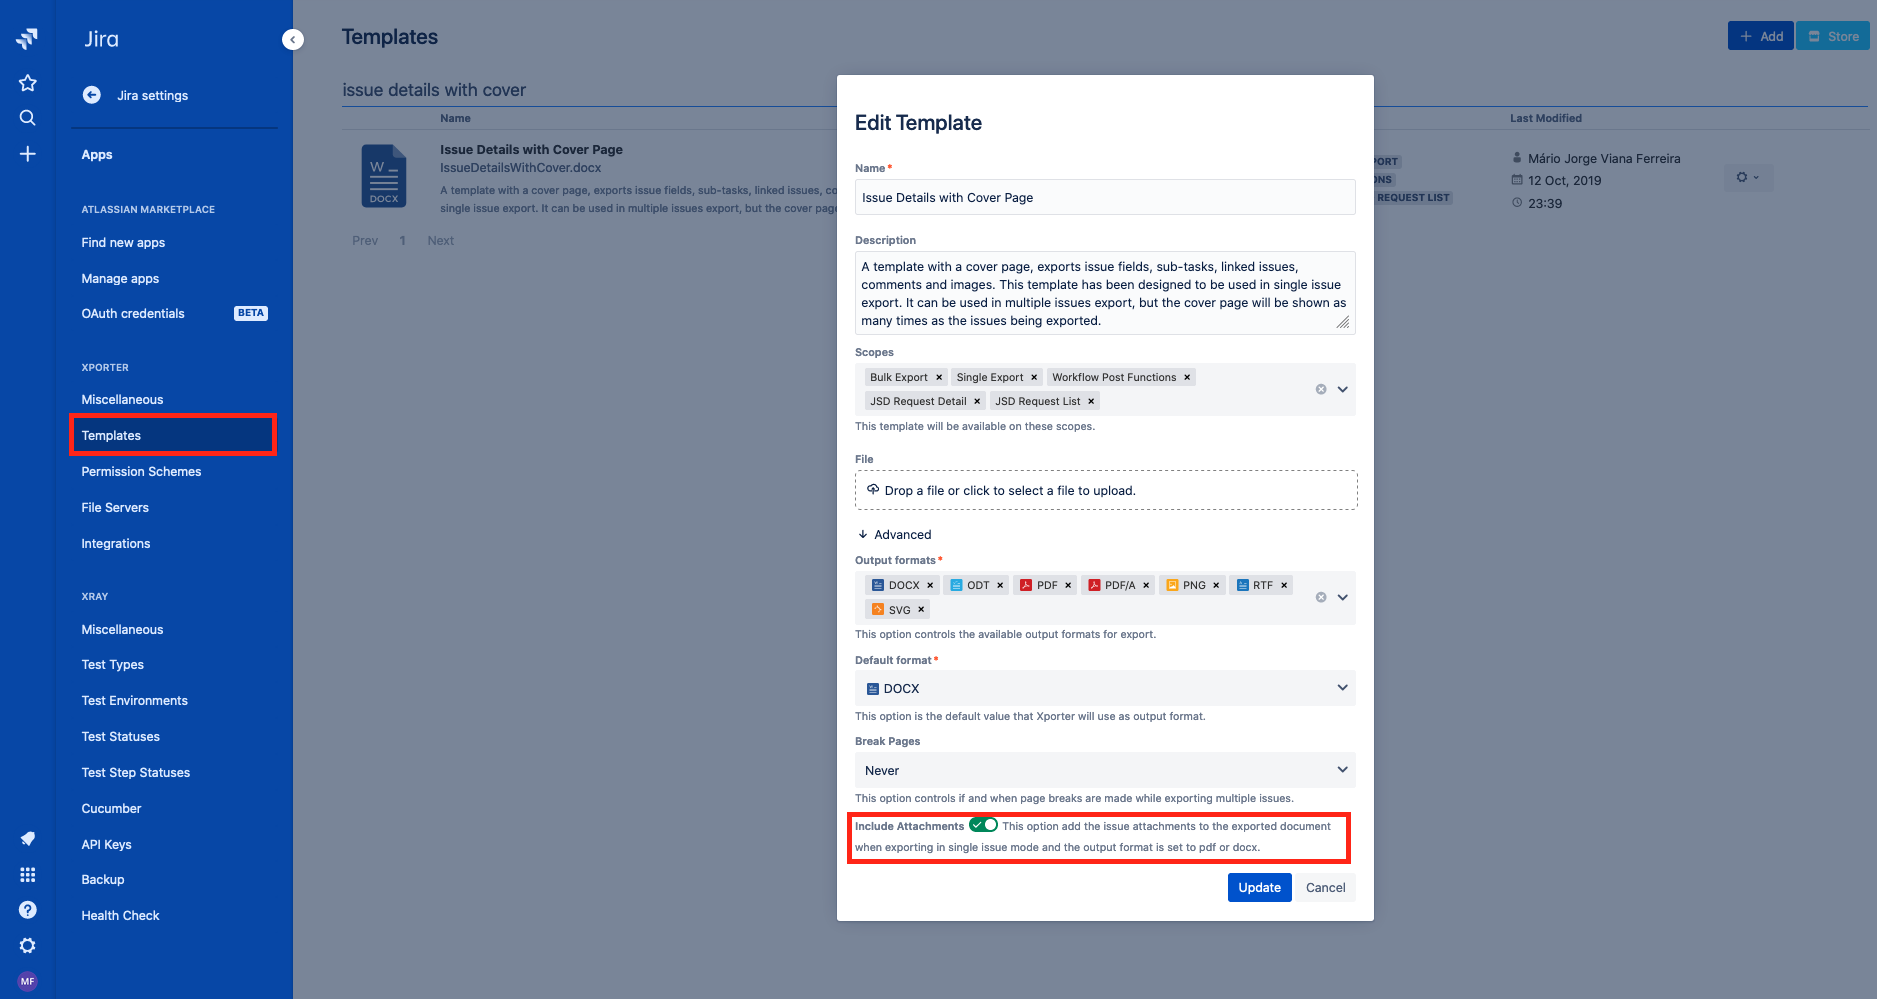
Return to the Templates page on Jira Administration and edit the Issue Details with Cover Page template to include attachments.
Now, choose any issue of your desire and add two attachments. Select the Issue Details with Cover Page and the PDF output format and click Export.
Open the generated file with a PDF reader and you'll see your generated document along with the attached issue files.
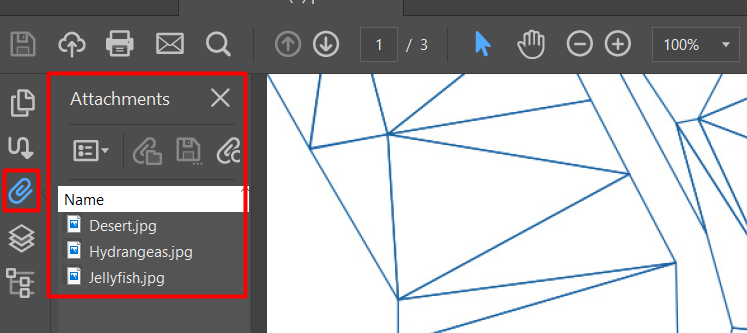
PDF note
The browser-embedded PDF viewers don't allow you to check the PDF attachments, so we suggest using a standalone PDF reader like Adobe Acrobat, and check the attachments on the left sidebar.
Exporting a Bulk of Issues
Return to your Jira issues and filters page tab and selected Search for Issues.
Customize the JQL to and make sure multiple issues are displayed (but less than 10000 which is the Xporter maximum issues to be exported).
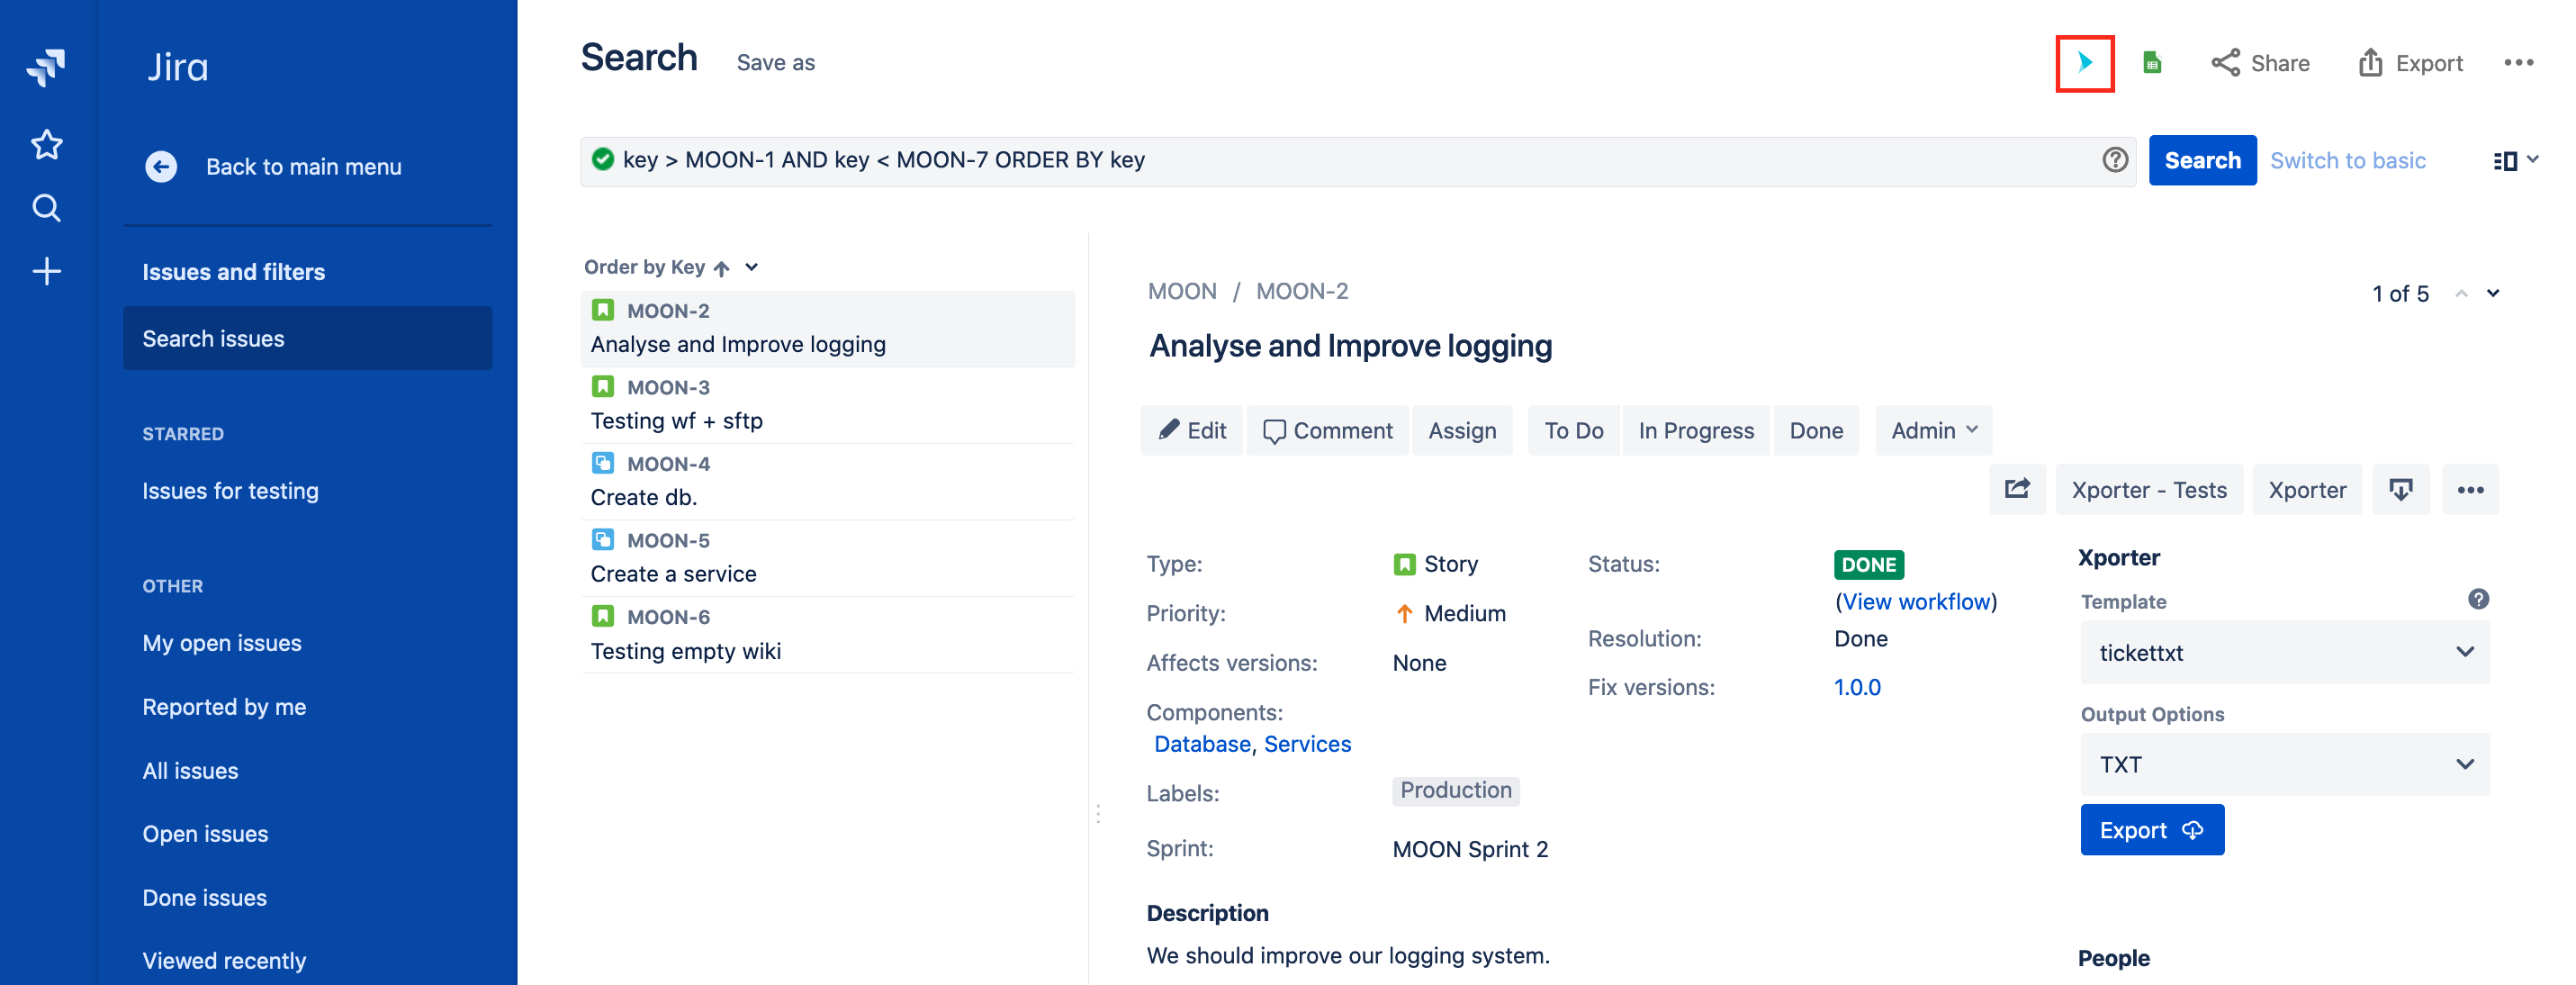
Click on the Xporter menu on top of the search bar, select Xporter for Jira and you will navigate to a modal where you can choose the exporting options.
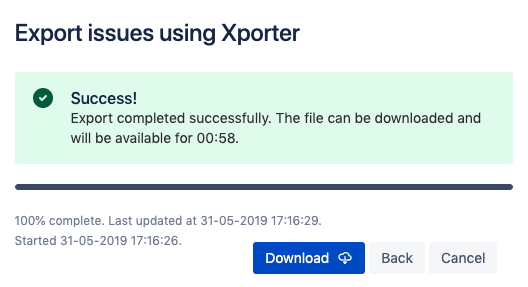
Export the Issue Details with Cover Page template with the Output format as DOCX and the Break pages selector with the Issues value.
The generated document will be available for 10 minutes to be downloaded. Click on Download to retrieve it.
After downloading, open it and you'll see that all issues are printed, each starting after a page break.
Break Pages
Other possible values on Break Pages option:
- Projects: a break occurs only when an issue belongs to a different project than the previous one on the stack of issues to be printed.
- Issue Types: when an issue is from a different Issue type than the previous one on the stack of issues to be printed
- Components: when an issue is associated with different components than the previous one on the stack of issues to be printed.
Working with the Enable Xporter for all projects and all users option
Navigate to the Miscellaneous page on Jira Administration and on the Enable Xporter for all projects and all users, tick Off and click Save.
Now visit any Issue page and you'll notice the Xporter panel will now be missing since no Permission Scheme is configured to allow you to use Xporter. Also, on the Issue Navigator, if you try to bulk export, an Error message will inform you that you are Unable to export the selected issues. If you check the details, you will be informed on the Error Reporting pop-over that the User has no permissions for using Xporter in current Permission Scheme.
Return to Miscellaneous page on Jira Administration and on the Enable Xporter for all projects and all users, tick On again and click Save.
Exercise 1 is now complete. Proceed to Exercise 2 to learn how to manage Xporter Templates.
If you like this exercise, please leave a comment or a ![]() . Your feedback is very important to us.
. Your feedback is very important to us.
Thank you in advance. Enjoy our product. ![]()